DIY Outdoor Kitchen: The Complete Step-by-Step Building Guide for 2026
DIY outdoor kitchen builds save 40 to 60 percent versus contractor pricing. Step-by-step framing, plumbing, gas,
Outdoor Kitchen Setup Editorial Team
Outdoor living specialists with 15+ years of hands-on experience
Top Picks: Best DIY Outdoor Kitchen: The Complete Step-by-Step Building Guide for 2026 in 2026
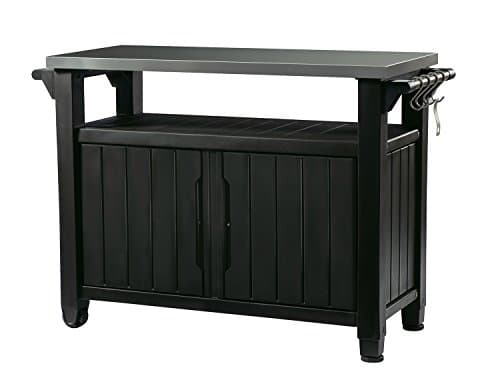
Keter Unity XL Portable Outdoor Table with Stainless Steel Top for Kitchen Prep and Outdoor Storage Cabinet for Grilling Accessories, Dark Grey
$220.99
Shop Now
TAOMAND Large 76 x 52 inches Under Grill Mats for Outdoor Grill | Double-Sided Fireproof | Waterproof | Oil-Proof | Easy to Clean | Indoor Fireplace/Fire Pit Mat | Quality BBQ Mat for Deck Patio Lawn
$33.99
Shop Now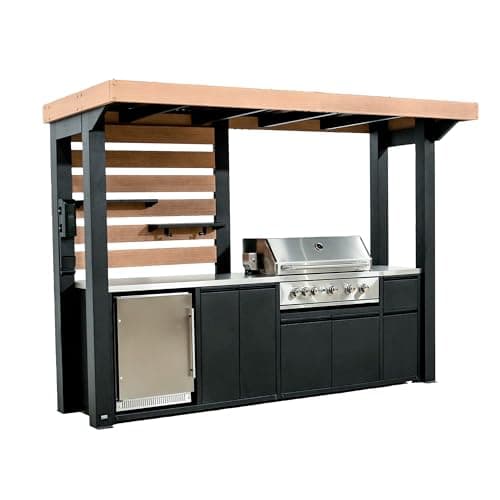
Backyard Discovery Fusion Flame Galvanized Steel Covered Outdoor Kitchen with 5-Burner Stainless, Grill, Refrigerator, Countertop, Storage, and, Roof for All-Season Outdoor Cooking, electric
$4,999.00
Shop Now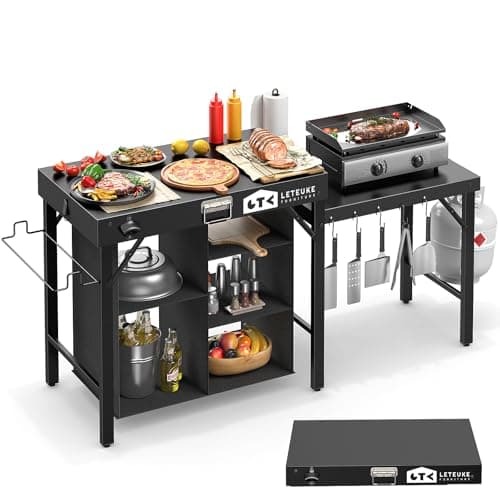
Leteuke Grill Table for Blackstone Griddle, Portable Foldable Grill Table with Storage Fits Ninja, Blackstone Griddle Stand for Outdoor Camping, Picnic, Garden, Patio, Dining, BBQ, Party
$159.99
Shop Now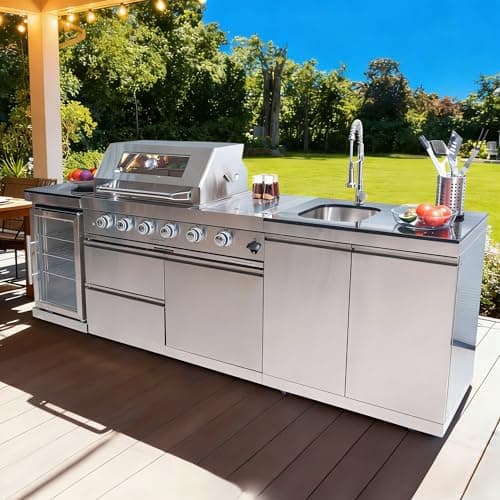
98 Inches Outdoor Kitchen Island, 4-Burner 72000 BTU Propane Stainless Steel BBQ with Side/Rear Burners, With Refrigerator and Sink, Rotisserie, Granite Countertops, Storage, For Backyard BBQ, Silver
$3,652.00
Shop Now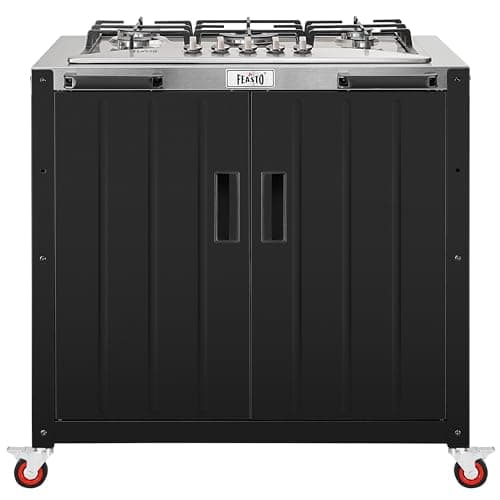
Feasto Gas Grill, Movable Outdoor Gas Stove Stainless Steel Top with Cabinet, 5 Burners with 36,200 BTUs, Outdoor Propane Grill for Outdoor Cooking, Ideal for Lawn & Garden, L35.4 x W24
$539.99
Shop Now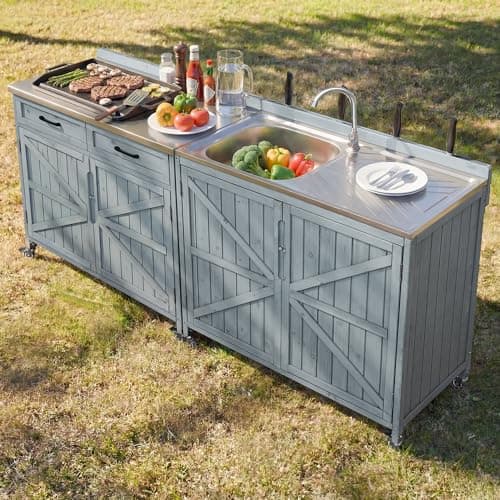
Merax 2 Piece Modular Outdoor Kitchen Series- Kitchen Grill Cart w/Stainless Steel Sink, Wood Rolling BBQ Prep Table w/Stainless Steel Top, Lockable Wheels for Patio & Outdoor Cooking, Grey Blue
$529.99
Shop Now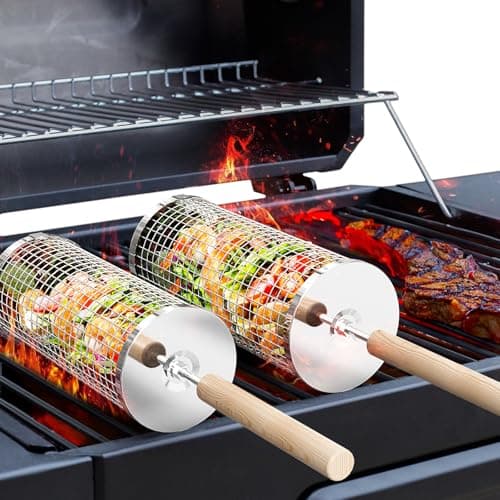
ivtivfu Rolling Grill Basket, Removable Wooden Handle, 304 Stainless Steel, Nesting BBQ Tools, Smoker Grilling Accessories for Vegetable, Outdoor Cooking Camping, Birthday Gifts for Men Dad Husband
$23.99
Shop NowKeter Unity XL Portable Outdoor Table with Stainless Steel Top for Kitchen Prep and Outdoor Storage Cabinet for Grilling Accessories, Dark Grey
$220.99
Shop NowTAOMAND Large 76 x 52 inches Under Grill Mats for Outdoor Grill | Double-Sided Fireproof | Waterproof | Oil-Proof | Easy to Clean | Indoor Fireplace/Fire Pit Mat | Quality BBQ Mat for Deck Patio Lawn
$33.99
Shop NowBackyard Discovery Fusion Flame Galvanized Steel Covered Outdoor Kitchen with 5-Burner Stainless, Grill, Refrigerator, Countertop, Storage, and, Roof for All-Season Outdoor Cooking, electric
$4,999.00
Shop NowLeteuke Grill Table for Blackstone Griddle, Portable Foldable Grill Table with Storage Fits Ninja, Blackstone Griddle Stand for Outdoor Camping, Picnic, Garden, Patio, Dining, BBQ, Party
$159.99
Shop Now98 Inches Outdoor Kitchen Island, 4-Burner 72000 BTU Propane Stainless Steel BBQ with Side/Rear Burners, With Refrigerator and Sink, Rotisserie, Granite Countertops, Storage, For Backyard BBQ, Silver
$3,652.00
Shop NowFeasto Gas Grill, Movable Outdoor Gas Stove Stainless Steel Top with Cabinet, 5 Burners with 36,200 BTUs, Outdoor Propane Grill for Outdoor Cooking, Ideal for Lawn & Garden, L35.4 x W24
$539.99
Shop NowMerax 2 Piece Modular Outdoor Kitchen Series- Kitchen Grill Cart w/Stainless Steel Sink, Wood Rolling BBQ Prep Table w/Stainless Steel Top, Lockable Wheels for Patio & Outdoor Cooking, Grey Blue
$529.99
Shop Nowivtivfu Rolling Grill Basket, Removable Wooden Handle, 304 Stainless Steel, Nesting BBQ Tools, Smoker Grilling Accessories for Vegetable, Outdoor Cooking Camping, Birthday Gifts for Men Dad Husband
$23.99
Shop NowPlanning Your DIY Outdoor Kitchen Layout and Design
Every successful DIY outdoor kitchen begins with a solid plan. Before purchasing a single bag of concrete, you need to answer several critical questions about location, size, workflow, and utility access. Start by selecting a site that balances convenience with practicality. The ideal location sits within 15 to 30 feet of your indoor kitchen so running supplies back and forth stays manageable, while also being close enough to existing gas, water, and electrical lines to keep utility costs reasonable. Avoid placing your kitchen directly under low tree branches, which drip sap and debris onto cooking surfaces, or in low-lying areas where water pools after rainstorms.
Sketch your layout on paper or use free design tools like SketchUp to create a scaled drawing. The three most popular configurations are the straight-line (I-shape), the L-shape, and the U-shape. A straight-line layout works best for tight spaces and smaller budgets, typically running 8 to 12 feet long. An L-shape adds a perpendicular counter run that creates a natural work triangle between the grill, prep area, and sink. The U-shape offers maximum counter space and storage but demands a footprint of at least 10 by 12 feet. Regardless of shape, maintain at least 36 inches of clear walkway around the entire structure for safe movement while cooking. Factor in the prevailing wind direction so smoke blows away from your dining area, and orient the grill so the cook faces guests rather than staring at a wall. Document every measurement on your plan because these numbers drive your material estimates in the next step. Pair this guide with our broader outdoor kitchen setup overview for a complete picture of how this fits into a full backyard build.
Essential Tools and Materials for a DIY Outdoor Kitchen Build
Assembling your tool kit and material list before breaking ground prevents costly mid-project hardware store runs. For hand tools, you need a tape measure, speed square, 4-foot level, chalk line, masonry trowel, rubber mallet, caulk gun, and a set of adjustable wrenches. Power tools should include a circular saw with a masonry blade, a cordless drill/driver, an angle grinder with a diamond cutting disc, and a concrete mixer or mixing drill attachment. If you plan to run gas or electrical lines yourself, which we only recommend if you hold the appropriate licenses, you will also need pipe wrenches, a gas leak detector, and a voltage tester.
Material choices depend on your climate, aesthetic preference, and budget. The structural frame of most DIY outdoor kitchens uses either concrete block (CMU), steel studs, or pressure-treated lumber. Concrete block is the most popular choice because it is fireproof, termite-proof, relatively inexpensive at around $1.50 to $3.00 per block, and easy to stack without specialized skills. Steel stud framing is lighter and faster to assemble but requires cement board sheathing for fire protection behind the grill. Pressure-treated lumber is the quickest to frame but must be wrapped in cement board on all surfaces near heat sources and is not recommended in high-humidity climates where rot can develop within a few years. For the exterior finish, budget-friendly options include natural stone veneer at $8 to $15 per square foot, stucco at $6 to $10 per square foot, and porcelain tile at $5 to $12 per square foot. Each brings a different look and maintenance profile, so choose based on the style of your home and how much upkeep you are willing to perform.
Building the Foundation and Base Structure for Your Outdoor Kitchen
A solid foundation prevents settling, cracking, and structural failure. For any DIY outdoor kitchen, a reinforced concrete slab is the gold standard. Excavate the area to a depth of 6 inches below the planned finished grade, compact the soil with a plate compactor, lay 4 inches of compacted gravel, then pour a 4-inch concrete slab reinforced with 6x6 welded wire mesh or number 4 rebar on 18-inch centers. Use concrete rated at a minimum of 3,000 PSI and slope the slab one-quarter inch per foot away from any adjacent structure for drainage. Allow at least 48 hours for curing before building on top.
With the slab cured, begin framing the base structure. If using concrete block, dry-lay the first course to confirm dimensions, then set blocks in type S mortar starting from the corners and working inward. Check level after every two blocks and use a string line to keep the courses straight. Build in vertical rebar every 32 inches and fill those cells with grout for earthquake and wind resistance. Leave openings for access doors, grill cutouts, and utility penetrations exactly where your plan indicates. Steel stud framers should anchor the bottom track to the slab with concrete screws every 16 inches and build the walls with studs on 16-inch centers, adding horizontal blocking at the heights where you will mount doors and drawers. Whichever framing method you choose, stop building and double-check every measurement before applying any exterior finish because corrections become exponentially harder once the surface treatment goes on.
Running Utilities: Gas, Water, and Electrical for Your DIY Outdoor Kitchen
Utility rough-ins represent the phase where many DIY builders wisely call in a licensed professional. Running a natural gas line requires a licensed plumber or gas fitter in virtually every jurisdiction, and attempting it without a permit can void your homeowner's insurance and create a serious safety hazard. That said, understanding the process helps you plan and budget accurately. A typical gas line extension from an existing meter to an outdoor kitchen 20 to 40 feet away costs $300 to $800 for professional installation. The line must be sized to deliver enough BTUs for your grill plus any side burners, typically requiring a three-quarter-inch or one-inch black iron or corrugated stainless steel tubing (CSST) line.
For water supply, a half-inch PEX or copper line tapped off an existing hose bib or interior cold-water line is usually sufficient for an outdoor sink. You will also need a drain line, which can connect to a dry well, a French drain, or an existing sewer line depending on local code. Electrical requirements depend on your appliance selection. At minimum, plan for one 20-amp GFCI-protected circuit for outlets and a separate circuit for any high-draw appliances like an outdoor refrigerator or electric griddle. All outdoor wiring must be in weatherproof conduit and boxes rated for wet locations. Run all utility lines before applying exterior finishes so you can route them inside the block cavities or stud walls cleanly. Schedule inspections as required by your local building department before covering any work.
DIY Outdoor Kitchen Countertops: Selection and Installation
The countertop is the most visible and most-used surface on your DIY outdoor kitchen, so choosing the right material and installing it correctly matters enormously. Poured concrete countertops are the top choice among DIY builders because the raw materials cost only $5 to $15 per square foot, you can customize the color and edge profile, and the process, while labor-intensive, does not require specialized stone-cutting equipment. Build your form from melamine-coated particleboard, reinforce with fiberglass mesh or rebar, mix a high-strength concrete blend with integral color, pour, vibrate to remove air bubbles, and cure for at least five days before demolding and sealing with a food-safe penetrating sealer.
Granite and quartzite slab countertops deliver a premium look but require professional templating and fabrication unless you have access to a wet saw capable of cutting stone. Budget $40 to $80 per square foot installed for these natural stone options. Porcelain slab countertops have surged in popularity for outdoor kitchens because they resist UV fading, heat, stains, and scratching better than almost any other surface, with prices ranging from $30 to $60 per square foot. Tile countertops remain the most affordable option at $10 to $25 per square foot and are highly DIY-friendly, though grout lines require periodic resealing. Whichever material you select, ensure the substrate is perfectly level, provide adequate overhang support with corbels or angle brackets every 24 inches on spans greater than 8 inches, and seal all cut edges to prevent moisture infiltration that leads to cracking in freeze-thaw climates.
Budget Breakdown: How Much Does a DIY Outdoor Kitchen Really Cost?
One of the biggest advantages of building your own outdoor kitchen is the dramatic cost savings compared to hiring a contractor. A basic DIY outdoor kitchen with a built-in grill, a short run of countertop, one access door, and a simple stone veneer finish can be completed for $2,500 to $5,000 in materials. A mid-range build that adds an L-shaped counter, a sink with running water, a side burner, an outdoor-rated refrigerator, and higher-end stone or stucco finishes typically runs $5,000 to $12,000. A high-end DIY project with premium appliances, granite or quartzite countertops, extensive lighting, and a U-shaped layout with a bar seating area can reach $12,000 to $25,000, which is still roughly half the cost of having the same kitchen professionally built and installed.
Here is a typical mid-range budget breakdown: concrete slab foundation at $500 to $1,000, concrete block framing at $300 to $600, mortar and grout at $100 to $200, stone veneer exterior at $800 to $1,500, concrete countertops at $300 to $600, built-in grill at $1,000 to $2,500, access doors and drawers at $300 to $800, sink and plumbing at $200 to $500, gas line professional installation at $300 to $800, electrical professional installation at $300 to $600, and finishing supplies like sealers, adhesive, and caulk at $100 to $200. These figures reflect 2026 retail pricing at major home improvement stores. To further reduce costs, watch for holiday sales on appliances, source stone veneer from landscape supply yards rather than retail stores, and consider poured concrete countertops over natural stone. Buying a grill during end-of-season clearance events in September and October can save 20 to 40 percent on your single most expensive component.
Common DIY Outdoor Kitchen Mistakes and How to Avoid Them
After reviewing hundreds of DIY outdoor kitchen builds and interviewing professional installers, certain mistakes appear over and over again. The most damaging is skipping the permit process. Many homeowners assume an outdoor kitchen is just a fancy grill and does not require permits, but most municipalities require building permits for any permanent structure with gas, water, or electrical connections. Building without permits can result in fines, forced demolition, and complications when selling your home. Check with your local building department before you start.
The second most common mistake is underestimating the weight of the finished structure and pouring an inadequate foundation. A completed outdoor kitchen with stone veneer and granite countertops can weigh 3,000 to 8,000 pounds. A thin slab or one poured on uncompacted soil will crack and settle, taking your entire kitchen with it. Third, many DIY builders fail to account for thermal expansion. Metal grill frames expand when heated and contract when cooled. Leave a minimum of one-quarter inch gap between the grill frame and the surrounding countertop or structure, filled with high-temperature silicone rather than rigid mortar. Fourth, neglecting drainage leads to standing water inside the base structure, which causes mold, rust, and premature deterioration. Install weep holes at the base of block walls and slope countertops slightly toward the front edge. Fifth, choosing indoor-rated appliances to save money is a costly false economy. Indoor refrigerators, sinks, and electrical components are not designed for temperature extremes, UV exposure, or moisture, and they will fail prematurely. Always select UL-rated outdoor appliances.
Finishing Touches and Maintenance for Your DIY Outdoor Kitchen
With the structure built and appliances installed, the finishing touches transform your project from a construction zone into an inviting outdoor living space. Install under-counter LED strip lighting to illuminate prep areas and create ambient glow for evening entertaining. Add a weatherproof outlet with USB ports near the bar area for charging devices and powering blenders or small appliances. Mount a stainless steel paper towel holder and spice rack within arm's reach of the grill. If your layout includes bar seating, install a foot rail along the base of the counter for guest comfort.
Long-term maintenance keeps your DIY outdoor kitchen looking and functioning like new for decades. Seal natural stone countertops and veneer annually with a penetrating silicone-based sealer. Clean stainless steel appliances monthly with a dedicated stainless steel cleaner applied in the direction of the grain. Inspect gas connections annually for leaks using a soap-and-water solution or an electronic gas detector. Drain and winterize water supply lines before the first freeze if you live in a cold climate by shutting off the supply valve and opening the outdoor faucet to release residual water. Cover the entire kitchen with a fitted, breathable cover when not in use to protect against UV damage, rain, and debris. Stucco finishes should be inspected each spring for hairline cracks, which can be filled with elastomeric caulk before they allow moisture behind the surface. With consistent seasonal maintenance, a well-built DIY outdoor kitchen will serve your family for 20 years or more, making it one of the best long-term investments you can make in your outdoor living space.