Outdoor Kitchen Designs: Layout Options, Style Guide & Architecture Integration
Outdoor kitchen designs spanning Mediterranean, modern farmhouse, coastal, and mid-century styles. Linear, L-shape, U-shape, and island layouts compared.
Outdoor Kitchen Setup Editorial Team
Outdoor living specialists with 15+ years of hands-on experience
Top Picks: Best Outdoor Kitchen Designs: Layout Options, Style Guide & Architecture Integration in 2026
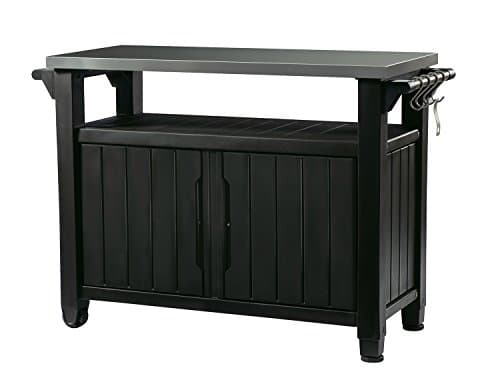
Keter Unity XL Portable Outdoor Table with Stainless Steel Top for Kitchen Prep and Outdoor Storage Cabinet for Grilling Accessories, Dark Grey
$220.99
Shop Now
TAOMAND Large 76 x 52 inches Under Grill Mats for Outdoor Grill | Double-Sided Fireproof | Waterproof | Oil-Proof | Easy to Clean | Indoor Fireplace/Fire Pit Mat | Quality BBQ Mat for Deck Patio Lawn
$33.99
Shop Now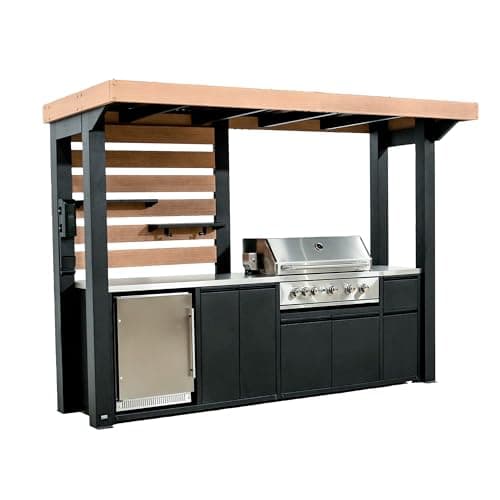
Backyard Discovery Fusion Flame Galvanized Steel Covered Outdoor Kitchen with 5-Burner Stainless, Grill, Refrigerator, Countertop, Storage, and, Roof for All-Season Outdoor Cooking, electric
$4,999.00
Shop Now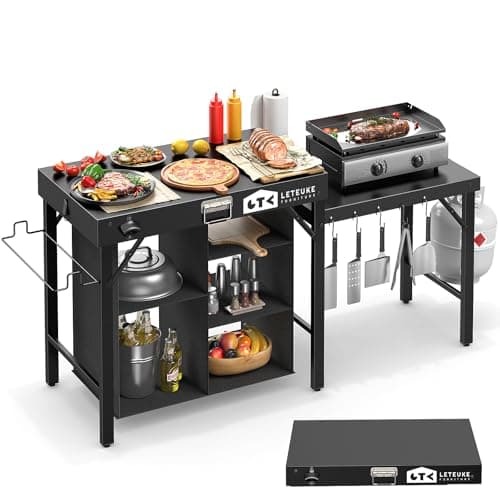
Leteuke Grill Table for Blackstone Griddle, Portable Foldable Grill Table with Storage Fits Ninja, Blackstone Griddle Stand for Outdoor Camping, Picnic, Garden, Patio, Dining, BBQ, Party
$159.99
Shop Now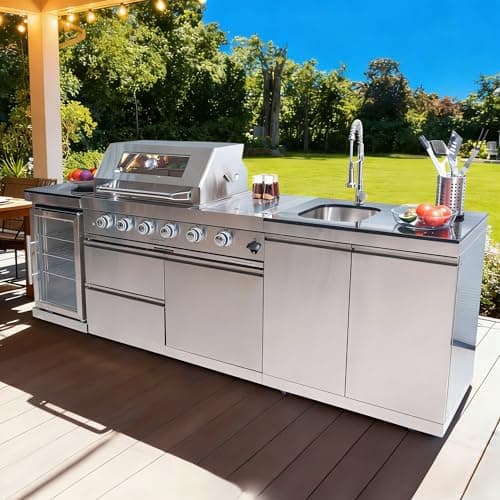
98 Inches Outdoor Kitchen Island, 4-Burner 72000 BTU Propane Stainless Steel BBQ with Side/Rear Burners, With Refrigerator and Sink, Rotisserie, Granite Countertops, Storage, For Backyard BBQ, Silver
$3,652.00
Shop Now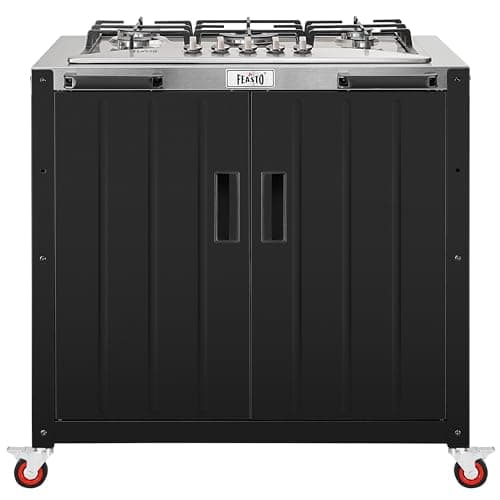
Feasto Gas Grill, Movable Outdoor Gas Stove Stainless Steel Top with Cabinet, 5 Burners with 36,200 BTUs, Outdoor Propane Grill for Outdoor Cooking, Ideal for Lawn & Garden, L35.4 x W24
$539.99
Shop Now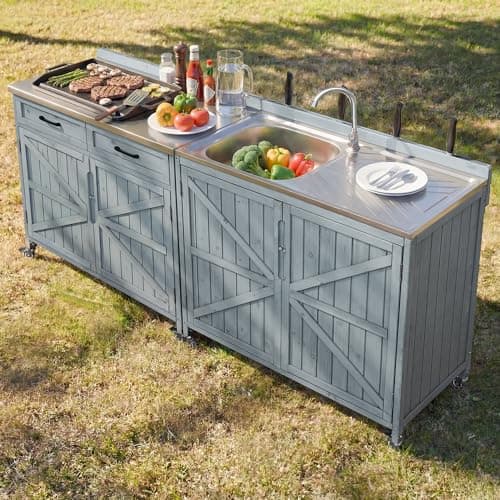
Merax 2 Piece Modular Outdoor Kitchen Series- Kitchen Grill Cart w/Stainless Steel Sink, Wood Rolling BBQ Prep Table w/Stainless Steel Top, Lockable Wheels for Patio & Outdoor Cooking, Grey Blue
$529.99
Shop Now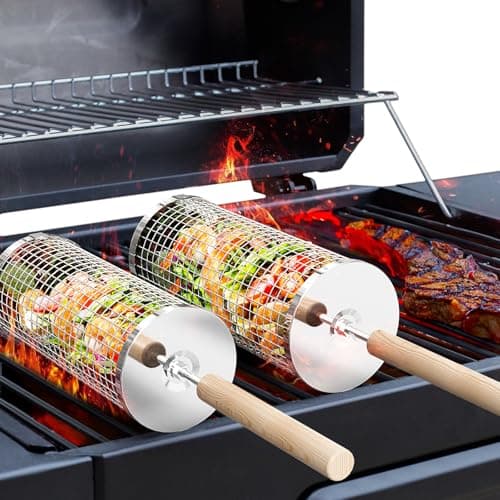
ivtivfu Rolling Grill Basket, Removable Wooden Handle, 304 Stainless Steel, Nesting BBQ Tools, Smoker Grilling Accessories for Vegetable, Outdoor Cooking Camping, Birthday Gifts for Men Dad Husband
$23.99
Shop NowKeter Unity XL Portable Outdoor Table with Stainless Steel Top for Kitchen Prep and Outdoor Storage Cabinet for Grilling Accessories, Dark Grey
$220.99
Shop NowTAOMAND Large 76 x 52 inches Under Grill Mats for Outdoor Grill | Double-Sided Fireproof | Waterproof | Oil-Proof | Easy to Clean | Indoor Fireplace/Fire Pit Mat | Quality BBQ Mat for Deck Patio Lawn
$33.99
Shop NowBackyard Discovery Fusion Flame Galvanized Steel Covered Outdoor Kitchen with 5-Burner Stainless, Grill, Refrigerator, Countertop, Storage, and, Roof for All-Season Outdoor Cooking, electric
$4,999.00
Shop NowLeteuke Grill Table for Blackstone Griddle, Portable Foldable Grill Table with Storage Fits Ninja, Blackstone Griddle Stand for Outdoor Camping, Picnic, Garden, Patio, Dining, BBQ, Party
$159.99
Shop Now98 Inches Outdoor Kitchen Island, 4-Burner 72000 BTU Propane Stainless Steel BBQ with Side/Rear Burners, With Refrigerator and Sink, Rotisserie, Granite Countertops, Storage, For Backyard BBQ, Silver
$3,652.00
Shop NowFeasto Gas Grill, Movable Outdoor Gas Stove Stainless Steel Top with Cabinet, 5 Burners with 36,200 BTUs, Outdoor Propane Grill for Outdoor Cooking, Ideal for Lawn & Garden, L35.4 x W24
$539.99
Shop NowMerax 2 Piece Modular Outdoor Kitchen Series- Kitchen Grill Cart w/Stainless Steel Sink, Wood Rolling BBQ Prep Table w/Stainless Steel Top, Lockable Wheels for Patio & Outdoor Cooking, Grey Blue
$529.99
Shop Nowivtivfu Rolling Grill Basket, Removable Wooden Handle, 304 Stainless Steel, Nesting BBQ Tools, Smoker Grilling Accessories for Vegetable, Outdoor Cooking Camping, Birthday Gifts for Men Dad Husband
$23.99
Shop NowL-Shape Outdoor Kitchen Designs for Maximum Efficiency
The L-shape is the most popular outdoor kitchen design layout, and it earns that status through sheer versatility. An L-shape configuration uses two perpendicular countertop runs, typically with the grill centered on the longer run and the sink and prep area on the shorter wing. This natural separation keeps the hot cooking zone away from the cold prep zone, reducing accidents and improving workflow. The minimum footprint for a functional L-shape outdoor kitchen is approximately 10 by 10 feet, with each run measuring 6 to 10 feet long.
The corner junction is prime real estate in L-shape outdoor kitchen designs. Use it for a 45-degree angled cabinet that holds a trash pullout or a lazy susan storage system, or install a corner sink for convenient access from both wings. The outside corner of the L is also an ideal spot for a raised bar counter at 42 inches tall with two to four barstools, creating a social hub where guests can watch the cook and converse without crowding the work area. For materials, matching the stone veneer or tile on both runs creates visual continuity. Brands like Eldorado Stone and Cultured Stone offer lightweight manufactured veneer panels that install over a steel or cinder block frame, providing the look of full-thickness natural stone at roughly 40 percent of the cost and weight. Pair this guide with our broader outdoor kitchen setup overview for a complete picture of how this fits into a full backyard build.
U-Shape Outdoor Kitchen Designs for Serious Entertainers
U-shape outdoor kitchen designs wrap three sides of a rectangular footprint, creating an enclosed workspace that maximizes counter space and storage while keeping the cook at the center of the action. This layout requires a minimum footprint of 12 by 12 feet, with the interior walkway measuring at least 42 inches wide — 48 inches is preferable if two people will be cooking simultaneously. The rear wall of the U typically houses the grill and hood, while the two side wings accommodate the sink, refrigeration, and prep surfaces.
One of the biggest advantages of U-shape outdoor kitchen designs is the ability to dedicate an entire wing to bar seating. By raising the outer countertop edge of one wing to 42 inches and leaving the inner work surface at 36 inches, you create a two-tier bar that conceals the work mess from seated guests. This design can comfortably seat four to six people on 30-inch barstools. U-shape layouts also allow for appliance redundancy — a second small grill, a side burner with a wok ring, or a built-in smoker on the opposite wing from the main grill. The main consideration is traffic flow: because the U is semi-enclosed, you need a clear entry point at least 36 inches wide. Avoid placing the entry directly behind the grill to prevent guests from walking through the hot zone.
Straight-Line and Galley Outdoor Kitchen Designs
A straight-line outdoor kitchen design arranges all components along a single wall or countertop run, making it the most space-efficient option for narrow patios, balconies, and side yards. The typical straight-line layout spans 8 to 16 feet and positions the grill at one end, the sink at the opposite end, and storage or prep space in the middle. This design works exceptionally well when placed against a house wall or privacy fence, using the existing structure as a backdrop and wind shield.
A variation is the galley design, which places two parallel runs facing each other, separated by a 42-to-48-inch walkway. Galley outdoor kitchen designs are borrowed from professional restaurant kitchens and are highly efficient for one or two cooks because everything is within a single step. However, the galley layout is not guest-friendly — it is a dedicated cooking zone rather than a social space. For material coordination, a straight-line outdoor kitchen against a house wall should use matching or complementary materials. If your home has a brick facade, consider using the same brick or a closely matching thin brick veneer for the outdoor kitchen base. The countertop should extend 10 to 12 inches beyond the cabinet face on the guest side to provide a small overhang for bar seating, even in a straight-line configuration.
Island Outdoor Kitchen Designs: Freestanding and Flexible
A freestanding island is one of the most versatile outdoor kitchen designs because it can be placed anywhere in your yard, oriented in any direction, and does not rely on an adjacent wall or structure. Island outdoor kitchen designs work best in open spaces with at least 36 inches of clearance on all four sides — meaning a 4-by-8-foot island needs a clear area of roughly 10 by 14 feet. The 360-degree access makes islands ideal for social cooking, where the chef faces guests rather than a wall.
Structurally, outdoor kitchen islands can be built from steel stud frames clad in stone veneer, poured concrete, stacked cinder blocks, or prefabricated modular kits. Prefab island kits from companies like Bull Outdoor Products, RTA Outdoor Living, and Cal Flame ship ready to assemble in a weekend, with pre-cut openings for grills, access doors, and drawers. Custom masonry islands offer unlimited design flexibility but typically cost two to four times more than prefab options. For utilities, island designs require underground conduit runs for gas, water, and electrical — plan these during the concrete slab pour phase to avoid costly post-installation trenching. A popular design enhancement is a raised countertop on one long side of the island, creating a bar-height dining area that seats four to six guests while the cook works on the lower 36-inch surface.
Matching Outdoor Kitchen Design to Your Home's Architecture
The most polished outdoor kitchen designs look like they were built at the same time as the house, even when they were added years later. Achieving this requires careful coordination of materials, proportions, and architectural details. Start by inventorying your home's exterior materials: what is the siding (stucco, brick, stone, wood lap, fiber cement)? What is the trim color? What is the roof pitch and material? Your outdoor kitchen design should echo at least two of these elements.
For a Mediterranean or Spanish-style home, use stucco-clad base walls with arched niches, terracotta or Saltillo tile countertop accents, and a clay barrel-tile roof on the pergola. For a modern farmhouse, combine shiplap-textured composite panels, black steel hardware, and concrete or butcher block countertops under a simple gable roof structure. Contemporary homes pair best with brushed stainless steel cabinets, minimalist horizontal-grain porcelain panels, and flat-roof shade structures with clean lines. Craftsman and bungalow homes call for natural stone pillars, heavy timber pergola beams, and honed granite or slate countertops. Even small details matter: match your outdoor kitchen's light fixtures, outlet covers, and faucet finishes to those used on your home's exterior. This level of coordination signals intentional design and elevates the perceived quality and value of the entire property.
Outdoor Kitchen Design Software and Planning Tools
Before committing to materials and contractors, use outdoor kitchen design software to visualize your layout in 3D and identify potential issues before they become expensive mistakes. Several tools cater specifically to outdoor kitchen planning. SketchUp Free (web-based) is the most accessible option, offering a 3D modeling environment where you can draw your patio dimensions, place appliance models from the 3D Warehouse, and experiment with different layouts. The learning curve is moderate, but thousands of YouTube tutorials make it approachable for beginners.
Chief Architect Home Designer (around $200 for the Architectural version) is a more powerful option that generates construction-ready plans with accurate dimensions, material lists, and even cost estimates. It includes a dedicated outdoor living design mode with built-in templates for kitchens, pergolas, and fire features. For quick concept sketches, RoomSketcher and Planner 5D offer drag-and-drop interfaces that produce attractive 2D floor plans and 3D renderings without any CAD experience. Many outdoor kitchen manufacturers also provide free design services: Bull Outdoor Products, Lynx, and Cal Flame all have online design tools or in-house designers who will create a layout based on your patio dimensions and appliance preferences. Take advantage of these free services to get a professional starting point, then refine the design using your own software.
Outdoor Kitchen Design Mistakes to Avoid
Even well-intentioned outdoor kitchen designs can fail when common mistakes are not addressed during the planning phase. The most frequent error is insufficient countertop space. A grill alone does not make a kitchen — you need at least 24 inches of clear counter on each side of the grill for staging platters, resting utensils, and placing ingredients. Total countertop length should be at least 8 linear feet for a functional outdoor kitchen, and 12 to 16 feet is ideal for regular entertaining.
Another critical mistake is ignoring wind direction. Place the grill so that prevailing winds carry smoke away from the dining area and house, not toward them. A simple ribbon test on a few breezy days reveals your yard's dominant wind patterns. Poor lighting ranks high on the regret list — install task lighting directly above the grill and prep areas using weather-rated fixtures, not just ambient string lights. Skipping the ventilation hood is another design flaw; even in an open-air setting, a hood above the grill captures grease-laden smoke and prevents it from staining a pergola ceiling or nearby walls. Other common outdoor kitchen design mistakes include placing the refrigerator in direct sunlight (which forces the compressor to work overtime), forgetting about trash and recycling storage, and underestimating the electrical load needed for appliances, lighting, and entertainment systems.
Integrating Shade Structures and Roofing into Outdoor Kitchen Designs
A shade structure is not optional in most climates — it is a fundamental element of functional outdoor kitchen design. Without overhead protection, direct sun makes cooking uncomfortable, UV rays degrade appliances and finishes faster, and a single rainstorm forces you indoors. The four primary shade options are pergolas, solid roof extensions, pavilions, and retractable awnings, each with distinct aesthetic and functional characteristics.
A pergola with an open-rafter design provides partial shade and works well in mild climates. Adding a retractable canopy, shade cloth, or louvered panels (like the Equinox Louvered Roof system starting around $80 per square foot installed) converts a pergola into an adjustable all-weather cover. A solid roof extension that ties into your home's existing roofline provides the most seamless look and complete weather protection but requires structural engineering and typically costs $15,000 to $40,000. A freestanding pavilion with its own post-and-beam structure and finished ceiling is ideal for island kitchen designs located away from the house, with costs ranging from $10,000 to $50,000 depending on materials and size. Retractable awnings from brands like Sunsetter and SunSetter offer the most flexibility at $1,500 to $5,000, extending when needed and retracting for clear-sky evenings. Whichever option you choose, ensure minimum headroom of 8 feet over the cooking area and 7 feet over seating areas.