Outdoor Kitchen Design: Principles, Layouts, and Planning Guide for 2026
Outdoor kitchen design starts with workflow, sun angles, and traffic patterns — not appliance shopping. Learn the work triangle, zone planning, and 3D tools.
Outdoor Kitchen Setup Editorial Team
Outdoor living specialists with 15+ years of hands-on experience
Outdoor kitchen design is the critical planning phase that separates a functional, beautiful, and long-lasting outdoor cooking space from one that frustrates you every time you use it. Great outdoor kitchen design accounts for how you actually cook and entertain, how people move through the space, how weather and sun exposure affect comfort, and how the kitchen integrates with your home's architecture and surrounding landscape. Rushing past the design phase is the single most expensive mistake homeowners make, because relocating a gas line or rebuilding an island that is two feet too short costs far more than spending extra time on paper before construction begins. In 2026, the outdoor kitchen design landscape has evolved considerably, with free and professional-grade design software making it possible to visualize your layout in 3D before committing to a single purchase. Online design tools from manufacturers like Bull, RTA Outdoor Living, and Belgard let you configure islands, select finishes, and generate material lists from your browser. For those who prefer expert guidance, landscape architects and outdoor kitchen designers charge $500 to $5,000 for professional plans depending on project complexity. This guide walks you through every principle and decision involved in designing an outdoor kitchen, from the foundational work triangle concept and traffic flow patterns to material selection, lighting design, integrating with your landscape, and choosing between DIY design and hiring a professional. Whether you are sketching your first ideas on a napkin or refining a detailed blueprint, these design fundamentals ensure your outdoor kitchen works as well as it looks.
Top Picks: Best Outdoor Kitchen Design: Principles, Layouts, and Planning Guide for 2026 in 2026
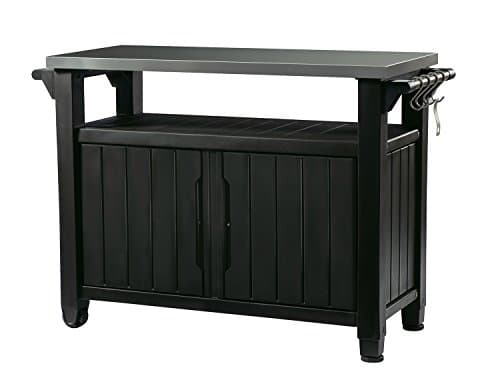
Keter Unity XL Portable Outdoor Table with Stainless Steel Top for Kitchen Prep and Outdoor Storage Cabinet for Grilling Accessories, Dark Grey
$220.99
Shop Now
TAOMAND Large 76 x 52 inches Under Grill Mats for Outdoor Grill | Double-Sided Fireproof | Waterproof | Oil-Proof | Easy to Clean | Indoor Fireplace/Fire Pit Mat | Quality BBQ Mat for Deck Patio Lawn
$33.99
Shop Now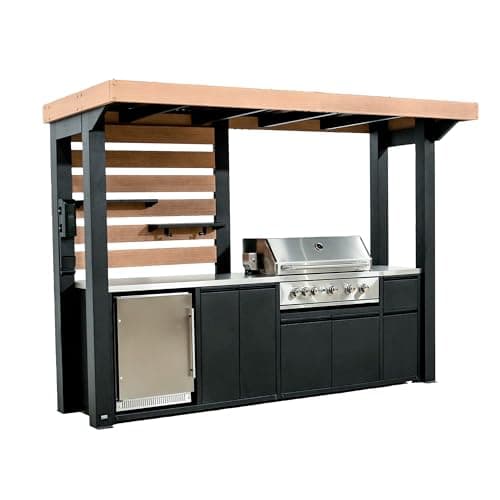
Backyard Discovery Fusion Flame Galvanized Steel Covered Outdoor Kitchen with 5-Burner Stainless, Grill, Refrigerator, Countertop, Storage, and, Roof for All-Season Outdoor Cooking, electric
$4,999.00
Shop Now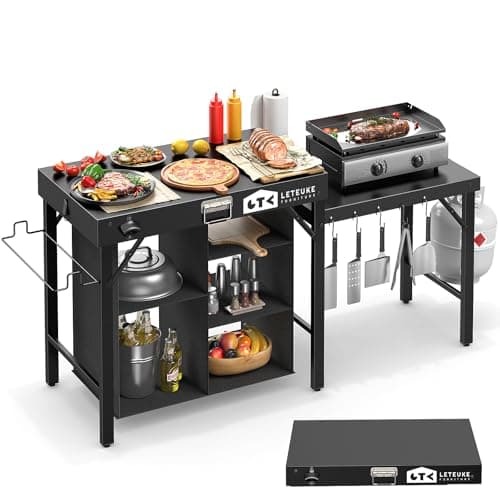
Leteuke Grill Table for Blackstone Griddle, Portable Foldable Grill Table with Storage Fits Ninja, Blackstone Griddle Stand for Outdoor Camping, Picnic, Garden, Patio, Dining, BBQ, Party
$159.99
Shop Now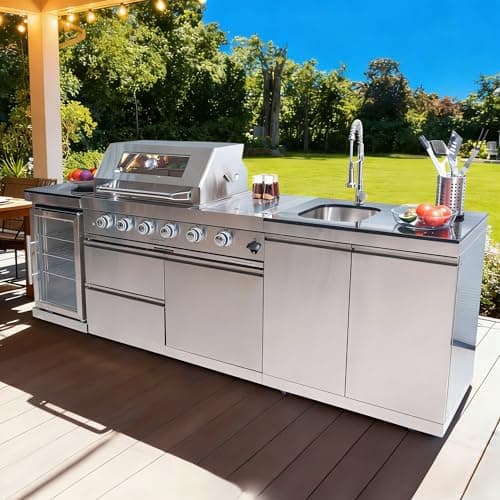
98 Inches Outdoor Kitchen Island, 4-Burner 72000 BTU Propane Stainless Steel BBQ with Side/Rear Burners, With Refrigerator and Sink, Rotisserie, Granite Countertops, Storage, For Backyard BBQ, Silver
$3,652.00
Shop Now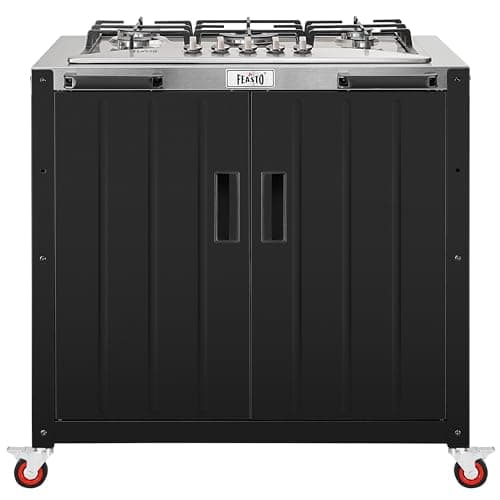
Feasto Gas Grill, Movable Outdoor Gas Stove Stainless Steel Top with Cabinet, 5 Burners with 36,200 BTUs, Outdoor Propane Grill for Outdoor Cooking, Ideal for Lawn & Garden, L35.4 x W24
$539.99
Shop Now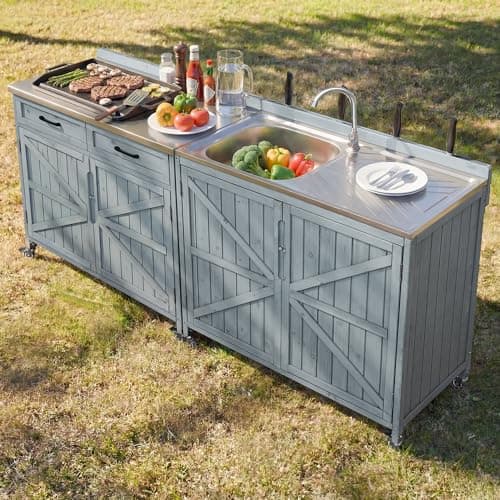
Merax 2 Piece Modular Outdoor Kitchen Series- Kitchen Grill Cart w/Stainless Steel Sink, Wood Rolling BBQ Prep Table w/Stainless Steel Top, Lockable Wheels for Patio & Outdoor Cooking, Grey Blue
$529.99
Shop Now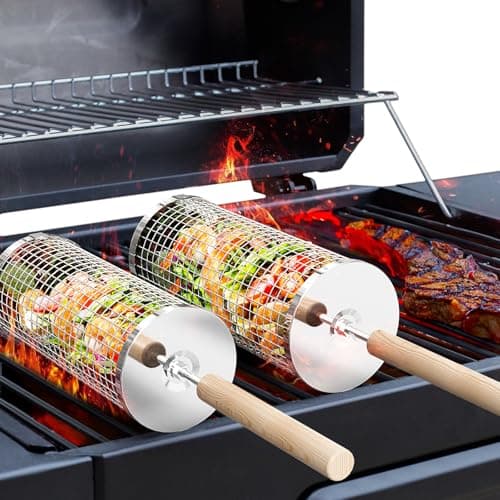
ivtivfu Rolling Grill Basket, Removable Wooden Handle, 304 Stainless Steel, Nesting BBQ Tools, Smoker Grilling Accessories for Vegetable, Outdoor Cooking Camping, Birthday Gifts for Men Dad Husband
$23.99
Shop NowKeter Unity XL Portable Outdoor Table with Stainless Steel Top for Kitchen Prep and Outdoor Storage Cabinet for Grilling Accessories, Dark Grey
$220.99
Shop NowTAOMAND Large 76 x 52 inches Under Grill Mats for Outdoor Grill | Double-Sided Fireproof | Waterproof | Oil-Proof | Easy to Clean | Indoor Fireplace/Fire Pit Mat | Quality BBQ Mat for Deck Patio Lawn
$33.99
Shop NowBackyard Discovery Fusion Flame Galvanized Steel Covered Outdoor Kitchen with 5-Burner Stainless, Grill, Refrigerator, Countertop, Storage, and, Roof for All-Season Outdoor Cooking, electric
$4,999.00
Shop NowLeteuke Grill Table for Blackstone Griddle, Portable Foldable Grill Table with Storage Fits Ninja, Blackstone Griddle Stand for Outdoor Camping, Picnic, Garden, Patio, Dining, BBQ, Party
$159.99
Shop Now98 Inches Outdoor Kitchen Island, 4-Burner 72000 BTU Propane Stainless Steel BBQ with Side/Rear Burners, With Refrigerator and Sink, Rotisserie, Granite Countertops, Storage, For Backyard BBQ, Silver
$3,652.00
Shop NowFeasto Gas Grill, Movable Outdoor Gas Stove Stainless Steel Top with Cabinet, 5 Burners with 36,200 BTUs, Outdoor Propane Grill for Outdoor Cooking, Ideal for Lawn & Garden, L35.4 x W24
$539.99
Shop NowMerax 2 Piece Modular Outdoor Kitchen Series- Kitchen Grill Cart w/Stainless Steel Sink, Wood Rolling BBQ Prep Table w/Stainless Steel Top, Lockable Wheels for Patio & Outdoor Cooking, Grey Blue
$529.99
Shop Nowivtivfu Rolling Grill Basket, Removable Wooden Handle, 304 Stainless Steel, Nesting BBQ Tools, Smoker Grilling Accessories for Vegetable, Outdoor Cooking Camping, Birthday Gifts for Men Dad Husband
$23.99
Shop NowThe Outdoor Kitchen Work Triangle: Foundation of Good Design
The work triangle is a time-tested design principle borrowed from indoor kitchen planning that applies equally well to outdoor kitchen design. It defines the spatial relationship between the three most-used stations: the cooking zone (grill and side burner), the prep zone (counter space and sink), and the storage or cold zone (refrigerator and dry storage). In an ideal layout, these three zones form a triangle where each leg measures between four and nine feet, and the total perimeter of the triangle is between 13 and 26 feet. This range keeps everything within a few steps of everything else while preventing stations from being so close that two people cannot work simultaneously without bumping into each other.
In a straight-line outdoor kitchen island, the work triangle flattens into a work line, which still functions efficiently for a single cook as long as the total island length stays between six and twelve feet. Beyond twelve feet in a straight line, the walk between the farthest stations becomes tiring during extended cooking sessions. For L-shaped and U-shaped outdoor kitchen designs, the work triangle comes into its full potential because each zone occupies a different leg of the layout. Place the grill at the center or end of the main island section, the sink and prep area at the corner of the L or U, and the refrigerator on the perpendicular wing. This configuration means the cook can pivot between tasks rather than walking back and forth along a line. The work triangle is a guideline rather than a rigid rule, so adjust the dimensions to fit your specific space, but keeping the three-zone concept in mind during the outdoor kitchen design phase produces a layout that feels intuitive and effortless once you start cooking. If you are still exploring different setups, our main outdoor kitchen setup guide walks through every category and layout type.
Traffic Flow and Zoning in Outdoor Kitchen Design
Beyond the cook's workflow, outdoor kitchen design must account for how other people move through and interact with the space. The most common design mistake is placing the outdoor kitchen in a location that forces foot traffic through the cooking zone, creating a constant stream of people walking between the cook and the grill. This is not only annoying but also a safety hazard when you are handling hot grill grates and sharp knives. The best outdoor kitchen designs clearly separate the space into distinct zones: a cooking zone that only the cook occupies, a social zone where guests gather, and a dining zone with table seating.
A raised bar counter on the guest-facing side of the island is one of the most effective ways to create a natural boundary between the cooking and social zones. The bar provides a place for guests to sit, eat appetizers, and chat with the cook while remaining safely outside the work area. The standard bar height of 42 inches with a 12-to-15-inch overhang accommodates standard bar stools and creates a visual separation that people instinctively respect. Pathway planning is equally important. The main path from the house to the yard should not pass through the cooking zone. If your patio layout makes this unavoidable, position the outdoor kitchen so the grill faces away from the primary traffic path. Additionally, maintain a minimum of 42 inches between the island and any parallel wall, fence, or obstacle to allow two people to pass comfortably. In the cooking zone itself, a clearance of 36 to 48 inches between the island front and any surface behind the cook provides enough room to open grill lids, pull out drawers, and step back from flare-ups without feeling confined.
Choosing the Right Outdoor Kitchen Layout for Your Space
The layout of your outdoor kitchen is dictated by the shape and size of your available space, the number of appliances you want to include, and how you plan to use the area for entertaining. There are five primary layout options, each with distinct advantages. The straight-line (I-shape) layout is the most versatile and space-efficient, consisting of a single island ranging from five to twelve feet long. It works in almost any patio configuration and is the easiest to build and the most affordable. A straight island is ideal when the outdoor kitchen is against a wall or fence, and it accommodates a grill plus two to three additional features depending on length.
The L-shaped layout adds a perpendicular wing to the main island, creating a natural corner that separates cooking from serving. L-shaped outdoor kitchen designs typically run 8 to 12 feet on the long side and 5 to 8 feet on the short side, providing room for four to six appliances and significantly more counter space than a straight island. This is the most popular layout for medium-sized patios of 150 to 300 square feet. The U-shaped layout wraps around the cook on three sides, maximizing counter space and creating an enclosed cooking cockpit. U-shaped designs require at least 200 square feet of dedicated patio space and are best for serious entertainers who want every appliance within arm's reach. The G-shaped layout extends a U-shape with an additional peninsula, often used as a bar extension. Finally, the island-plus-bar layout pairs a cooking island with a separate freestanding bar or serving counter, creating a dedicated dining area that is physically separated from the cooking zone. This layout works well in large open patios where you want flexibility in how the space is used.
Integrating Outdoor Kitchen Design With Your Landscape
The most impressive outdoor kitchens do not look like they were dropped onto the patio as an afterthought. They feel like an organic extension of the home and landscape. Achieving this integration starts with material selection that echoes your home's existing finishes. If your house has a stone facade, use the same or a complementary stone on the outdoor kitchen island. If the house is stucco, match the stucco color and texture on the island. If the home features brick, incorporate brick accents into the island base or surrounding hardscape. This visual continuity makes the outdoor kitchen feel like it belongs rather than standing apart.
Hardscape coordination is the next layer. The patio surface under and around the outdoor kitchen should integrate with existing walkways, driveways, and patios. If your existing patio is travertine pavers, extend the same pavers under the outdoor kitchen rather than pouring a separate concrete pad. If cost is a concern, use a complementary but less expensive paver for the kitchen area that blends with the existing hardscape. Landscaping around the outdoor kitchen softens the structure and ties it into the garden. Low plantings like ornamental grasses, lavender, or rosemary along the base of the island add color and fragrance without encroaching on the cooking space. A pergola or shade structure above the outdoor kitchen extends the usable season by providing relief from direct sun and light rain. Match the pergola material and style to your home's trim, whether that is painted wood, natural cedar, aluminum, or vinyl. Privacy plantings like tall hedges, bamboo screens, or climbing vines on a trellis can define the boundaries of the outdoor kitchen area without the hard visual barrier of a solid fence. The goal of landscape integration in outdoor kitchen design is to create a space that looks like it has always been there.
Outdoor Kitchen Design Software and Planning Tools
Modern design software takes the guesswork out of outdoor kitchen design by letting you create accurate 2D floor plans and realistic 3D renderings before spending a dollar on materials. Several free and paid options cater specifically to outdoor kitchen planning. SketchUp Free (app.sketchup.com) is the most widely used 3D modeling tool for DIY outdoor kitchen design. Its intuitive push-pull interface lets you draw an island, set precise dimensions, add appliances from the 3D Warehouse library, and view the result from any angle. The free web version handles most residential projects, while SketchUp Pro at $349 per year adds advanced features like solid modeling and construction documents.
Belgard Rooms Designer is a free online tool specifically built for outdoor living spaces, including kitchens. You select your patio shape, drop in island components from Belgard's product library, choose finishes, and generate a bird's-eye view with material quantities. It is less flexible than SketchUp but faster to learn if you plan to use Belgard pavers and components. RTA Outdoor Living offers a free online island configurator where you select a layout shape (straight, L, U, or custom), set dimensions, place appliance cutouts, choose panel finishes, and get an instant price quote for their modular island system. Planner 5D is an app-based designer with a specific outdoor module that lets you furnish a patio with outdoor kitchen islands, dining sets, landscaping, and lighting, then walk through the space in a virtual reality mode. The premium version at $7 per month unlocks a full catalog of outdoor elements. For homeowners who want professional-level renderings without hiring a designer, Chief Architect Home Designer Suite at $99 offers the most comprehensive outdoor kitchen design features among consumer software, including automatic material lists, cross-section views, and photo-realistic rendering.
Hiring an Outdoor Kitchen Designer vs DIY Design
Deciding whether to design your outdoor kitchen yourself or hire a professional depends on your project complexity, budget, confidence with spatial planning, and how much value you place on getting the design right the first time. DIY design is a perfectly viable approach for straightforward projects like a single straight-line island on an existing patio, especially with the design software available today. If your outdoor kitchen involves a standard grill, optional side burner, and access doors in a six-to-eight-foot island, the layout decisions are relatively simple: center the grill, add features to one or both sides, and ensure utility connections reach the island location. Thousands of homeowners successfully design and build these kitchens every year using manufacturer templates and YouTube tutorials.
Hiring a professional designer becomes increasingly valuable as project complexity rises. An L-shaped or U-shaped kitchen with multiple appliances, a sink with plumbing, electrical for lighting and outlets, a gas line serving two or more appliances, a pergola or roof structure, and integration with surrounding landscaping involves dozens of interdependent decisions where a mistake in one area cascades into problems elsewhere. Professional outdoor kitchen designers charge $500 to $2,000 for a design-only package that includes site assessment, 2D floor plan, 3D renderings, material specifications, and an appliance schedule. Landscape architects who design the outdoor kitchen as part of a comprehensive backyard renovation charge $2,000 to $5,000 or more, but they handle everything from grading and drainage to plant selection and irrigation. When to hire a pro: your project exceeds $10,000 in budget, involves structural elements like a roof or second-story deck, requires significant grading or drainage work, or is in a location with strict HOA design review requirements. The $1,000 to $3,000 design fee typically saves multiples of that amount by preventing construction errors, material waste, and costly change orders.
Lighting and Electrical Design for Outdoor Kitchens
Lighting is one of the most frequently underdesigned elements of an outdoor kitchen, yet it has an outsized impact on both functionality and ambiance after dark. A comprehensive outdoor kitchen lighting design includes three layers: task lighting, ambient lighting, and accent lighting. Task lighting illuminates work surfaces where you prep food, read recipes, and monitor grill temperatures. The most effective task lighting for outdoor kitchens is provided by LED fixtures mounted under a pergola or overhead structure, aimed directly at the countertop. Under-counter LED strip lights ($15 to $50 for waterproof strips) provide a secondary layer of illumination that fills shadows under the countertop overhang and lights up the lower cabinet area.
Ambient lighting sets the overall mood and provides general illumination for the entire outdoor living area. String lights are the most popular ambient lighting choice for outdoor kitchens, available in LED versions that consume minimal electricity and last for years. The classic warm-white Edison-style bulb string, hung in a gentle swag pattern at eight to ten feet above the patio, creates an inviting atmosphere that encourages guests to linger. Lanterns, pillar candles in hurricane holders, and low-voltage path lights around the patio perimeter are also effective ambient sources. Accent lighting highlights architectural or landscape features and adds depth to the scene. Uplights aimed at a stone column, a tree canopy, or a water feature create dramatic shadows and focal points that make the entire outdoor space feel more dynamic. On the electrical side, plan for at least two GFCI-protected outdoor-rated outlets in the island for small appliances, phone charging, and an electric igniter. All outdoor electrical work should be on a dedicated circuit and installed by a licensed electrician in compliance with your local electrical code, which typically requires UL-listed wet-rated fixtures and conduit-protected wiring for outdoor kitchen applications.
Common Outdoor Kitchen Design Mistakes and How to Avoid Them
Even experienced homeowners fall into predictable traps during the outdoor kitchen design process. Awareness of these common mistakes helps you sidestep them. Mistake one: building too small. In an effort to save money or fit a tight space, many homeowners build an island that is shorter than it should be and immediately regret the lack of counter space. The minimum recommended length for a grill island is six feet. If budget is tight, build the full-length island structure now and install appliances incrementally. Mistake two: ignoring wind direction. Placing the grill on the windward side of the island sends smoke directly into the dining and seating area. Observe your patio during different times of day and different weather conditions to understand prevailing wind patterns before finalizing grill placement.
Mistake three: forgetting about shade. Cooking over a hot grill under direct midday sun is miserable. If your patio does not have existing shade, plan for a pergola, shade sail, or patio umbrella as part of the outdoor kitchen design, not as an afterthought. Mistake four: inadequate lighting. As discussed in the previous section, cooking outdoors after dark without proper lighting is frustrating and unsafe. Plan your lighting during the design phase when running electrical conduit inside the island and to overhead fixtures is easy, not after the island is built and sealed up. Mistake five: no plan for rain and weather protection. Even in mild climates, an uncovered outdoor kitchen is unusable during rain, which severely limits your return on investment. At minimum, plan for a retractable awning or a simple roof extension from the house to cover the cooking zone. Mistake six: placing the kitchen too far from the house. The farther your outdoor kitchen is from the indoor kitchen, the more inconvenient it becomes to transport dishes, ingredients, and supplies back and forth. Unless there is a compelling reason otherwise, position the outdoor kitchen within 15 to 25 feet of your back door, ideally visible through a window or sliding glass door for easy supervision during parties.