Outdoor Kitchen Plans: Blueprints, Dimensions & Design Guides for Every Budget
Outdoor kitchen plans cut build costs by 23% versus winging it. Free manufacturer blueprints, paid CAD layouts, dimension standards, and permit-ready drawings.
Outdoor Kitchen Setup Editorial Team
Outdoor living specialists with 15+ years of hands-on experience
Outdoor kitchen plans are the foundation of every successful backyard cooking space, transforming vague ideas about grilling stations and countertops into precise, buildable blueprints that contractors can follow and building departments can approve. Whether you are downloading a free plan from a manufacturer like Bull Outdoor Products or RTA Outdoor Living, purchasing a detailed CAD-drawn blueprint from an architect for $500 to $2,000, or sketching your own layout on graph paper, the quality of your outdoor kitchen plan directly determines whether your finished project is a functional cooking environment or an expensive mistake. A proper outdoor kitchen plan includes overhead views showing appliance placement and traffic flow, elevation drawings revealing counter heights and backsplash details, utility rough-in diagrams specifying gas line size, water supply routing, electrical circuit placement, and drainage slope, plus a detailed materials list with quantities and specifications. The National Kitchen and Bath Association reports that homeowners who build from detailed plans spend 23 percent less on their projects than those who wing it, primarily because accurate plans eliminate the change orders, material waste, and rework that plague improvised builds. This comprehensive guide covers everything from reading architectural blueprints and understanding standard outdoor kitchen dimensions to planning utility connections, navigating the permit process, and choosing between free plans, paid premium plans, and custom architect-designed layouts that perfectly match your property and cooking needs.
Top Picks: Best Outdoor Kitchen Plans: Blueprints, Dimensions & Design Guides for Every Budget in 2026
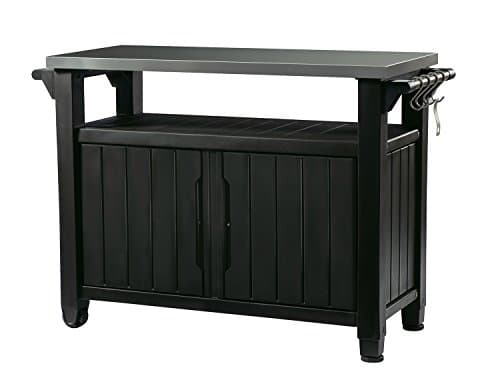
Keter Unity XL Portable Outdoor Table with Stainless Steel Top for Kitchen Prep and Outdoor Storage Cabinet for Grilling Accessories, Dark Grey
$220.99
Shop Now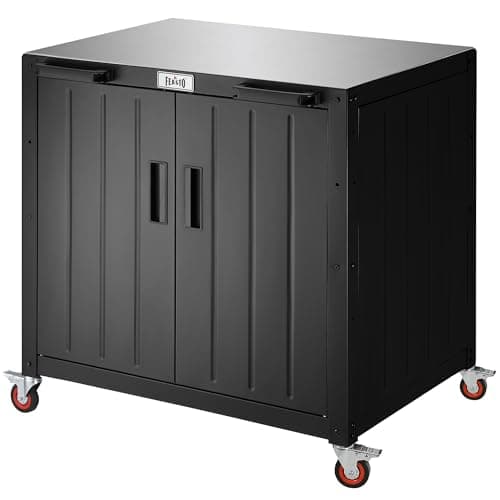
Feasto Outdoor Grill Cart with Storage Cabinet and Stainless Steel Top, 35-Inch Outdoor Grill Station with Door, Modular Kitchen Island for Food Prep and BBQ, Black & Silver
$219.99
Shop Now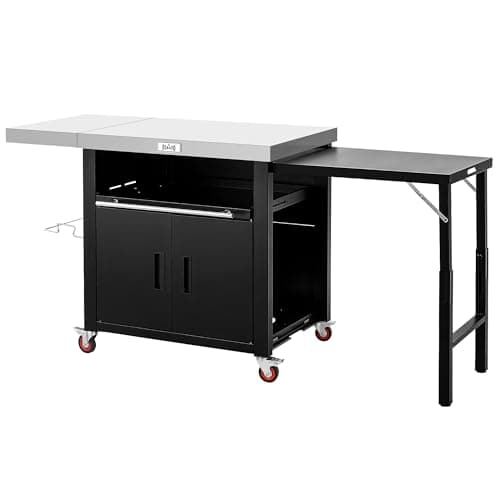
Feasto Outdoor Kitchen Island with Cabinet, Outdoor Grill Table with Stainless Steel Top for Pizza Oven& Griddles, Movable Bar Cart with Pull-Out Plate for Parties& Gathering, Heavy-Duty, L74”x W24”
$259.99
Shop Now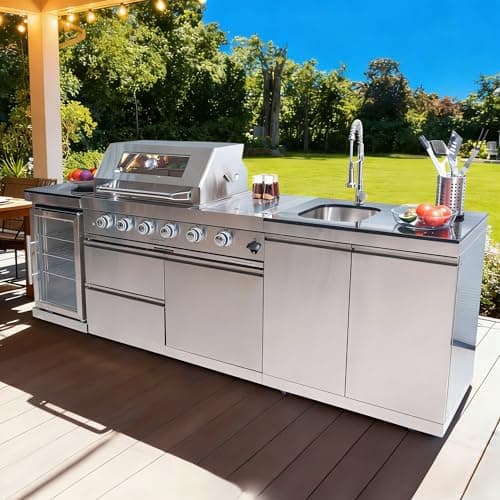
98 Inches Outdoor Kitchen Island, 4-Burner 72000 BTU Propane Stainless Steel BBQ with Side/Rear Burners, With Refrigerator and Sink, Rotisserie, Granite Countertops, Storage, For Backyard BBQ, Silver
$3,652.00
Shop Now
Keter Outdoor Rolling Table Cart for Food Prep, Storage, Bar & Grill, Dark Brown - Portable Kitchen Island Tabletop with Wheels for Drinks, Snacks, and Cooking
$265.99
Shop Now
JY QAQA Outdoor Grill Cart with Storage,Patio Kitchen Island Outdoor Grill Table with Wheels,BBQ Cart Movable Pizza Oven Table Stand, Storage Cabinet, Foldable Tabletop, (Black)
$135.98
Shop Now
FUQARHY 43.3-Inch Outdoor Kitchen Island with Storage Cabinet and Stainless Steel Top, Solid Wood Prep Station Grill Table with Lockable Wheels for Patio, Backyard, Party (Black)
$199.99
Shop Now
Stanbroil Rolling Outdoor Kitchen Island, BBQ Grill Cart with Stainless Steel Table Top, Double-Door Storage Cabinet & Pull-Out Shelf, Grill Table Cart for Outdoor Indoor, Large
$519.99
Shop NowKeter Unity XL Portable Outdoor Table with Stainless Steel Top for Kitchen Prep and Outdoor Storage Cabinet for Grilling Accessories, Dark Grey
$220.99
Shop NowFeasto Outdoor Grill Cart with Storage Cabinet and Stainless Steel Top, 35-Inch Outdoor Grill Station with Door, Modular Kitchen Island for Food Prep and BBQ, Black & Silver
$219.99
Shop NowFeasto Outdoor Kitchen Island with Cabinet, Outdoor Grill Table with Stainless Steel Top for Pizza Oven& Griddles, Movable Bar Cart with Pull-Out Plate for Parties& Gathering, Heavy-Duty, L74”x W24”
$259.99
Shop Now98 Inches Outdoor Kitchen Island, 4-Burner 72000 BTU Propane Stainless Steel BBQ with Side/Rear Burners, With Refrigerator and Sink, Rotisserie, Granite Countertops, Storage, For Backyard BBQ, Silver
$3,652.00
Shop NowKeter Outdoor Rolling Table Cart for Food Prep, Storage, Bar & Grill, Dark Brown - Portable Kitchen Island Tabletop with Wheels for Drinks, Snacks, and Cooking
$265.99
Shop NowJY QAQA Outdoor Grill Cart with Storage,Patio Kitchen Island Outdoor Grill Table with Wheels,BBQ Cart Movable Pizza Oven Table Stand, Storage Cabinet, Foldable Tabletop, (Black)
$135.98
Shop NowFUQARHY 43.3-Inch Outdoor Kitchen Island with Storage Cabinet and Stainless Steel Top, Solid Wood Prep Station Grill Table with Lockable Wheels for Patio, Backyard, Party (Black)
$199.99
Shop NowStanbroil Rolling Outdoor Kitchen Island, BBQ Grill Cart with Stainless Steel Table Top, Double-Door Storage Cabinet & Pull-Out Shelf, Grill Table Cart for Outdoor Indoor, Large
$519.99
Shop NowFree vs Paid Outdoor Kitchen Plans: Which Are Worth Your Money
Free outdoor kitchen plans are widely available from grill manufacturers, home improvement retailers, and online design communities, but their quality varies dramatically. The best free plans come directly from appliance manufacturers like Bull Outdoor Products, which offers downloadable PDF plans for straight-line, L-shaped, and U-shaped layouts designed specifically around their grill and appliance dimensions. RTA Outdoor Living provides free 3D design consultations and generates detailed plans when you purchase their modular frame kits ($2,500 to $8,000). Home Depot and Lowe's both offer basic free outdoor kitchen plan templates through their in-store design services, though these tend to be generic and optimized to sell their inventory rather than optimize your specific space. Online communities like BBQ Brethren forums and Reddit's r/OutdoorKitchens host user-submitted plans that are often highly detailed because they were actually built and refined through real-world experience.
Paid outdoor kitchen plans range from $50 for basic downloadable PDFs with dimensions and materials lists to $2,000 or more for custom architect-drawn plans that include structural engineering calculations, utility specifications, and permit-ready documentation. Mid-range options like those from OutdoorKitchenPlans.com ($149 to $399) provide multiple layout options with detailed cut lists, appliance specifications, and step-by-step assembly instructions. The sweet spot for most homeowners is a paid plan in the $200 to $500 range that includes overhead and elevation views, a complete materials list, utility rough-in diagrams, and appliance cutout specifications. If your project involves structural elements like load-bearing pergolas, roof extensions, or second-story deck installations, invest in a licensed architect or structural engineer's custom plan, because free plans never account for site-specific load calculations that building inspectors require for permit approval. If you are still exploring different setups, our main outdoor kitchen setup guide walks through every category and layout type.
How to Read Outdoor Kitchen Blueprints and Construction Drawings
Understanding how to read outdoor kitchen blueprints saves you from costly misinterpretations during construction. A complete plan set includes at least four drawing types. The plan view, also called the overhead or bird's-eye view, shows the kitchen from directly above and reveals the overall footprint, appliance positions, counter dimensions, and traffic flow patterns. Dimensions are noted in feet and inches, with the overall length and depth listed first, followed by individual component widths. A standard notation like 12'-6" x 3'-0" means the kitchen is 12 feet 6 inches long and 3 feet deep. Pay close attention to centerline dimensions marked with the CL symbol, which indicate where utilities like gas stubs and water supply lines should be positioned relative to appliance centers rather than cabinet edges.
Elevation drawings show the kitchen from the front, back, or side, revealing counter heights, appliance heights, backsplash dimensions, and the vertical relationship between components. Standard outdoor kitchen counter height is 36 inches from finished floor to countertop surface, matching indoor kitchen standards for ergonomic comfort. Bar-height counters for seating areas measure 42 inches. Section drawings cut through the kitchen at specific points to show internal construction details like stud spacing, cement board sheathing layers, countertop overhang depth (typically 1.5 to 2 inches for standard use or 12 to 15 inches for bar seating), and how the structural frame connects to the foundation. Finally, utility diagrams use standardized symbols to mark gas line routing (shown as a dashed line with G labels), water supply (solid blue lines), drainage (solid green lines with flow direction arrows), and electrical circuits (lines with hash marks indicating wire gauge). Learning these basic symbols, available in any architectural standards reference like Architectural Graphic Standards, takes 30 minutes and prevents thousands of dollars in construction errors.
Standard Outdoor Kitchen Dimensions and Spacing Requirements
Getting your dimensions right is non-negotiable because outdoor kitchens that violate spacing standards create unsafe, uncomfortable cooking environments that fail inspections. The standard countertop depth for an outdoor kitchen is 25 to 27 inches for the base cabinet area, with a 1.5-inch front overhang and a 0 to 1-inch rear overhang against a backsplash. Counter height is universally 36 inches from the finished floor surface to the top of the countertop, which matches ADA accessibility standards and provides comfortable working height for most adults between 5 feet 4 inches and 6 feet 2 inches tall. For a raised bar section used for seating, the counter rises to 42 inches with a 12 to 15-inch overhang to accommodate bar stools and provide knee clearance underneath.
Appliance cutout dimensions vary by manufacturer and must be verified against the specific model's installation guide, not generic estimates. A standard 30-inch built-in gas grill typically requires a cutout of approximately 28.5 by 19.5 inches, but this varies. For example, the Weber Summit S-460 requires a cutout of 28.25 by 19.25 inches while the Blaze Professional LUX 34-Inch needs 31.25 by 20 inches. Always obtain the exact installation manual before finalizing your plan. Traffic flow clearances are equally important: maintain 42 inches minimum between the front of your counter and any wall, fence, or opposing counter, with 48 inches preferred for comfortable movement. The primary cooking zone needs 36 inches of clear space on at least one side for a safe stepping-away zone in case of flare-ups. Between a cooking station and a seating area, maintain 60 inches minimum so guests are not exposed to grease splatter or heat radiation. Overall kitchen depth from front of counter to back wall should be 30 to 36 inches to accommodate standard 24-inch base cabinets plus countertop overhang and backsplash.
Utility Planning for Outdoor Kitchen Blueprints: Gas, Water, and Electrical
Utility planning is where outdoor kitchen plans get complex, and where cutting corners causes the most expensive problems. Gas line planning starts with calculating total BTU demand by adding up every gas appliance: a typical 4-burner grill draws 48,000 to 60,000 BTU, a side burner adds 12,000 to 15,000 BTU, a gas-powered pizza oven like the Ooni Karu 16 or Alfa ONE draws 25,000 to 35,000 BTU, and a fire pit or warming drawer adds another 30,000 to 40,000 BTU. Total BTU demand determines pipe diameter. Up to 200,000 BTU within 50 feet of the meter can typically run on a 3/4-inch black iron or CSST (corrugated stainless steel tubing) line, but exceeding that or running longer distances requires 1-inch pipe. Your plan must show the gas line route from the existing supply point, typically your home's gas meter, to each appliance location, including shutoff valve positions, which are required within 6 feet of each appliance by most building codes.
Water supply planning is simpler but still requires precision. A standard outdoor kitchen sink needs a 1/2-inch hot and cold water supply line rated for outdoor use, with anti-siphon valves to prevent backflow contamination. Drainage requires a minimum 1.5-inch P-trap drain line sloped at 1/4-inch per foot toward either a sanitary sewer connection or a dry well, depending on local code. In cold climates, all water lines must either be buried below the frost line, typically 36 to 48 inches in northern US states, or be designed with accessible drain-down valves for winterization. Electrical planning should include at minimum one dedicated 20-amp GFCI-protected circuit for countertop outlets, positioned every 4 feet along the counter per NEC code, plus a separate 15-amp circuit for lighting. If you are installing an electric smoker, rotisserie motor, or outdoor refrigerator, each may require its own dedicated circuit. Your plan should show conduit routing, junction box positions, and the circuit breaker assignments in your main panel. Always hire a licensed electrician and plumber for utility connections; this is not a DIY area even for experienced builders.
Permit Considerations and Building Codes for Outdoor Kitchen Plans
Navigating permits and building codes is an essential part of your outdoor kitchen planning process, and ignoring this step can result in fines ranging from $500 to $10,000, forced demolition of non-compliant work, or serious complications when you sell your home. Most municipalities require a building permit for any outdoor kitchen that includes gas line connections, electrical circuits, plumbing, or structural elements like overhead covers. A simple freestanding grill cart on an existing patio typically does not need a permit, but the moment you build permanent counters, run utilities, or attach a structure to your home, permits are almost certainly required. The permit application process requires submitting your outdoor kitchen plans, which is precisely why having detailed, to-scale blueprints matters. Building departments want to see structural details, utility routing, setback compliance, and fire-safety clearances.
Key building codes that affect outdoor kitchen plans include setback requirements, which typically mandate that permanent structures be built at least 5 to 10 feet from property lines, though this varies significantly by municipality. The International Residential Code (IRC) and International Fire Code (IFC) require that cooking appliances maintain specific clearances from combustible materials: 36 inches above the cooking surface and 24 inches to the sides is the general minimum for open flames. Gas installations must comply with NFPA 54, the National Fuel Gas Code, which specifies pipe sizing, connection methods, and ventilation requirements. If you are adding a covered structure, your plan needs to show compliance with local wind load and snow load requirements, which vary dramatically by region, from 20 PSF wind load in sheltered southern locations to 60 PSF or more in coastal or mountain areas. HOA restrictions add another layer: many homeowners associations have architectural review committees that must approve outdoor kitchen plans before construction begins, with review periods of 30 to 90 days. Start the permit and HOA approval process at least 8 to 12 weeks before your target build date to avoid delays.
Outdoor Kitchen Plan Layouts: Straight, L-Shaped, U-Shaped, and Island
Your property dimensions, cooking style, and entertainment needs determine which layout type belongs in your outdoor kitchen plan. The straight-line or single-wall layout is the simplest and most affordable, requiring as little as 8 linear feet of space. It positions all appliances and work surfaces along a single wall, typically against your home's exterior or a property-line wall. This layout works best for compact patios and keeps utility runs short and inexpensive since everything is on one wall. The primary disadvantage is limited counter space and a linear workflow that requires walking back and forth. Budget $4,000 to $12,000 for a well-equipped straight-line layout. The L-shaped layout adds a perpendicular wing, creating a natural work triangle between the grill, prep area, and sink that reduces walking distance by 30 to 40 percent compared to a straight layout.
The U-shaped layout wraps counters on three sides, creating the most efficient workflow with everything within arm's reach. It requires a minimum footprint of 10 by 10 feet for the interior work area and is ideal for serious cooks who want maximum counter space and storage. However, U-shaped plans cost 60 to 80 percent more than straight layouts because of the additional countertop material, structural support, and utility routing to three separate walls. Budget $12,000 to $30,000 for a mid-range to premium U-shaped kitchen. The island layout places a freestanding counter in the middle of your patio, offering 360-degree access and a social cooking experience where guests can sit on all sides. Islands require utility trenching across the patio surface, which adds $1,500 to $4,000 to the project, and they need a minimum of 42 inches of clear walkway on all sides. Hybrid layouts that combine elements, such as an L-shape with a detached island, are increasingly popular and allow you to separate the hot cooking zone from the social seating area. Your plan should test multiple layouts using a scaled drawing or a free design tool like SketchUp before committing to construction.
Creating Your Own Outdoor Kitchen Plans Using Design Software
Modern design software makes it possible for homeowners with no architectural training to create professional-quality outdoor kitchen plans. The most accessible free option is SketchUp Free, a browser-based 3D modeling tool that includes a massive warehouse of pre-built outdoor kitchen components, grill models, cabinet units, and material textures. Start by measuring your available outdoor space precisely, capturing the patio or yard dimensions, distances to the house wall, locations of existing utilities like hose bibs and outdoor outlets, and any obstacles like trees, posts, or grade changes. Enter these measurements into SketchUp to create a scaled site plan, then begin placing components. The learning curve is approximately 4 to 6 hours for basic competency, and YouTube offers hundreds of outdoor kitchen-specific SketchUp tutorials.
For more detailed planning, RoomSketcher ($49 per year) and Chief Architect Home Designer ($199 one-time purchase) offer outdoor kitchen templates with built-in dimension tools, material calculators, and the ability to generate elevation views and materials lists automatically. Chief Architect is particularly powerful because it includes utility routing tools that let you plan gas, water, and electrical lines in 3D, catching conflicts before construction begins. If you prefer working with a professional, many kitchen design companies offer virtual design services where you submit your measurements and wish list, and a designer creates custom plans. Companies like OutdoorKitchenDesigner.com charge $300 to $800 for a complete plan set including 3D renderings. For the DIY route, the critical rule is measure twice, draw once, and always verify appliance cutout dimensions against the manufacturer's current installation manual, not last year's specs, because manufacturers frequently update dimensions between model years. Print your final plan at actual scale or at a clearly noted scale like 1/4 inch equals 1 foot and bring it to a local contractor or experienced builder for a reality check before purchasing materials.
Common Outdoor Kitchen Plan Mistakes That Waste Time and Money
Even well-intentioned outdoor kitchen plans fail when homeowners make avoidable design errors that only become apparent during construction or after the first few months of use. The number one mistake is underestimating counter space. During the planning phase, everything looks spacious on paper, but once you install a 36-inch grill, a 15-inch sink, a 24-inch refrigerator, and access doors, you discover there is only 18 inches of usable prep surface left, which is not enough to lay out a cutting board and a plate simultaneously. The fix is simple: plan for a minimum of 36 inches of clear, uninterrupted counter space on at least one side of the grill, and preferably 24 inches on both sides. This single rule transforms the usability of any outdoor kitchen plan.
The second most costly mistake is ignoring drainage. Outdoor kitchens get rained on, and any plan that creates enclosed cabinet spaces without drainage provisions will trap water, promote mold growth, and rot out cabinet interiors within two to three years. Every base cabinet should have a 1/2-inch drain hole at the lowest point, and countertops should slope 1/8 inch per foot away from the house to prevent water pooling against your foundation. The third common mistake is poor grill placement relative to prevailing winds. Study your backyard wind patterns for at least two weeks before finalizing your plan, because positioning the grill where wind hits the cooking surface broadside causes uneven heat distribution, blows out gas flames, and pushes smoke directly into the dining area. Ideally, position the grill so prevailing winds approach from behind the cook, carrying smoke away from the cooking and seating areas. Fourth, many plans fail to account for sun exposure. A west-facing outdoor kitchen with no shade structure turns into an unbearable workspace on summer afternoons when temperatures at the counter can exceed 130 degrees Fahrenheit. Plan your orientation or include a shade structure from the start rather than adding one as an expensive afterthought.