Outdoor Kitchen with Pool: Design, Placement, Safety & Complete Planning Guide
Outdoor kitchen with pool placement, splash-zone material picks, chlorine corrosion-resistant finishes, swim-up bar plumbing,
Outdoor Kitchen Setup Editorial Team
Outdoor living specialists with 15+ years of hands-on experience
Top Picks: Best Outdoor Kitchen with Pool: Design, Placement, Safety & Complete Planning Guide in 2026
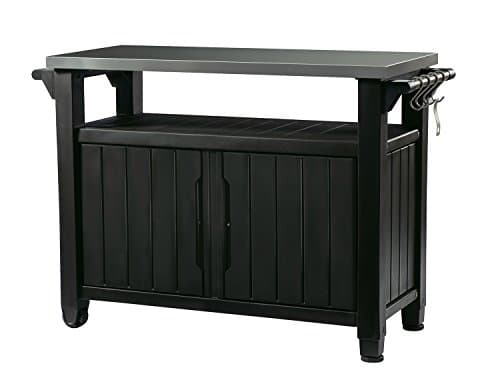
Keter Unity XL Portable Outdoor Table with Stainless Steel Top for Kitchen Prep and Outdoor Storage Cabinet for Grilling Accessories, Dark Grey
$220.99
Shop Now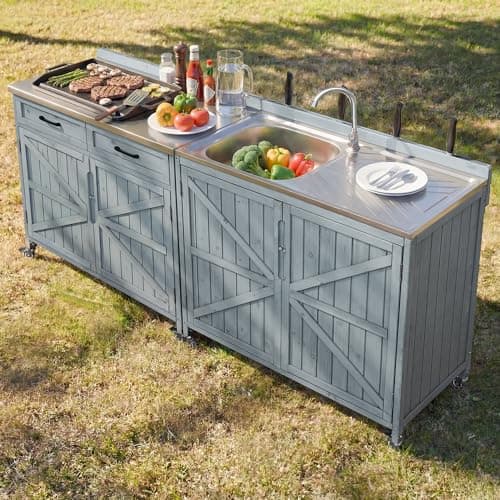
Merax 2 Piece Modular Outdoor Kitchen Series- Kitchen Grill Cart w/Stainless Steel Sink, Wood Rolling BBQ Prep Table w/Stainless Steel Top, Lockable Wheels for Patio & Outdoor Cooking, Grey Blue
$529.99
Shop Now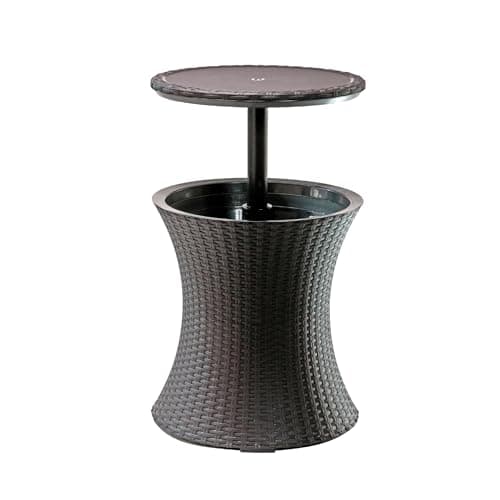
Keter Pacific Cool Bar Outdoor Patio Furniture and Hot Tub Side Table with 7.5 Gallon Beer and Wine Cooler, Espresso Brown
$67.49
Shop Now
LUMISOL Outdoor Wicker Storage Cabinet with Fridge Space, Rattan Patio Bar Table with Adjustable Shelves & Drawers, Outdoor Mini Fridge Bar Cabinet for Pool Garden Kitchen, Grey
$222.99
Shop Now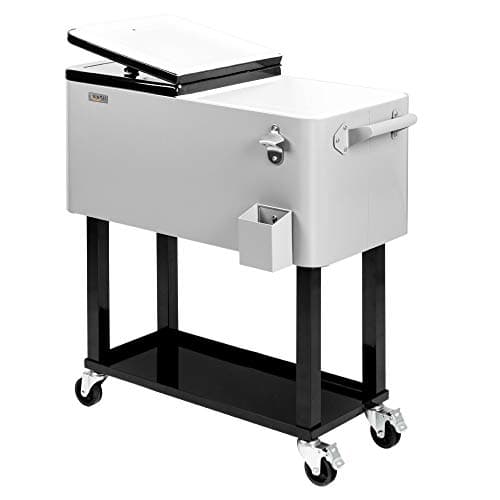
VINGLI 80 Quart Rolling Ice Chest, Portable Patio Party Bar Drink Cooler Cart, with Shelf, Beverage Pool with Bottle Opener,Grey
$107.99
Shop Now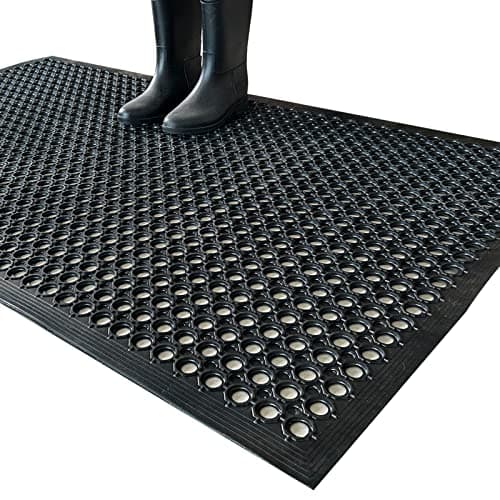
Uniboho Outdoor Rubber Floor Mats Anti Slip Restaurant Commercial Kitchen Rubber Drainage Mat 60 x 35 Heavy Duty Mat for Garage Garden Indoor Outside Industral Pool Entrance Bar Wet Area
$45.99
Shop Now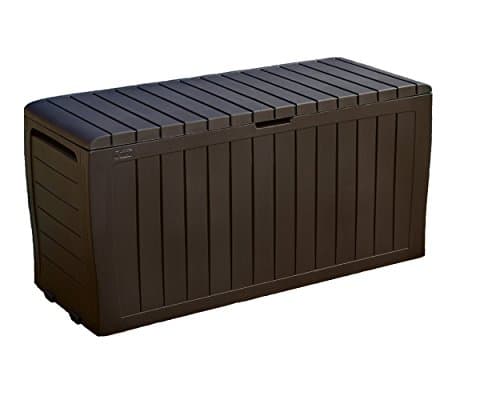
Keter Marvel Plus 71 Gallon Resin Outdoor Storage Box for Patio Furniture Cushions, Throw Pillows, Garden Tools and Pool Floats, Brown
$95.41
Shop Now
Pool Decorations Outdoor Pool Decor Swim At Your Own Risk Pool Sign Pool Deck Accessories Gifts Funny Warning Safety Plaque Signs For Swimming Pool Beach Water Park Decor Outdoor 8 X 12 Inch
$12.99
Shop NowKeter Unity XL Portable Outdoor Table with Stainless Steel Top for Kitchen Prep and Outdoor Storage Cabinet for Grilling Accessories, Dark Grey
$220.99
Shop NowMerax 2 Piece Modular Outdoor Kitchen Series- Kitchen Grill Cart w/Stainless Steel Sink, Wood Rolling BBQ Prep Table w/Stainless Steel Top, Lockable Wheels for Patio & Outdoor Cooking, Grey Blue
$529.99
Shop NowKeter Pacific Cool Bar Outdoor Patio Furniture and Hot Tub Side Table with 7.5 Gallon Beer and Wine Cooler, Espresso Brown
$67.49
Shop NowLUMISOL Outdoor Wicker Storage Cabinet with Fridge Space, Rattan Patio Bar Table with Adjustable Shelves & Drawers, Outdoor Mini Fridge Bar Cabinet for Pool Garden Kitchen, Grey
$222.99
Shop NowVINGLI 80 Quart Rolling Ice Chest, Portable Patio Party Bar Drink Cooler Cart, with Shelf, Beverage Pool with Bottle Opener,Grey
$107.99
Shop NowUniboho Outdoor Rubber Floor Mats Anti Slip Restaurant Commercial Kitchen Rubber Drainage Mat 60 x 35 Heavy Duty Mat for Garage Garden Indoor Outside Industral Pool Entrance Bar Wet Area
$45.99
Shop NowKeter Marvel Plus 71 Gallon Resin Outdoor Storage Box for Patio Furniture Cushions, Throw Pillows, Garden Tools and Pool Floats, Brown
$95.41
Shop NowPool Decorations Outdoor Pool Decor Swim At Your Own Risk Pool Sign Pool Deck Accessories Gifts Funny Warning Safety Plaque Signs For Swimming Pool Beach Water Park Decor Outdoor 8 X 12 Inch
$12.99
Shop NowWhy an Outdoor Kitchen and Pool Combination Maximizes Property Value
An outdoor kitchen with pool is one of the most powerful property value multipliers in residential real estate, consistently outperforming either feature built in isolation. Real estate market analyses show that a well-designed pool alone adds 5 to 8 percent to a home's value in warm-climate markets, while an outdoor kitchen adds 5 to 15 percent depending on its sophistication and build quality. When combined into a cohesive entertainment zone, the synergy between these features can increase property value by 10 to 20 percent — significantly more than the sum of their individual contributions — because the combination transforms the backyard from a collection of amenities into a true outdoor living destination.
The value multiplier effect exists because buyers perceive a coordinated outdoor kitchen and pool area as a lifestyle upgrade rather than a feature addition. A pool with a nearby grill station says “this homeowner likes to swim and cook.” A unified outdoor kitchen and pool design with matching materials, integrated bar seating overlooking the water, ambient lighting that unifies both spaces, and thoughtful traffic flow between cooking and swimming says “this home was designed for exceptional outdoor living.” That distinction drives significantly higher buyer interest and willingness to pay a premium.
Beyond resale value, the combined outdoor kitchen and pool setup delivers practical returns in daily use. Families report spending 40 to 60 percent more time outdoors when both features are present compared to having either one alone. The pool draws people outside, and the kitchen keeps them there — eliminating the constant trips indoors for food and drinks that interrupt pool days. Parents can monitor children in the pool while preparing meals just feet away. Hosts can grill, mix drinks, and socialize while guests swim, creating the kind of effortless entertaining experience that was once exclusive to resort properties. The investment in a well-planned outdoor kitchen with pool pays dividends in both equity and quality of life for as long as you own the home. For a full overview of every component, layout option, and design path, see our complete outdoor kitchen setup guide.
Optimal Placement: Positioning Your Outdoor Kitchen Upwind of the Pool
The single most important placement principle when designing an outdoor kitchen with pool is to position the cooking area upwind of the pool based on your property's prevailing wind direction. This seemingly simple rule has an outsized impact on the usability and enjoyment of both the kitchen and the pool, and violating it is the most common design mistake in combined pool-and-kitchen projects.
When a grill, smoker, or pizza oven operates upwind of the pool, the prevailing breeze carries smoke, grease vapor, and cooking odors away from the water and the swimmers in it. When the kitchen is positioned downwind — meaning the wind blows from the pool toward the cooking area — smoke drifts directly across the pool surface, creating an unpleasant haze that stings eyes, settles on wet skin, deposits grease film on pool water, and makes poolside lounging unpleasant during active cooking sessions. Grease particles that land on pool water are captured by the skimmer and can clog filters, requiring more frequent maintenance.
To determine your property's prevailing wind direction, use the National Weather Service wind rose data for your nearest weather station, which shows the frequency and direction of wind for each month. In most of the continental United States, prevailing summer winds blow from the south or southwest. This means positioning your outdoor kitchen on the south or southwest side of the pool will carry smoke away from the water on most days. If your property has unique wind patterns caused by terrain, buildings, or vegetation corridors, observe actual airflow across your backyard at different times of day over several weeks before committing to a kitchen location.
Beyond wind, consider these additional placement factors:
- Proximity to the house: Place the kitchen between the house and the pool whenever possible to minimize the distance utilities (gas, water, electric) must travel from the house connection point.
- Sight lines from the kitchen: The cook should have a clear, unobstructed view of the entire pool, especially the shallow end and any diving areas, for child safety monitoring.
- Traffic flow: Create a natural path from the house to the kitchen to the pool that avoids forcing wet swimmers to walk through the cooking area.
- Sun exposure: Orient the kitchen so the cook is not facing directly into the afternoon sun while grilling, which causes glare and discomfort.
Safety Considerations for Outdoor Kitchens Near Swimming Pools
Combining cooking equipment and a swimming pool in the same outdoor space introduces a unique set of safety considerations that do not apply when either feature is built independently. Gas lines, electrical circuits, hot cooking surfaces, sharp knives, and open flames exist just feet from a body of water where children and adults walk barefoot on wet surfaces — a combination that demands careful design, code compliance, and operational protocols to prevent accidents.
Electrical safety is the highest priority. All electrical outlets, switches, and fixtures within 20 feet of the pool must be protected by ground-fault circuit interrupter (GFCI) devices that trip within milliseconds if current leaks to ground — preventing electrocution in wet conditions. The National Electrical Code (NEC) Article 680 specifies minimum distances between electrical equipment and pool water: receptacles must be at least 6 feet from the inside wall of the pool (10 feet in some jurisdictions), and no electrical equipment can be placed directly over the pool. All outdoor kitchen wiring within the pool zone must be run through weatherproof conduit rated for wet locations. Hire a licensed electrician familiar with pool electrical codes for all wiring in the combined kitchen-pool area.
Gas line safety requires proper routing and protection. Natural gas and propane supply lines to the outdoor kitchen should be buried to code-required depth (typically 18 to 24 inches below grade) and routed away from pool plumbing and electrical conduits. Gas shutoff valves must be accessible and clearly labeled. If the outdoor kitchen sits on a raised pool deck, gas lines must be secured to the structure with approved brackets and protected from physical damage by deck furniture, pool equipment, and foot traffic.
Slip-and-fall prevention around the cooking area is critical because pool decks are perpetually wet during swimming season. The area immediately surrounding the outdoor kitchen island should use slip-resistant surface materials with a dynamic coefficient of friction (DCOF) of 0.42 or higher when wet — the threshold established by ANSI for wet-area flooring. Textured natural stone, brushed concrete, and certain porcelain pavers meet this standard. Polished granite, smooth ceramic tile, and unsealed limestone are dangerously slippery when wet and should be avoided within 6 feet of the pool edge.
Physical barriers between the cooking zone and the pool edge are recommended when the kitchen sits directly adjacent to the water. A 30 to 42-inch-tall planter wall, raised garden bed, or decorative railing between the grill area and the pool edge prevents a cook from accidentally stepping backward into the water and creates a buffer that discourages running children from darting between hot appliances and the pool. This barrier can also double as a serving counter or display shelf, adding functionality to the safety feature.
Pool House Kitchens: Enclosed and Semi-Enclosed Cooking Structures
A pool house kitchen elevates the outdoor kitchen and pool combination from a backyard amenity to a self-contained entertainment pavilion. Pool house kitchens are enclosed or semi-enclosed structures positioned adjacent to or overlooking the pool, providing a dedicated cooking, dining, and entertaining space with the comfort of walls, a roof, and the option for climate control — while maintaining a direct visual and physical connection to the pool area. These structures range from modest 150-square-foot cabanas with a wet bar and mini-fridge to elaborate 600-square-foot pool houses with full kitchens, bathrooms, outdoor showers, and changing rooms.
Semi-enclosed pool house kitchens are the most popular residential design. They feature a permanent roof and two to three solid walls (typically the back wall and one or both side walls) with the pool-facing side left completely open or fitted with retractable screens, folding glass doors, or removable panels. This configuration provides rain and wind protection, houses plumbing and electrical infrastructure within the walls, and maintains the open-air connection to the pool that makes outdoor cooking enjoyable. Semi-enclosed pool houses cost $25,000 to $80,000 for a basic 200 to 300-square-foot structure with a kitchen counter, grill, sink, refrigerator, and basic finishes.
Fully enclosed pool house kitchens with air conditioning, insulated walls, and full plumbing are essentially small guesthouses positioned at the pool's edge. They serve as year-round entertaining spaces, guest accommodations, and home offices in addition to their poolside kitchen function. Full enclosure allows the installation of equipment that cannot tolerate outdoor exposure, such as wine coolers, ice machines, dishwashers, and large-format televisions. Fully enclosed pool houses cost $60,000 to $200,000 or more depending on size, finishes, and the inclusion of bathrooms and HVAC.
Critical design considerations for pool house kitchens include:
- Plumbing access: Running hot and cold water, drain lines, and gas supply to a pool house typically requires trenching from the main house — budget $3,000 to $8,000 for underground utility runs depending on distance.
- Bathroom and shower: If the pool house includes a changing area, a half-bath and outdoor shower eliminate wet foot traffic through the main home — a convenience that adds $5,000 to $15,000 but dramatically improves the pool day experience.
- Storage: Dedicate cabinet and closet space for pool chemicals, floats, towels, cleaning equipment, and outdoor cushions. A pool house without adequate storage quickly becomes cluttered and less useful.
Wet Bar and Swim-Up Bar Designs for Pool-Adjacent Outdoor Kitchens
A wet bar or swim-up bar is the signature feature that transforms an outdoor kitchen with pool from a practical cooking station into a resort-caliber entertainment destination. These bar configurations create a social focal point where the cook, the swimmers, and the lounging guests all converge, fostering the kind of natural, effortless socializing that defines memorable backyard gatherings.
Pool-adjacent wet bars are built into the outdoor kitchen island with a bar-height countertop (42 inches) facing the pool and bar stools positioned so guests can sit with a view of the water. The wet bar typically includes a stainless steel or copper bar sink for rinsing glasses and preparing drinks, an outdoor-rated refrigerator or beverage cooler for cold storage, an ice maker or insulated ice bin, a bottle rail and speed rail for liquor and mixers, and a blender station with a waterproof GFCI outlet. The bar countertop material should be chosen for its resistance to water rings, alcohol stains, and sunscreen — sealed granite, quartz (outdoor-rated formulations), and marine-grade stainless steel are the top choices. A well-equipped pool-adjacent wet bar adds $3,000 to $10,000 to the outdoor kitchen build depending on appliance selection and countertop material.
Swim-up bars are partially submerged structures built into the pool itself, allowing swimmers to sit on underwater bar stools and be served drinks and food from a bar counter at water level. This is the most dramatic and impressive pool kitchen feature but also the most complex and expensive to build. A swim-up bar requires coordination between the pool builder and the outdoor kitchen contractor because the bar structure must be integrated into the pool shell during construction — it cannot be retrofitted after the pool is completed. The bar counter sits at pool coping level (approximately 12 inches above the waterline) with the service area on the dry side and submerged bar stools (typically 24-inch-tall ledge seats cast into the pool wall) on the wet side.
Swim-up bar construction costs $8,000 to $25,000 in addition to the base pool cost, depending on size and the number of seats. Key design details include a raised lip on the bar counter to prevent drink spills from running into the pool, a separate return jet near the bar area to maintain water circulation, non-slip tile on the submerged seating shelf, and underwater LED lighting for evening ambiance. Materials for the bar face and counter must withstand permanent water contact — natural stone veneer, glass mosaic tile, and poured concrete with marine-grade sealer are the standard choices.
Coordinating Finishes Between Your Outdoor Kitchen and Pool
One of the most visible indicators of a professionally designed outdoor kitchen with pool versus a haphazard combination is finish coordination — the intentional selection of complementary materials, colors, and textures that create visual unity between the kitchen, pool, deck, and landscaping. When finishes are coordinated, the entire outdoor space reads as a single, cohesive design. When they clash — a red brick kitchen island beside a gray travertine pool deck, for example — the space looks fragmented and unplanned, regardless of how well each individual component is built.
Start with the pool coping and decking as your anchor materials, since these occupy the largest visual area and are typically installed first. Common pool deck materials include travertine pavers, brushed concrete, porcelain pavers, natural flagstone, and composite decking around above-ground or semi-inground pools. Whatever material and color you select for the pool deck, your outdoor kitchen countertop and island facing should be drawn from the same material family or a complementary palette.
Effective coordination strategies include:
- Same material, different application: Use the same travertine on the pool deck and as the countertop material for the outdoor kitchen, tying the spaces together through material continuity while varying the finish (tumbled for the deck, honed for the countertop) for visual interest and functional differentiation.
- Complementary tones: If your pool deck is warm-toned (cream travertine, tan sandstone, honey-colored pavers), choose kitchen materials in the same warm family — buff stone veneer, cedar woodwork, copper accents. If the deck is cool-toned (gray bluestone, charcoal porcelain, white concrete), coordinate with cool kitchen materials — gray granite, stainless steel, powder-coated aluminum in graphite or black.
- Accent material linking: Repeat a single accent material from the pool in the kitchen to create visual connections. If the pool's waterline tile is blue glass mosaic, use the same tile as a backsplash strip behind the outdoor kitchen grill. If the pool coping is a specific natural stone, use that stone as the cap on the kitchen island.
Waterline tile and kitchen backsplash coordination is one of the most elegant linking strategies. The thin band of decorative tile visible at the pool's waterline is a prominent design element that catches the eye from multiple vantage points. Selecting a complementary or matching tile for the outdoor kitchen backsplash creates a subtle but powerful visual thread connecting the two spaces. Glass mosaic tiles in iridescent blue, green, and aqua tones are popular for both waterline and kitchen backsplash applications.
Stainless steel appliances create a neutral, modern element that coordinates with virtually any pool and deck palette. However, be intentional about the stainless finish — brushed stainless has a warm, matte appearance that complements natural materials, while polished or mirror-finish stainless creates a contemporary, high-contrast look that pairs best with sleek, modern pool designs featuring glass tile and geometric shapes.
Material Selection for Splash-Zone Durability Near Pools
Outdoor kitchen materials positioned within the pool's splash zone — defined as the area within 8 to 12 feet of the pool edge where water splashes, pool chemical vapor, and wet foot traffic are constant — face a harsher environment than standard outdoor kitchen materials encounter. Pool water contains chlorine, salt (in saltwater pools), stabilizers, and pH-adjusting chemicals that accelerate corrosion on metals, degrade certain sealers and adhesives, and leave mineral deposits on stone surfaces. Selecting materials specifically rated for splash-zone exposure ensures your outdoor kitchen maintains its appearance and structural integrity despite years of proximity to pool chemistry.
Stainless steel in the splash zone: Use only 304-grade or higher stainless steel for all appliances, cabinets, and fixtures within 12 feet of a chlorinated pool. Grade 430 stainless steel corrodes rapidly when exposed to chlorine vapor and chlorinated water splash — a process called chloride-induced pitting that creates permanent damage within one to two pool seasons. For saltwater pools, which generate chlorine through electrolysis of dissolved salt, 316-grade stainless steel is recommended for maximum resistance. Rinse all stainless steel surfaces near the pool with fresh water weekly to remove chlorine deposits.
Natural stone in the splash zone: Travertine, limestone, and sandstone are popular pool-adjacent materials but are porous enough to absorb pool water and the chemicals dissolved in it. Over time, chlorinated water absorption causes white efflorescence deposits, chemical staining, and accelerated erosion of the stone surface. Seal all natural stone within the splash zone with a high-performance penetrating sealer rated for pool chemical resistance (not standard stone sealers) and reseal every 6 to 12 months. Granite and quartzite are more resistant to chemical absorption due to their lower porosity and are safer choices for splash-zone countertops.
Concrete and masonry in the splash zone: Poured concrete, concrete block, and CMU (concrete masonry unit) island structures absorb moisture readily. In the splash zone, pool chemical absorption causes reinforcing steel inside the concrete to corrode, leading to spalling (chunks of concrete breaking away from expanding rust). Seal all concrete surfaces with a penetrating concrete sealer and ensure that any exposed reinforcing steel or hardware is stainless steel or epoxy-coated.
Wood in the splash zone: Avoid using wood for structural or decorative elements within the splash zone unless it is a naturally rot-resistant species (ipe, teak, or cypress) or marine-grade treated lumber rated for ground contact and wet environments. Standard pressure-treated pine, while adequate for general outdoor use, deteriorates rapidly in the consistently wet, chemically charged environment near a pool. Cedar pergola posts positioned within the splash zone should be set on stainless steel post bases that elevate the wood above standing water.
Designing Outdoor Kitchen and Pool Layouts: L-Shape, U-Shape, and Linear Configurations
The layout configuration of your outdoor kitchen relative to the pool determines traffic flow, social dynamics, sight lines, and the overall usability of the combined space. Three primary layout strategies dominate residential outdoor kitchen and pool designs, each offering distinct advantages depending on your backyard dimensions, pool shape, and entertaining style.
Linear (galley) kitchen parallel to the pool edge is the most space-efficient configuration, ideal for narrow backyards or rectangular pools where the kitchen must occupy a strip of deck between the pool and the property line or house wall. The kitchen island runs parallel to one side of the pool, typically 6 to 10 feet from the pool edge, with the cook facing either the pool (recommended for social interaction and child monitoring) or the house (better for utility access but isolates the cook from the pool scene). A linear layout accommodates 6 to 12 feet of counter space in a compact footprint and works best for setups focused on grilling and simple food preparation. The drawback is limited counter space and the inability to create distinct cooking and serving zones.
L-shaped kitchen at the pool corner is the most popular layout for outdoor kitchens with pools because it creates natural zone separation — one leg of the L serves as the cooking station (grill, side burners, prep surface) while the return leg becomes a bar or serving counter facing the pool. The corner where the two legs meet is an ideal location for a sink, which serves both cooking prep and bar service. L-shaped layouts fit naturally into the corner of a rectangular pool deck, using the two deck edges as visual boundaries for the kitchen zone. This configuration provides 10 to 18 feet of total counter space while maintaining an open, social atmosphere. Position the grill on the leg furthest from the pool to maximize the distance between hot cooking surfaces and wet traffic.
U-shaped kitchen with pool-facing bar provides the most counter space and creates a defined kitchen zone with the cook surrounded on three sides by countertops, storage, and appliances. The open side of the U faces the pool, often with a raised bar counter and stools that allow guests to sit facing the water while being served from the kitchen side. This layout provides 15 to 24 feet of counter space and accommodates a full complement of appliances — grill, side burners, refrigerator, sink, ice maker, and storage cabinets — without crowding. The U-shape works best on large pool decks with at least 15 by 12 feet of available space. The enclosed feeling can make the cook feel somewhat isolated during parties, so consider lowering the bar counter on the pool side to maintain visual connection with swimmers and loungers.
Regardless of layout, maintain these critical clearances between the outdoor kitchen and pool: a minimum of 6 feet between the pool edge and any gas appliance, 10 feet between the pool edge and any electrical outlet not on a dedicated GFCI pool circuit, and 36 inches of clear walkway between the kitchen island and the pool edge for safe foot traffic.
Frequently Asked Questions
01How far should an outdoor kitchen be from a swimming pool?
02Which side of the pool should the outdoor kitchen go on?
03Does an outdoor kitchen with pool increase home value?
04What materials work best for an outdoor kitchen near a pool?
05Can I build a swim-up bar as part of my outdoor kitchen?
06Do I need GFCI outlets for an outdoor kitchen near a pool?
07What is the best outdoor kitchen layout for a pool area?
08How do I protect my outdoor kitchen from pool splash and chemicals?
09How much does a pool house kitchen cost to build?
10Can I use a gas grill next to a pool?
Related Guides
Outdoor Kitchen Design: Principles, Layouts & Planning Guide
Read guide →
GuideOutdoor Kitchen Bar: Design, Seating & Beverage Setup Guide
Read guide →
GuideOutdoor Kitchen Patio: Materials, Drainage & Sizing Guide
Read guide →
GuideL-Shaped Outdoor Kitchen: Layout Ideas & Dimensions
Read guide →
GuideOutdoor Kitchen Lighting: Task, Ambient & Weatherproof Fixtures
Read guide →
GuideOutdoor Kitchen Countertops: The Definitive Material Comparison
Read guide →