Outdoor Kitchen Blueprints: How to Read, Scale, and Use Them
Outdoor kitchen blueprints decoded: where to download free plans, how to read elevation drawings, scale conversions, and dimensions every backyard build needs.
Outdoor Kitchen Setup Editorial Team
Outdoor living specialists with 15+ years of hands-on experience
Top Picks: Best Outdoor Kitchen Blueprints: How to Read, Scale, and Use Them in 2026
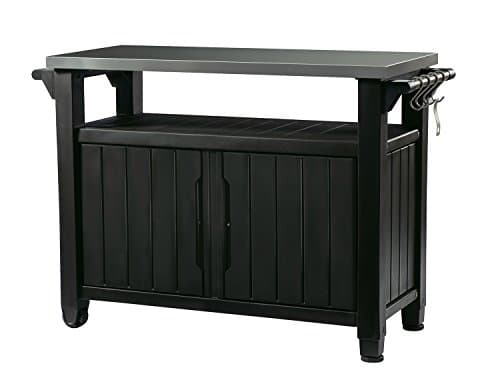
Keter Unity XL Portable Outdoor Table with Stainless Steel Top for Kitchen Prep and Outdoor Storage Cabinet for Grilling Accessories, Dark Grey
$220.99
Shop Now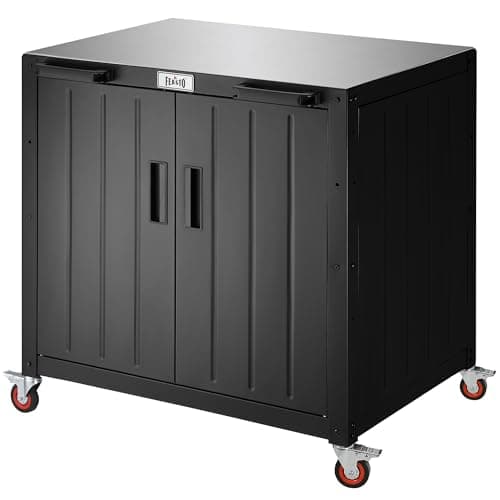
Feasto Outdoor Grill Cart with Storage Cabinet and Stainless Steel Top, 35-Inch Outdoor Grill Station with Door, Modular Kitchen Island for Food Prep and BBQ, Black & Silver
$219.99
Shop Now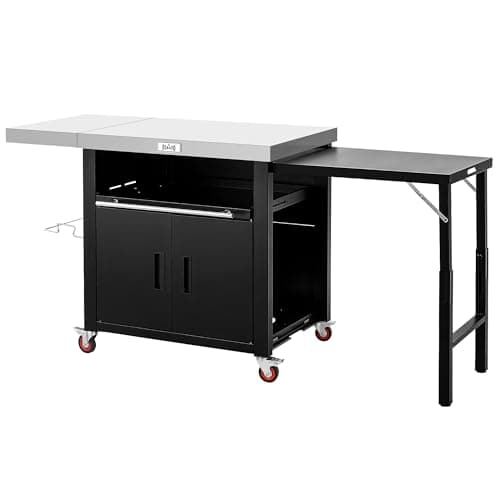
Feasto Outdoor Kitchen Island with Cabinet, Outdoor Grill Table with Stainless Steel Top for Pizza Oven& Griddles, Movable Bar Cart with Pull-Out Plate for Parties& Gathering, Heavy-Duty, L74”x W24”
$259.99
Shop Now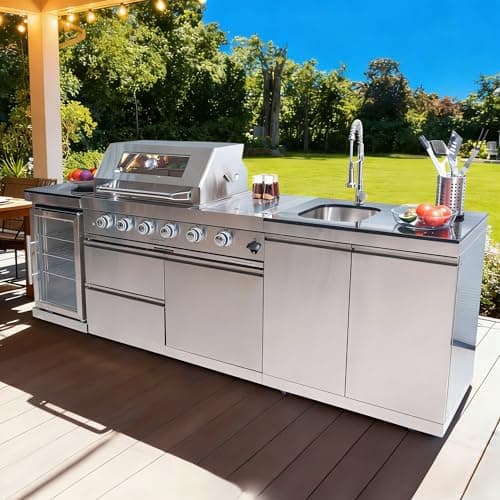
98 Inches Outdoor Kitchen Island, 4-Burner 72000 BTU Propane Stainless Steel BBQ with Side/Rear Burners, With Refrigerator and Sink, Rotisserie, Granite Countertops, Storage, For Backyard BBQ, Silver
$3,652.00
Shop Now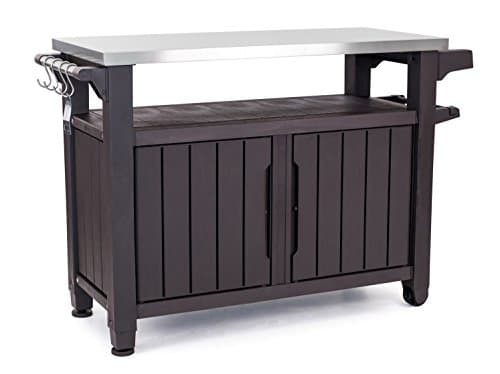
Keter Outdoor Rolling Table Cart for Food Prep, Storage, Bar & Grill, Dark Brown - Portable Kitchen Island Tabletop with Wheels for Drinks, Snacks, and Cooking
$265.99
Shop Now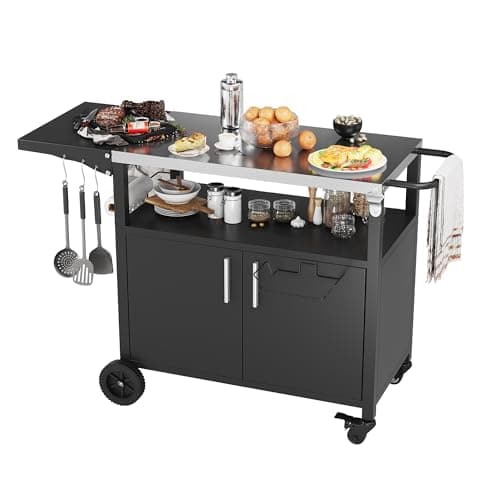
JY QAQA Outdoor Grill Cart with Storage,Patio Kitchen Island Outdoor Grill Table with Wheels,BBQ Cart Movable Pizza Oven Table Stand, Storage Cabinet, Foldable Tabletop, (Black)
$135.98
Shop Now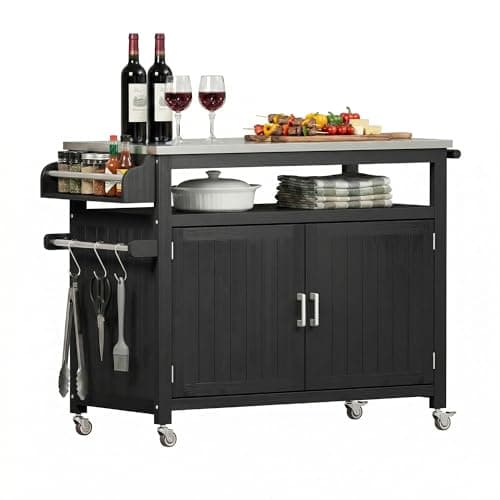
FUQARHY 43.3-Inch Outdoor Kitchen Island with Storage Cabinet and Stainless Steel Top, Solid Wood Prep Station Grill Table with Lockable Wheels for Patio, Backyard, Party (Black)
$199.99
Shop Now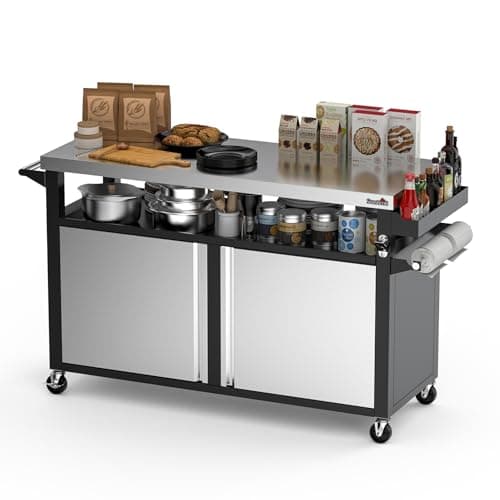
Stanbroil Rolling Outdoor Kitchen Island, BBQ Grill Cart with Stainless Steel Table Top, Double-Door Storage Cabinet & Pull-Out Shelf, Grill Table Cart for Outdoor Indoor, Large
$519.99
Shop NowKeter Unity XL Portable Outdoor Table with Stainless Steel Top for Kitchen Prep and Outdoor Storage Cabinet for Grilling Accessories, Dark Grey
$220.99
Shop NowFeasto Outdoor Grill Cart with Storage Cabinet and Stainless Steel Top, 35-Inch Outdoor Grill Station with Door, Modular Kitchen Island for Food Prep and BBQ, Black & Silver
$219.99
Shop NowFeasto Outdoor Kitchen Island with Cabinet, Outdoor Grill Table with Stainless Steel Top for Pizza Oven& Griddles, Movable Bar Cart with Pull-Out Plate for Parties& Gathering, Heavy-Duty, L74”x W24”
$259.99
Shop Now98 Inches Outdoor Kitchen Island, 4-Burner 72000 BTU Propane Stainless Steel BBQ with Side/Rear Burners, With Refrigerator and Sink, Rotisserie, Granite Countertops, Storage, For Backyard BBQ, Silver
$3,652.00
Shop NowKeter Outdoor Rolling Table Cart for Food Prep, Storage, Bar & Grill, Dark Brown - Portable Kitchen Island Tabletop with Wheels for Drinks, Snacks, and Cooking
$265.99
Shop NowJY QAQA Outdoor Grill Cart with Storage,Patio Kitchen Island Outdoor Grill Table with Wheels,BBQ Cart Movable Pizza Oven Table Stand, Storage Cabinet, Foldable Tabletop, (Black)
$135.98
Shop NowFUQARHY 43.3-Inch Outdoor Kitchen Island with Storage Cabinet and Stainless Steel Top, Solid Wood Prep Station Grill Table with Lockable Wheels for Patio, Backyard, Party (Black)
$199.99
Shop NowStanbroil Rolling Outdoor Kitchen Island, BBQ Grill Cart with Stainless Steel Table Top, Double-Door Storage Cabinet & Pull-Out Shelf, Grill Table Cart for Outdoor Indoor, Large
$519.99
Shop NowWhat a Complete Set of Outdoor Kitchen Blueprints Actually Includes
A professionally drawn set of outdoor kitchen blueprints contains five core sheet types, each with a specific purpose. Sheet 1 is the site plan, drawn at 1/4 inch equals 1 foot, showing the structure's footprint relative to the house, property lines, and any setback requirements. Sheet 2 is the floor plan or plan view, drawn at 1/2 inch equals 1 foot, depicting the island outline from above with all cabinet, appliance, and countertop locations. Sheet 3 covers elevations — front, back, left, and right vertical views — drawn at the same 1/2 inch scale.
Sheet 4 is the section view, a vertical slice through the island that exposes the internal framing, ventilation chases, and grill cutout depths. Sheet 5 is the mechanical/utility schematic showing gas line routing, water supply and drain lines, and electrical circuits with conduit specifications. Higher-end blueprint packages add a Sheet 6 detail page with enlarged views of complex joints, cabinet anchoring, and countertop overhangs at 3 inches equals 1 foot scale, and a Sheet 7 materials takeoff list that converts every dimension into ordered quantities of CMU block, rebar, gas pipe, and hardware. A complete plan set runs 24x36 inches per sheet and prints to ANSI D paper standards.
How to Read the Standard Symbols on Outdoor Kitchen Blueprints
Every blueprint relies on a shared visual vocabulary that takes about 20 minutes to learn but then makes every drawing instantly readable. Solid heavy lines indicate visible edges in the current view. Dashed lines show hidden features behind the visible plane — for example, the gas line running inside a wall. Centerlines, drawn as alternating long and short dashes, mark the geometric center of round elements like a sink drain or a column. Dimension lines terminate in arrows or tick marks and carry numerical values, always read left-to-right or bottom-to-top.
Specific symbols to memorize on outdoor kitchen blueprints: a small circle with a triangle inside marks a gas valve; a circle with a horizontal line through it indicates a water shutoff; an octagon with a J inside is a junction box for electrical; an N inside a hexagon is a 110V duplex outlet; an arrow with a number marks a section cut, with the number referring to which sheet shows the section detail. North arrows always appear on the site plan and the floor plan. The title block in the lower right corner of every sheet lists the project address, drafter, scale, sheet number, and revision date — always confirm you are working from the latest revision before cutting any material.
Scale Conversions: Translating Blueprints to Real-World Measurements
Scale is where blueprint reading trips up most DIYers. A drawing at 1/2 inch equals 1 foot means every half inch on paper represents one full foot in real life. So a cabinet drawn 1.5 inches wide on paper is actually 36 inches wide in the yard. The conversion math: divide the paper measurement by 0.5, then multiply by 12, and you get inches. To check a printed blueprint quickly, use an architect's scale ruler — a triangular tool that costs $10 to $25 from any drafting supply shop. The ruler has six different scales etched into its edges including 1/8, 1/4, 1/2, 3/4, 1, and 1.5 inches per foot.
When PDFs are printed, scale accuracy depends entirely on the print settings. Always select 'Print at 100% scale' or 'Actual size' — never 'Fit to page,' which arbitrarily resizes the drawing and breaks every dimension. After printing, verify the scale by measuring the drawn scale bar in the title block; if the printed scale bar does not match the legend, the print is bad and every measurement is suspect. For larger blueprints printed on smaller home printers, tile printing across multiple pages is acceptable but always reverify the scale bar on each tile. Imperial-to-metric conversions follow the rule that 1 inch equals exactly 25.4 millimeters; for outdoor kitchen blueprints prepared for international clients, common metric scales are 1:20, 1:50, and 1:100.
Free Outdoor Kitchen Blueprints: Where to Download Legitimate Plans
Free blueprint sources exist but the quality varies dramatically. The Eldorado Stone Resource Library publishes about 15 free outdoor kitchen blueprints in PDF format covering common L-shape and U-shape island configurations from 8 to 14 feet in length; these plans are CMU-block centric and assume veneer stone finishes. RCP Block & Brick offers a similar free library with about 12 plans tailored to their specific block products. Both libraries require a free email registration but no payment. The plans are detailed enough for permit submission in most jurisdictions and include rebar schedules.
Manufacturer-specific free plans from Bull Outdoor Products, Lion Premium Grills, and Cal Flame are oriented around their own appliance cutout dimensions but work with any equivalent grill. Avoid generic 'free outdoor kitchen plans' from random Pinterest or aggregator sites — these are often low-resolution screenshots of paid plans, missing critical dimensions, or drawn to non-standard scales. Public-domain DIY plans from Family Handyman magazine and the Old Farmer's Almanac archive are usable for basic concrete-block builds but typically lack the mechanical schematic sheet, meaning you still need a plumber and electrician to draw their own utility runs. Always check the publication date on free outdoor kitchen blueprints; plans from before 2018 often reference grill models and code provisions that have since been superseded.
Paid Plan Sets: $50 to $250 Pre-Drawn Designs
The mid-tier of outdoor kitchen blueprints is dominated by pre-drawn but professionally produced plan sets sold by stone manufacturers and dedicated plan publishers. Eldorado Stone's premium plans run $89 to $179 and add detailed elevations, full mechanical schematics, and a printed-and-bound copy delivered by mail. The Backyard Buddy plan library at Family Handyman sells 14 different outdoor kitchen designs at $39 to $89 each as instant-download PDFs. Houzz and HomeAdvisor sell aggregated plan sets from licensed designers at $99 to $249.
The advantage of a paid plan over a free one is consistency: paid plans have been used on hundreds of completed projects, the dimensions are verified, the mechanical schematics are professionally drawn, and the materials takeoff list converts directly to a Home Depot or Lowes shopping list. Most paid plan sets explicitly grant single-build licensing — meaning you can use the plans for your one project but not redistribute them. A few publishers like Cal Flame offer plans for free if you commit to buying their grill and side burner from an authorized dealer; this works out well for buyers who were going to purchase a Cal Flame appliance anyway and saves $100 to $200 on the plan cost.
Custom Outdoor Kitchen Blueprints from Licensed Designers
For complex sites, sloped yards, or any installation requiring permits in jurisdictions like California, Florida, or New York City, custom blueprints from a licensed designer become necessary. A licensed landscape architect or outdoor living designer charges $800 to $3,500 for a complete plan set, with the price scaling by project complexity rather than square footage. The deliverable is the same five-to-seven sheet package described above but drawn specifically for your yard's slope, soil conditions, and existing utility locations.
The custom process typically begins with a $200 to $400 site visit during which the designer measures the yard with a laser distance tool, photographs existing utilities, and discusses use-case priorities with the homeowner. Two to three weeks later, the designer delivers a draft plan set for one round of revisions, then issues final stamped drawings. The designer's stamp matters — most building departments will not accept unstamped drawings for permit applications involving gas or electrical work. Stamped custom plans also include a structural engineer's review when the island ties into existing patio cover columns or extends over a property setback. For very large projects above $50,000 in build cost, custom blueprints typically pay for themselves in avoided change orders during construction.
Reading Elevation Drawings vs Plan Views
The biggest learning curve on any blueprint set is mentally toggling between plan views (overhead) and elevations (vertical). A plan view shows you what the island looks like from a helicopter directly above; an elevation shows what you see standing in front of it at eye level. Plan views are great for laying out the footprint and measuring how far the island sits from the house. Elevations are essential for understanding finish heights, countertop overhangs, and how appliances stack vertically.
On a typical outdoor kitchen blueprints sheet, the front elevation is labeled 'A' or 'Elevation 1', the right side is 'B' or 'Elevation 2', and so on around the island clockwise. Each elevation includes a horizontal datum line marked 'F.F.' (finished floor) at zero inches, with all vertical dimensions measured up from that line. A countertop typically lives at 36 inches above F.F., a wall cabinet bottom at 54 inches, and the soffit of a pergola overhead at 96 to 120 inches. Section drawings — slices through the island — bridge the two views by showing how the internal framing, ventilation, and utility runs connect from floor to countertop. Always read the section drawing before cutting any cabinet panel; the section shows interior obstructions a plan view simply cannot.
Submitting Outdoor Kitchen Blueprints for Building Permits
Most municipalities require outdoor kitchen blueprints to be submitted as part of the permit application whenever the project includes gas piping, electrical wiring, plumbing, or any structure attached to the house. The exact submittal package varies by jurisdiction but typically includes three sets of full-size 24x36 inch prints, a completed permit application form, the property survey or plot plan, and the permit fee ranging from $200 to $2,000 depending on project value. Digital submittals through e-permitting portals are now standard in major metros and accept PDFs at full scale.
Plan reviewers look for code compliance more than design quality. Their checklist typically includes: gas line sizing per the IFGC (International Fuel Gas Code) showing pipe diameter and length from the meter, electrical loading per the NEC (National Electrical Code) with circuit breaker amperage and conductor gauge, distance from combustibles around any open-flame appliance (typically 36 inches minimum), and structural calculations if the island connects to or supports a pergola. Approval timelines run two to six weeks for residential outdoor kitchen blueprints in most jurisdictions, with revision cycles adding two weeks per round. Always pull the permit before construction starts — retroactive permits cost two to three times more and may require demolition for inspection.