Outdoor Kitchen Contractor: Working With One Pro Start to Finish 2026
Outdoor kitchen contractor relationship guide — selecting one pro, signing contracts, weekly check-ins, change orders,
Outdoor Kitchen Setup Editorial Team
Outdoor living specialists with 15+ years of hands-on experience
Top Picks: Best Outdoor Kitchen Contractor: Working With One Pro Start to Finish 2026 in 2026
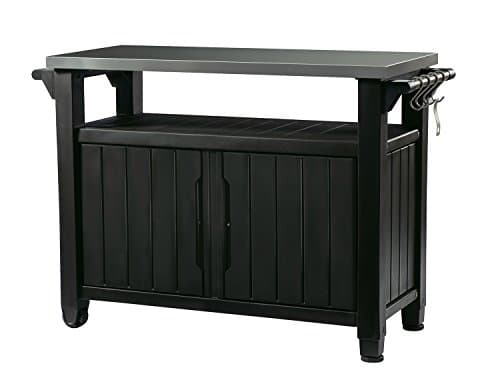
Keter Unity XL Portable Outdoor Table with Stainless Steel Top for Kitchen Prep and Outdoor Storage Cabinet for Grilling Accessories, Dark Grey
$220.99
Shop Now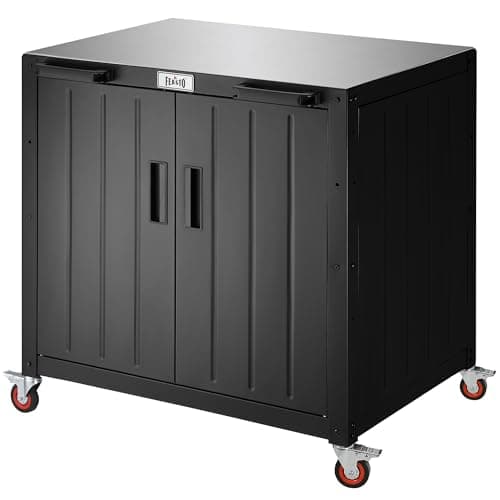
Feasto Outdoor Grill Cart with Storage Cabinet and Stainless Steel Top, 35-Inch Outdoor Grill Station with Door, Modular Kitchen Island for Food Prep and BBQ, Black & Silver
$219.99
Shop Now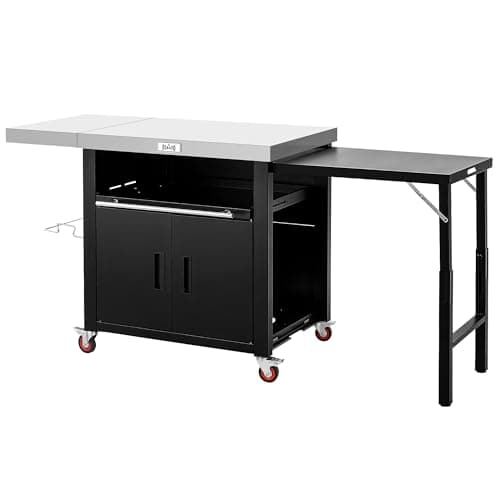
Feasto Outdoor Kitchen Island with Cabinet, Outdoor Grill Table with Stainless Steel Top for Pizza Oven& Griddles, Movable Bar Cart with Pull-Out Plate for Parties& Gathering, Heavy-Duty, L74”x W24”
$259.99
Shop Now
98 Inches Outdoor Kitchen Island, 4-Burner 72000 BTU Propane Stainless Steel BBQ with Side/Rear Burners, With Refrigerator and Sink, Rotisserie, Granite Countertops, Storage, For Backyard BBQ, Silver
$3,652.00
Shop Now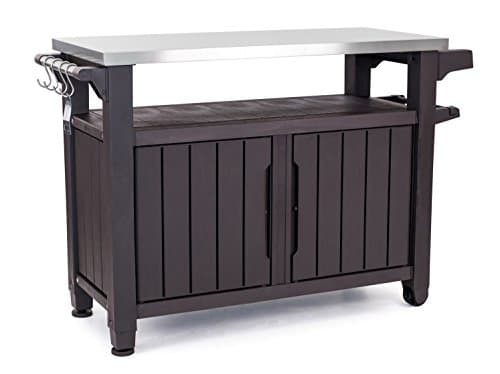
Keter Outdoor Rolling Table Cart for Food Prep, Storage, Bar & Grill, Dark Brown - Portable Kitchen Island Tabletop with Wheels for Drinks, Snacks, and Cooking
$265.99
Shop Now
JY QAQA Outdoor Grill Cart with Storage,Patio Kitchen Island Outdoor Grill Table with Wheels,BBQ Cart Movable Pizza Oven Table Stand, Storage Cabinet, Foldable Tabletop, (Black)
$135.98
Shop Now
FUQARHY 43.3-Inch Outdoor Kitchen Island with Storage Cabinet and Stainless Steel Top, Solid Wood Prep Station Grill Table with Lockable Wheels for Patio, Backyard, Party (Black)
$199.99
Shop Now
Stanbroil Rolling Outdoor Kitchen Island, BBQ Grill Cart with Stainless Steel Table Top, Double-Door Storage Cabinet & Pull-Out Shelf, Grill Table Cart for Outdoor Indoor, Large
$519.99
Shop NowKeter Unity XL Portable Outdoor Table with Stainless Steel Top for Kitchen Prep and Outdoor Storage Cabinet for Grilling Accessories, Dark Grey
$220.99
Shop NowFeasto Outdoor Grill Cart with Storage Cabinet and Stainless Steel Top, 35-Inch Outdoor Grill Station with Door, Modular Kitchen Island for Food Prep and BBQ, Black & Silver
$219.99
Shop NowFeasto Outdoor Kitchen Island with Cabinet, Outdoor Grill Table with Stainless Steel Top for Pizza Oven& Griddles, Movable Bar Cart with Pull-Out Plate for Parties& Gathering, Heavy-Duty, L74”x W24”
$259.99
Shop Now98 Inches Outdoor Kitchen Island, 4-Burner 72000 BTU Propane Stainless Steel BBQ with Side/Rear Burners, With Refrigerator and Sink, Rotisserie, Granite Countertops, Storage, For Backyard BBQ, Silver
$3,652.00
Shop NowKeter Outdoor Rolling Table Cart for Food Prep, Storage, Bar & Grill, Dark Brown - Portable Kitchen Island Tabletop with Wheels for Drinks, Snacks, and Cooking
$265.99
Shop NowJY QAQA Outdoor Grill Cart with Storage,Patio Kitchen Island Outdoor Grill Table with Wheels,BBQ Cart Movable Pizza Oven Table Stand, Storage Cabinet, Foldable Tabletop, (Black)
$135.98
Shop NowFUQARHY 43.3-Inch Outdoor Kitchen Island with Storage Cabinet and Stainless Steel Top, Solid Wood Prep Station Grill Table with Lockable Wheels for Patio, Backyard, Party (Black)
$199.99
Shop NowStanbroil Rolling Outdoor Kitchen Island, BBQ Grill Cart with Stainless Steel Table Top, Double-Door Storage Cabinet & Pull-Out Shelf, Grill Table Cart for Outdoor Indoor, Large
$519.99
Shop NowSelecting the Right Outdoor Kitchen Contractor for a Long Engagement
An outdoor kitchen contractor will be on your property for 30 to 60 working days, accessing your gas meter, electrical panel, and water main. Beyond licensing and insurance, you are evaluating a months-long working relationship. The strongest predictor of a successful engagement is communication style during the bid phase. A contractor who responds to your emails within 24 hours, arrives on time for the bid walkthrough, and provides a written proposal within 7 business days will generally maintain that responsiveness throughout the build.
Conversely, a contractor who takes 4 days to return your initial call, reschedules the bid meeting twice, or sends a one-page handwritten estimate is signaling exactly how the project will run. Trust those signals. During the bid phase, also pay attention to whether the contractor brings up code requirements, permit timelines, and inspection scheduling proactively or only when you ask. Proactive contractors anticipate problems and protect both parties; reactive contractors create surprises mid-project. Most successful homeowner-contractor relationships start with a chemistry match: choose someone whose personality and communication style you can tolerate for two months of close working contact.
The Pre-Construction Kickoff Meeting Agenda
Once your outdoor kitchen contractor is hired and the contract is signed, schedule a 90-minute pre-construction kickoff meeting at your home before any work starts. This meeting locks in details that prevent confusion later. Walk the site together with the contract in hand, confirming the exact kitchen footprint with stakes and string, the location of every utility tie-in (gas, water, electrical), the access path crews will use to reach the back yard, the staging area for materials and dumpster placement, the daily start and end times to respect family schedules, and any landscaping or hardscape that needs protection.
Cover communication norms next: who is your day-to-day point of contact (project manager vs. owner), what is the preferred communication channel (text, email, phone, or job-site app like CompanyCam or BuildBook), how often you will receive written progress updates (weekly is ideal), and how change orders will be presented and approved. Finally, walk through the high-risk milestones: when the gas line will be tied in, when the electrical panel will be opened, when the water service will be temporarily shut off. Knowing these dates in advance prevents you from being blindsided. Document the entire kickoff in a shared note or email summary so both parties have the same record.
Weekly Status Cadence That Prevents Surprises
The single highest-leverage tool in working with an outdoor kitchen contractor is a disciplined weekly status touchpoint. Every Friday afternoon, your contractor should send a written summary covering five items: what was completed this week, what is planned for next week, any decisions needed from you, any open punch-list items from prior weeks, and any timeline or budget impacts identified. Job-site management apps like CompanyCam attach photos to each daily entry and produce timestamped logs that protect both parties.
If the contractor does not provide this voluntarily, request it as a contract addendum during the kickoff. The cost to the contractor is roughly 30 minutes per week; the value to you is enormous. Weekly cadence catches problems while they are still small — a permit delay surfaces in week 2 instead of week 5, a substituted material appears in writing instead of as a fait accompli, a subcontractor scheduling conflict shows up before it derails the timeline. Pair the weekly written report with a bi-weekly 20-minute on-site walk-through where you and the contractor physically inspect work in progress and discuss next steps. This rhythm dramatically improves outcomes.
Change Orders: How to Handle Them Without Breaking the Budget
Change orders are the leading cause of outdoor kitchen project budget overruns, and they almost always originate from one of three sources: scope additions you request mid-project, hidden conditions discovered during excavation, or material substitutions due to supply chain issues. A well-structured contract caps change order markup at 15 to 20 percent over actual cost, requires written approval before work proceeds, and shows the cost impact and timeline impact in clear numbers.
Resist the temptation to verbally approve changes on-site. Even a 'sure, go ahead' said in passing can become a $2,000 line item later. Instead, ask the contractor to write up the change order, send it to you via email, and wait for your written reply before starting. For changes you initiate (adding a sink, upgrading the grill, switching countertop material), build a buffer of 5 to 10 percent of the contract value into your project budget specifically for changes you anticipate wanting to make. For changes the contractor initiates due to discovered conditions, ask for two photos and a brief written explanation of why the change is necessary; legitimate hidden conditions like undocumented buried utilities or rotted slab edges are real, but vague explanations are a warning sign.
Managing Subcontractors Through Your Contractor
Your outdoor kitchen contractor is the single point of accountability, but the actual hands-on work is typically performed by 4 to 8 different subcontractors over the project lifecycle: a mason, a plumber, a gas fitter (often the plumber), an electrician, a granite fabricator and installer, an appliance technician, sometimes a landscaper for soil work and sod restoration, and sometimes a separate tile setter for backsplashes. Each sub has its own scheduling rhythm and its own quality variability.
You should never directly direct a subcontractor — always work through your general contractor — but you should know who is on-site each day, ideally by name. Ask your contractor for the schedule of which subs are coming when, and confirm each sub's licensing status if they are working on systems that require licenses (plumbing, gas, electrical). When you observe subcontractor work in progress, document it with phone photos and discuss any concerns with your contractor the same day, in writing. This protects you in the rare case of subsequent quality disputes. The contractor is responsible for sub coordination, sub pay (subs should never ask you for payment directly), and sub workmanship. Your job is to observe and communicate concerns through the proper channel.
Inspections and Code Compliance Touchpoints
Most outdoor kitchen builds require multiple inspections coordinated through your local building department. The typical sequence is a footing inspection if you are pouring new footings (before pour), a rough-in inspection for gas, electrical, and plumbing (after rough-in but before veneer), and a final inspection (after appliances are connected and ready for use). Some jurisdictions also require a slab inspection and a separate gas pressure test witnessed by either a building inspector or a utility company technician.
Your contractor schedules and attends each inspection. Your role is to know the inspection schedule, ask for the green inspection card or written inspection record after each one, and verify with the building department that all inspections were genuinely performed. The single biggest contractor warranty risk for homeowners is undocumented work that bypasses inspections — at resale, an inspector will discover unpermitted work and force expensive remediation. Always insist on permit and inspection records as part of the project deliverables. A reputable contractor provides these proactively at the final walkthrough; a less reputable contractor sometimes hopes you forget to ask.
Final Walkthrough and Punch List Resolution
The final walkthrough is your last meaningful leverage point with your outdoor kitchen contractor. Schedule it for 90 minutes minimum, arrive with a printed checklist, and physically test every system. Light each grill burner, run the side burner and any sear burner, ignite any pizza oven or smoker. Run the sink hot and cold, check the drain for proper slope and any leaks under the cabinet. Open and close every cabinet door and drawer, verify alignment and soft-close function. Push the test button on every GFCI outlet to confirm proper trip behavior. Inspect every grout joint and stone seam for cracks, gaps, or color inconsistencies. Examine the countertop in raking light for scratches and chips.
Generate a written punch list of every item that needs correction, photograph each item, and email the list to your contractor the same day. The contract should specify that the final 10 to 15 percent payment is held until every punch-list item is resolved. Most reputable contractors complete punch lists within 7 to 14 days. If a contractor pressures you to release the final payment before the punch list is closed, hold firm — once the money is released, your leverage is gone and the resolution timeline can stretch indefinitely. Keep all walkthrough notes, photos, and emails in a single project folder for future reference.
Post-Project Warranty Period and Long-Term Relationship
The contractor relationship does not end at final payment. Most reputable outdoor kitchen contractors provide a 1-year workmanship warranty, with 2 years on plumbing and gas fittings, plus pass-through manufacturer warranties on appliances ranging from 1 year (entry-level grills) to lifetime (Lynx and Hestan stainless components). Schedule a 90-day follow-up walkthrough with your contractor — this is when most early-life issues surface, including settling in stone veneer, minor grout cracks, and any appliance ignition problems.
Maintain a project binder containing the signed contract, all change orders, all permits and inspection records, all manufacturer manuals and warranty registration confirmations, and the contact information for every subcontractor in case of long-term warranty work. Register every appliance directly with its manufacturer in the first 30 days; many warranties become void or shortened if registration is delayed. For long-term success, keep your contractor on a friendly footing — call them for any post-warranty repairs at fair-market rates, refer friends and neighbors when they ask. A multi-year relationship with a quality outdoor kitchen contractor is one of the most valuable home-services connections you can build, because outdoor kitchens need periodic professional service every 3 to 5 years for grout, gas line testing, and appliance maintenance.