Outdoor Kitchen Contractors: How to Vet, Hire & Manage Pros in 2026
Outdoor kitchen contractors guide covers licensing, insurance, contracts, payment schedules, and red flags.
Outdoor Kitchen Setup Editorial Team
Outdoor living specialists with 15+ years of hands-on experience
Top Picks: Best Outdoor Kitchen Contractors: How to Vet, Hire & Manage Pros in 2026 in 2026
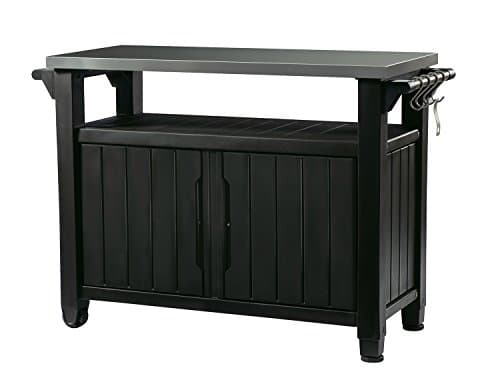
Keter Unity XL Portable Outdoor Table with Stainless Steel Top for Kitchen Prep and Outdoor Storage Cabinet for Grilling Accessories, Dark Grey
$220.99
Shop Now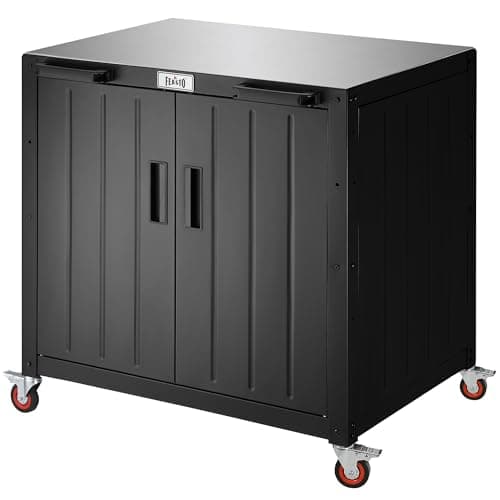
Feasto Outdoor Grill Cart with Storage Cabinet and Stainless Steel Top, 35-Inch Outdoor Grill Station with Door, Modular Kitchen Island for Food Prep and BBQ, Black & Silver
$219.99
Shop Now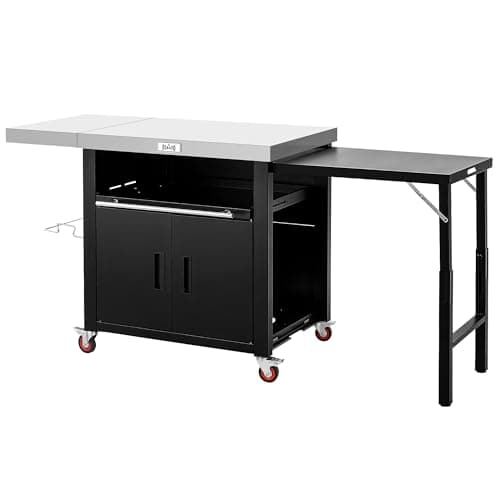
Feasto Outdoor Kitchen Island with Cabinet, Outdoor Grill Table with Stainless Steel Top for Pizza Oven& Griddles, Movable Bar Cart with Pull-Out Plate for Parties& Gathering, Heavy-Duty, L74”x W24”
$259.99
Shop Now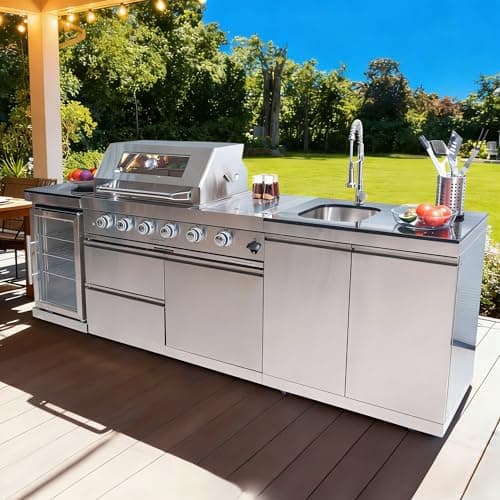
98 Inches Outdoor Kitchen Island, 4-Burner 72000 BTU Propane Stainless Steel BBQ with Side/Rear Burners, With Refrigerator and Sink, Rotisserie, Granite Countertops, Storage, For Backyard BBQ, Silver
$3,652.00
Shop Now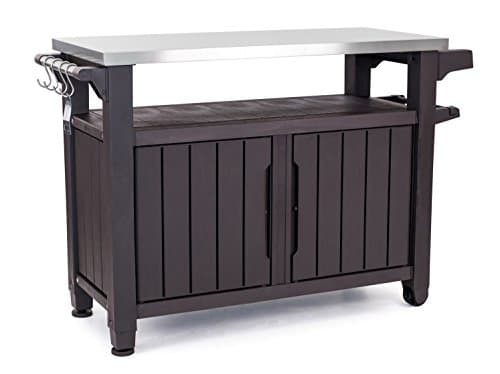
Keter Outdoor Rolling Table Cart for Food Prep, Storage, Bar & Grill, Dark Brown - Portable Kitchen Island Tabletop with Wheels for Drinks, Snacks, and Cooking
$265.99
Shop Now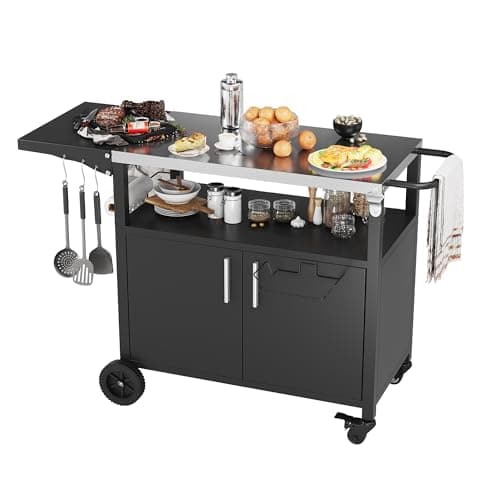
JY QAQA Outdoor Grill Cart with Storage,Patio Kitchen Island Outdoor Grill Table with Wheels,BBQ Cart Movable Pizza Oven Table Stand, Storage Cabinet, Foldable Tabletop, (Black)
$135.98
Shop Now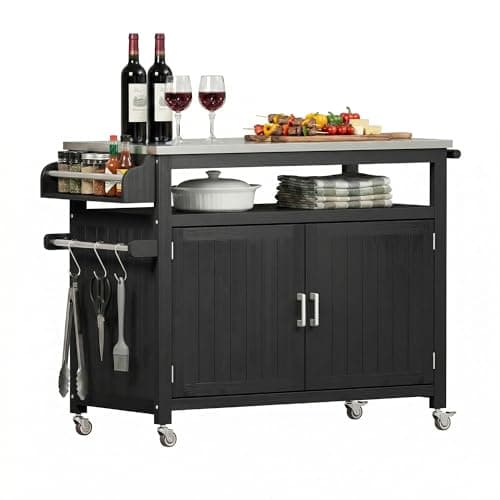
FUQARHY 43.3-Inch Outdoor Kitchen Island with Storage Cabinet and Stainless Steel Top, Solid Wood Prep Station Grill Table with Lockable Wheels for Patio, Backyard, Party (Black)
$199.99
Shop Now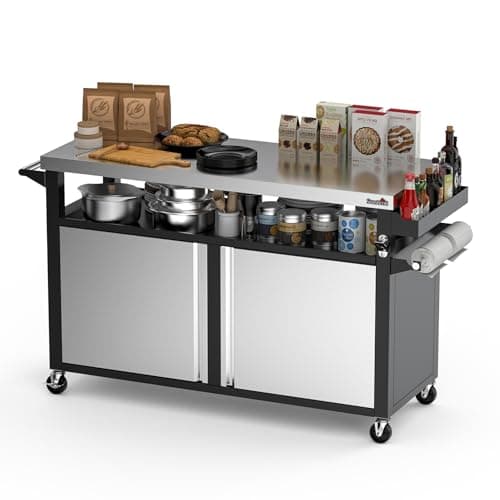
Stanbroil Rolling Outdoor Kitchen Island, BBQ Grill Cart with Stainless Steel Table Top, Double-Door Storage Cabinet & Pull-Out Shelf, Grill Table Cart for Outdoor Indoor, Large
$519.99
Shop NowKeter Unity XL Portable Outdoor Table with Stainless Steel Top for Kitchen Prep and Outdoor Storage Cabinet for Grilling Accessories, Dark Grey
$220.99
Shop NowFeasto Outdoor Grill Cart with Storage Cabinet and Stainless Steel Top, 35-Inch Outdoor Grill Station with Door, Modular Kitchen Island for Food Prep and BBQ, Black & Silver
$219.99
Shop NowFeasto Outdoor Kitchen Island with Cabinet, Outdoor Grill Table with Stainless Steel Top for Pizza Oven& Griddles, Movable Bar Cart with Pull-Out Plate for Parties& Gathering, Heavy-Duty, L74”x W24”
$259.99
Shop Now98 Inches Outdoor Kitchen Island, 4-Burner 72000 BTU Propane Stainless Steel BBQ with Side/Rear Burners, With Refrigerator and Sink, Rotisserie, Granite Countertops, Storage, For Backyard BBQ, Silver
$3,652.00
Shop NowKeter Outdoor Rolling Table Cart for Food Prep, Storage, Bar & Grill, Dark Brown - Portable Kitchen Island Tabletop with Wheels for Drinks, Snacks, and Cooking
$265.99
Shop NowJY QAQA Outdoor Grill Cart with Storage,Patio Kitchen Island Outdoor Grill Table with Wheels,BBQ Cart Movable Pizza Oven Table Stand, Storage Cabinet, Foldable Tabletop, (Black)
$135.98
Shop NowFUQARHY 43.3-Inch Outdoor Kitchen Island with Storage Cabinet and Stainless Steel Top, Solid Wood Prep Station Grill Table with Lockable Wheels for Patio, Backyard, Party (Black)
$199.99
Shop NowStanbroil Rolling Outdoor Kitchen Island, BBQ Grill Cart with Stainless Steel Table Top, Double-Door Storage Cabinet & Pull-Out Shelf, Grill Table Cart for Outdoor Indoor, Large
$519.99
Shop NowWhat Outdoor Kitchen Contractors Actually Do
Outdoor kitchen contractors typically operate as general contractors who self-perform some trades and subcontract others. The full scope of work on a typical project includes site survey and grading, pouring or modifying the concrete slab, framing the kitchen structure, running gas lines from the meter or propane tank, running 20-amp GFCI-protected electrical circuits and low-voltage lighting wiring, installing potable water supply and a drain to either a P-trap that discharges to a graywater pit or to a tied-in sanitary line, mortaring the stone or stucco veneer, fabricating and templating countertop slabs, and finally installing all built-in appliances and connecting them to gas and electrical.
A reputable contractor coordinates inspections at every stage where local code requires them — typically a rough-in inspection for gas and electrical before veneer is applied, and a final inspection after appliances are connected. Most outdoor kitchen contractors charge a 15 to 25 percent markup on subcontractor labor and a 10 to 20 percent markup on materials, so a $30,000 project may include $4,500 to $9,000 in contractor margin. That margin pays for project management, permit pulling, scheduling, and warranty support, and it is reasonable when the contractor is genuinely managing the build.
Licensing, Insurance, and Bonding Requirements by State
Licensing rules vary dramatically by state. California requires any contractor performing work over $500 to hold a Contractors State License Board (CSLB) C-27 Landscape or B General Building license. Florida requires a Certified Building Contractor or Certified General Contractor license for projects over $25,000, plus a separate gas piping license. Texas does not license general contractors at the state level, but most municipalities like Houston and Dallas require local registration plus state-licensed master plumbers and electricians for trade work. Ask every contractor for their state license number and verify it independently on the state licensing board website.
Insurance is non-negotiable. The minimum acceptable coverage is $1 million general liability and active workers compensation for every employee on your property. Request a Certificate of Insurance (COI) issued directly by the contractor's insurance broker — never accept a photocopy from the contractor themselves, because COIs can be modified. Many states also require contractors to carry a surety bond ranging from $5,000 to $25,000, which provides recourse if the contractor abandons the job or fails to pay subcontractors. Verify bond status with the state licensing authority.
Where to Find Legitimate Outdoor Kitchen Contractors
The most reliable lead sources for outdoor kitchen contractors are referrals from friends, neighbors, and especially landscape architects who routinely coordinate outdoor kitchen builds and only refer professionals who deliver. After referrals, the next best sources are the Hearth, Patio & Barbecue Association (HPBA) certified installer directory, the National Association of the Remodeling Industry (NARI) member finder, and the National Kitchen and Bath Association (NKBA) outdoor design specialist directory. These trade organizations require members to maintain licensing, insurance, and continuing education.
Houzz and Angi (formerly Angie's List) provide review-based directories but require careful filtering — focus on contractors with at least 25 reviews, a 4.7-or-higher average rating, photos of completed projects, and reviews mentioning outdoor kitchens specifically rather than generic landscaping. Avoid contractors who exclusively run lead-generation Google ads with no organic web presence, because these are often sales-first operations that subcontract everything out. Local masonry suppliers and high-end appliance dealerships (Ferguson, Pirch) also maintain installer referral lists of contractors they know deliver clean work.
How to Compare Bids from Outdoor Kitchen Contractors
Always collect at least three written bids before signing. A legitimate bid is a multi-page document — never a single-line quote — that itemizes labor by trade (excavation, masonry, plumbing, gas, electrical, finish), specifies brand and model numbers for every appliance, lists countertop material with square footage and edge profile, and shows a clear timeline with milestone dates. Bids that arrive as a single lump sum number with vague descriptions like 'complete outdoor kitchen' should be rejected because they leave the contractor wide latitude to substitute cheaper materials or cut corners.
Compare bids on apples-to-apples terms. If Contractor A specifies a 36-inch Lynx L36ATR grill and Contractor B specifies a 36-inch generic gas grill, the price difference does not mean Contractor B is cheaper — it means they are bidding lower-quality equipment. Reject the lowest bid if it is more than 15 percent below the median, because lowballing is the most common precursor to a job that runs over budget through change orders. The healthiest pricing pattern is three bids that fall within 10 to 15 percent of each other, with the middle bid almost always being the best fit on quality and value.
Critical Questions to Ask Before You Hire
Beyond verifying license and insurance, a strong vetting interview covers experience, project management, and conflict resolution. Key questions: How many outdoor kitchen projects have you completed in the last 24 months? Can I visit two completed jobs and speak with those homeowners? Do you self-perform masonry, or do you sub it out? Who pulls the permits — you or me? What is your typical change order process and markup percentage? What warranty do you provide on workmanship, and is it written? Do you offer a separate appliance manufacturer warranty handoff?
Ask specifically about the gas connection: who in your crew is licensed to run and pressure-test gas lines, and will the connection be inspected by the local utility or building department? Many failed outdoor kitchens trace back to undersized gas lines that cannot deliver enough BTU to run a 60,000-BTU grill plus a 20,000-BTU side burner simultaneously. Insist on a load calculation if you are adding more than 80,000 total BTUs to an existing meter. Finally, ask about communication: who is your day-to-day point of contact, how often will you provide written progress updates, and how do you handle weather delays?
Contract Clauses That Protect Homeowners
Never sign an outdoor kitchen contract that does not include the following clauses. First, a detailed scope of work with model numbers and material specifications. Second, a milestone payment schedule that limits the deposit to 10 percent of the total or $1,000 (whichever is less) — many states actually cap deposits at 10 percent by law, including California and Maryland. Subsequent payments should be tied to verifiable completion stages: 25 percent at frame and rough-in completion, 25 percent at veneer completion, 25 percent at appliance install, and the final 15 percent withheld until passing final inspection and homeowner walkthrough.
Third, a written change order procedure requiring your signature and a fixed markup percentage on changes (15 percent is typical). Fourth, a clear lien waiver clause requiring the contractor to provide signed lien waivers from all subcontractors and material suppliers before the final payment is released. Fifth, a workmanship warranty of at least one year, with two years on plumbing and gas fittings. Sixth, a force majeure clause clarifying weather and permit-delay handling. Seventh, a clear termination clause allowing you to terminate for cause if work stops for more than 14 consecutive days without justification.
Red Flags That Signal a Bad Contractor Hire
Watch for these warning signs during the bidding and early project phases. A request for cash-only payment, large up-front deposits over 25 percent, or pressure to sign immediately because the price is 'only good today' all indicate a scam-style operation. A contractor who cannot produce a valid state license number, an in-date Certificate of Insurance, or references from completed projects within driving distance is not a professional you want managing your money.
During the project, watch for crew members showing up without proper equipment, frequent unexplained absences from the site, refusal to share copies of pulled permits, materials being delivered to a different address, or pressure to make payments ahead of the milestone schedule. The single biggest red flag is a contractor asking for a check made out to them personally rather than to their licensed business entity. That is almost always a sign of either tax evasion or impending bankruptcy. Never make personal-name payments. If at any point you suspect fraud, file a complaint with the state contractor licensing board, your state attorney general's consumer protection office, and your local police department for theft if money has been taken without work performed.
Managing the Project: Walkthroughs and Final Acceptance
A well-managed outdoor kitchen build includes at least four scheduled homeowner walkthroughs: a pre-construction walkthrough to confirm layout and utility locations, a rough-in walkthrough after framing and gas/electrical/plumbing rough-in, a pre-veneer walkthrough to verify appliance fit and any last-minute changes, and a final walkthrough at substantial completion. At each walkthrough, generate a written punch list of items to be addressed, and tie payment release to completion of the prior phase's punch list.
The final walkthrough is the most important. Bring a notebook, your phone for photos, and a checklist that covers gas leak testing (the contractor should demonstrate a soap-bubble or electronic leak test on every connection), electrical GFCI tripping (push the test button on every outlet), plumbing for leaks and proper drainage slope, all appliance ignition and operation, every cabinet door and drawer for alignment, every veneer joint for cracks or grout gaps, and the countertop for scratches or chips. Hold back at least 10 percent of the contract value until every punch-list item is resolved. Once everything is signed off, request all manufacturer manuals, registration cards, warranty documents, and any as-built drawings of utility runs. Store these in a binder for future reference and resale documentation.