Outdoor Kitchen Installation: Process, Timeline, and DIY vs Pro
Outdoor kitchen installation explained step by step: site prep, utility runs, cabinet assembly, countertop set, and what professional installers actually do.
Outdoor Kitchen Setup Editorial Team
Outdoor living specialists with 15+ years of hands-on experience
Top Picks: Best Outdoor Kitchen Installation: Process, Timeline, and DIY vs Pro in 2026
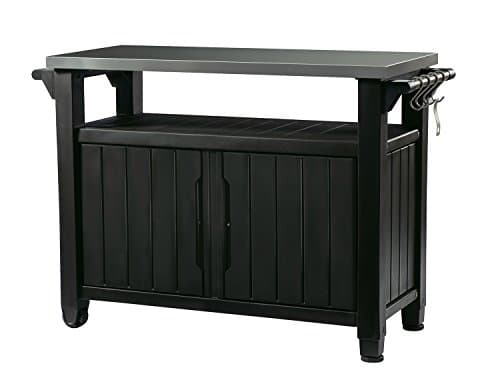
Keter Unity XL Portable Outdoor Table with Stainless Steel Top for Kitchen Prep and Outdoor Storage Cabinet for Grilling Accessories, Dark Grey
$220.99
Shop Now
TAOMAND Large 76 x 52 inches Under Grill Mats for Outdoor Grill | Double-Sided Fireproof | Waterproof | Oil-Proof | Easy to Clean | Indoor Fireplace/Fire Pit Mat | Quality BBQ Mat for Deck Patio Lawn
$33.99
Shop Now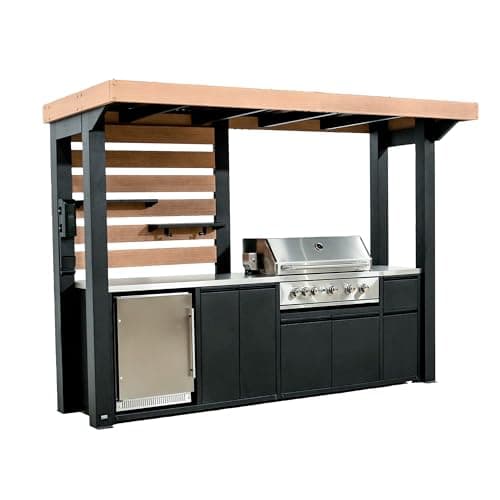
Backyard Discovery Fusion Flame Galvanized Steel Covered Outdoor Kitchen with 5-Burner Stainless, Grill, Refrigerator, Countertop, Storage, and, Roof for All-Season Outdoor Cooking, electric
$4,999.00
Shop Now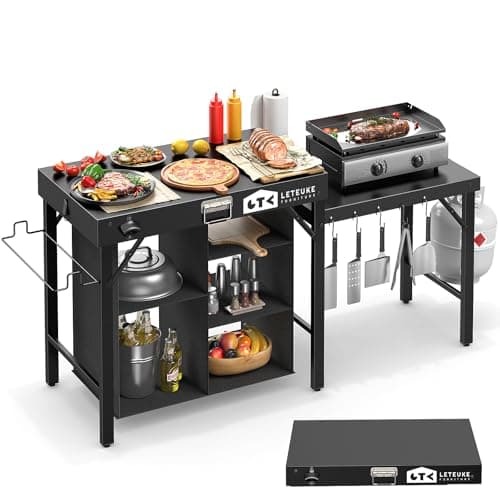
Leteuke Grill Table for Blackstone Griddle, Portable Foldable Grill Table with Storage Fits Ninja, Blackstone Griddle Stand for Outdoor Camping, Picnic, Garden, Patio, Dining, BBQ, Party
$159.99
Shop Now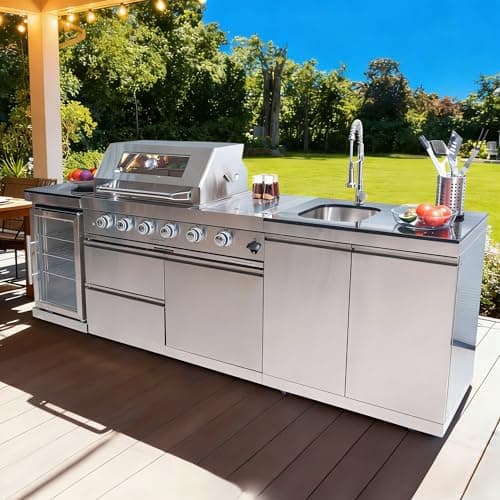
98 Inches Outdoor Kitchen Island, 4-Burner 72000 BTU Propane Stainless Steel BBQ with Side/Rear Burners, With Refrigerator and Sink, Rotisserie, Granite Countertops, Storage, For Backyard BBQ, Silver
$3,652.00
Shop Now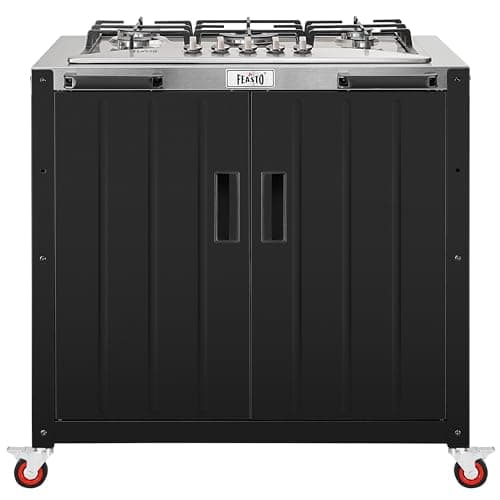
Feasto Gas Grill, Movable Outdoor Gas Stove Stainless Steel Top with Cabinet, 5 Burners with 36,200 BTUs, Outdoor Propane Grill for Outdoor Cooking, Ideal for Lawn & Garden, L35.4 x W24
$539.99
Shop Now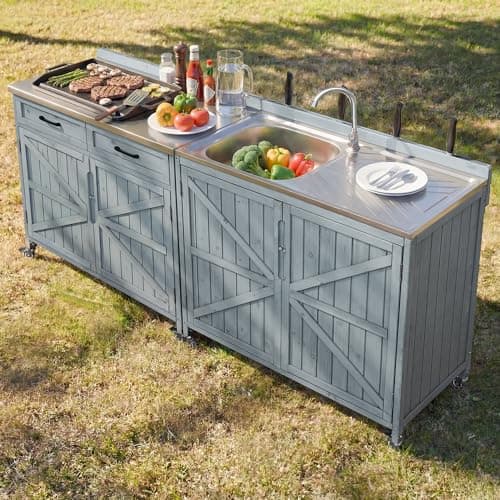
Merax 2 Piece Modular Outdoor Kitchen Series- Kitchen Grill Cart w/Stainless Steel Sink, Wood Rolling BBQ Prep Table w/Stainless Steel Top, Lockable Wheels for Patio & Outdoor Cooking, Grey Blue
$529.99
Shop Now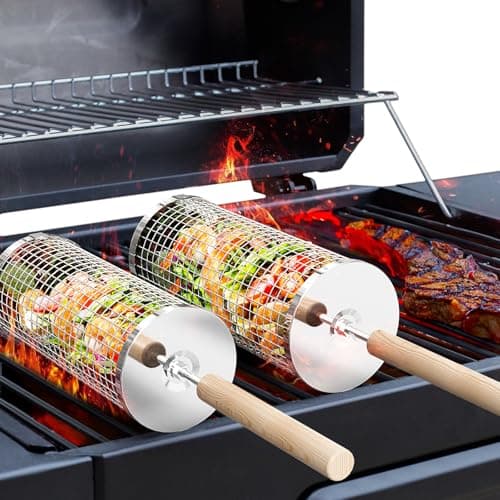
ivtivfu Rolling Grill Basket, Removable Wooden Handle, 304 Stainless Steel, Nesting BBQ Tools, Smoker Grilling Accessories for Vegetable, Outdoor Cooking Camping, Birthday Gifts for Men Dad Husband
$23.99
Shop NowKeter Unity XL Portable Outdoor Table with Stainless Steel Top for Kitchen Prep and Outdoor Storage Cabinet for Grilling Accessories, Dark Grey
$220.99
Shop NowTAOMAND Large 76 x 52 inches Under Grill Mats for Outdoor Grill | Double-Sided Fireproof | Waterproof | Oil-Proof | Easy to Clean | Indoor Fireplace/Fire Pit Mat | Quality BBQ Mat for Deck Patio Lawn
$33.99
Shop NowBackyard Discovery Fusion Flame Galvanized Steel Covered Outdoor Kitchen with 5-Burner Stainless, Grill, Refrigerator, Countertop, Storage, and, Roof for All-Season Outdoor Cooking, electric
$4,999.00
Shop NowLeteuke Grill Table for Blackstone Griddle, Portable Foldable Grill Table with Storage Fits Ninja, Blackstone Griddle Stand for Outdoor Camping, Picnic, Garden, Patio, Dining, BBQ, Party
$159.99
Shop Now98 Inches Outdoor Kitchen Island, 4-Burner 72000 BTU Propane Stainless Steel BBQ with Side/Rear Burners, With Refrigerator and Sink, Rotisserie, Granite Countertops, Storage, For Backyard BBQ, Silver
$3,652.00
Shop NowFeasto Gas Grill, Movable Outdoor Gas Stove Stainless Steel Top with Cabinet, 5 Burners with 36,200 BTUs, Outdoor Propane Grill for Outdoor Cooking, Ideal for Lawn & Garden, L35.4 x W24
$539.99
Shop NowMerax 2 Piece Modular Outdoor Kitchen Series- Kitchen Grill Cart w/Stainless Steel Sink, Wood Rolling BBQ Prep Table w/Stainless Steel Top, Lockable Wheels for Patio & Outdoor Cooking, Grey Blue
$529.99
Shop Nowivtivfu Rolling Grill Basket, Removable Wooden Handle, 304 Stainless Steel, Nesting BBQ Tools, Smoker Grilling Accessories for Vegetable, Outdoor Cooking Camping, Birthday Gifts for Men Dad Husband
$23.99
Shop NowSite Preparation: The First Three Days of Outdoor Kitchen Installation
Site preparation makes or breaks every outdoor kitchen installation, and skipping it costs more than any other corner-cutting decision a homeowner can make. Day one is layout: marking the exact footprint with spray paint or chalk, verifying setback distances from property lines and the house, and confirming the proposed location does not sit over any underground utilities. Call 811 (national one-call service) at least 72 hours before any digging — utility marking is free and prevents the dramatic experience of cutting a buried gas main.
Day two is excavation and base prep. For a prefab kit, dig 6 inches below grade across the footprint plus 12 inches of perimeter, fill with compacted Class 5 road base in two 3-inch lifts, then cap with 4 inches of reinforced concrete or properly bedded concrete pavers. For a custom masonry build, dig footings 12 to 18 inches deep depending on local frost line — typically 18 inches in northern climates and 6 inches in southern. Day three is utility stub-up: gas line stubbed at the future grill cutout location, electrical conduit pulled to the future outlet location, water supply and drain pipes (if a sink is planned) capped at the future sink location. Stub-ups must be precisely located before the slab pours; relocating a stub after concrete cures requires saw-cutting and is expensive.
Trade Work Sequence: Gas, Electrical, Plumbing in the Right Order
The strict order of trade work during outdoor kitchen installation is gas first, electrical second, plumbing third, and finish trades last. Gas first because gas lines have the most stringent code requirements, the longest runs, and the largest pipe diameter (typically 3/4-inch black iron from the meter, reduced to 1/2-inch at the appliance). A licensed plumber pulls the gas permit, runs the line, pressure tests at 1.5 times working pressure for 15 minutes, and submits to inspection before any other trade enters the trench.
Electrical second because the electrician needs to see where the gas line went to avoid running conduit too close (NEC requires 12 inches of separation for parallel runs). The dedicated outdoor circuit is typically 20 amps at 120 volts on a GFCI breaker, with conduit rated for direct burial (Schedule 40 or 80 PVC) at 18-inch depth. Pull at least one circuit; serious builds with refrigeration and lighting often pull two or three. Plumbing third because the supply line needs frost-proof terminations and the drain requires a vent up to roof height to comply with the IPC plumbing code. Finish trades — masons, fabricators, granite installers — come last because their work would otherwise have to be cut open to access the buried utilities. Skipping the gas-first sequence is the most common reason outdoor kitchen installation projects fail inspection on the first review.
Cabinet and Frame Installation: Anchoring and Leveling
Once utilities are stubbed and the slab is fully cured (minimum 7 days for full structural strength on standard concrete), cabinet installation begins. For prefab kits, individual cabinet boxes are positioned according to the manufacturer's assembly drawings, then anchored to the slab with Tapcon 3/16-inch by 2-3/4-inch concrete screws — typically two screws front and two rear of each cabinet base. Adjacent cabinets bolt to each other with M8 stainless hardware through pre-drilled holes in the side panels.
Leveling is non-negotiable. Each cabinet's adjustable feet should be set so the entire run reads level within 1/16 inch over its full length. A 6-foot bubble level checks adjacent cabinets; a laser level handles the entire run. The countertop will not template correctly if the cabinet tops are not coplanar. For custom masonry outdoor kitchen installation, the cabinet equivalent is the CMU block structure, which is laid in courses with mortar joints, every other course reinforced with 1/2-inch rebar tied vertically into the footing rebar grid. Block walls cure for 7 to 14 days before any countertop or veneer work begins. Skipping cure time causes mortar to crack as the structure absorbs the weight of subsequent layers.
Countertop Templating, Fabrication, and Set
Countertop installation deserves its own dedicated phase in any outdoor kitchen installation timeline because it cannot start until cabinets are fully installed and sealed, and once it starts it requires a separate trade visit, a separate fabrication shop turnaround, and finally a careful three-person set. Day one of countertop work is templating: the granite or stone fabricator visits with thin Coroplast or rigid foam templates, measures the actual installed cabinet tops to within 1/16 inch, and notes every appliance cutout dimension verified against the actual delivered grill, side burner, and sink models.
Templates go back to the fabrication shop where the slab is cut on a CNC waterjet or bridge saw, with cutouts machined precisely. Fabrication takes 7 to 14 days for granite, 14 to 21 days for sintered stone surfaces like Dekton or Neolith. Final set is a careful day's work: the slab is delivered on edge in a steel A-frame, three to four people lift it onto the cabinets using vacuum suction lifters rated to 200 pounds each, dry-fit checks every cutout against actual appliances, and finally the slab is set in a bed of clear silicone adhesive. Seams are filled with color-matched epoxy. Total countertop process from templating to first grill use: 2 to 4 weeks. Rush fabrication is sometimes possible for an additional 30 to 50 percent fee.
Professional Installer Day Rates and What They Actually Do
Hiring professionals for outdoor kitchen installation breaks down by trade, with different rates and scopes for each. A licensed plumber for gas and water work charges $85 to $135 per hour in most US markets, and a typical residential outdoor kitchen gas line installation takes 6 to 10 hours including the pressure test and inspection scheduling, totaling $600 to $1,400. An electrician for the dedicated outdoor circuit charges $75 to $125 per hour, with most installs running 4 to 6 hours total at $300 to $750.
A general installer or outdoor living specialist coordinating the full project charges $400 to $900 per day plus materials markup of 15 to 25 percent. The installer handles cabinet assembly, panel cladding, hardware mounting, appliance drop-in, and seam sealing. Expect 3 to 5 installer-days for a standard prefab kit and 8 to 14 installer-days for a custom masonry build. The granite or stone installer charges $35 to $90 per square foot of countertop installed, including templating, fabrication, and set. Total professional installation cost for a $7,899 prefab outdoor kitchen kit typically lands at $4,500 to $7,500 in trade work and labor, bringing the all-in installed cost to $12,000 to $15,500. Custom masonry builds run $15,000 to $40,000 in trade and installer labor on top of materials.
Realistic Outdoor Kitchen Installation Timelines by Project Type
Project timelines vary dramatically by build type. The fastest realistic timeline for a basic prefab outdoor kitchen installation runs 2 to 3 weeks: 3 days site prep, 2 days utility runs, 7 days cabinet and panel assembly with countertop templating, 7 to 14 days countertop fabrication wait, and 1 day countertop set plus appliance integration. Most homeowners running this project on weekends only stretch the timeline to 4 to 6 weeks.
Mid-tier prefab kits with refrigeration, side burner, and sink integration typically take 4 to 6 weeks of professional installation or 8 to 10 weeks for DIY weekend work. Custom masonry outdoor kitchen installation runs 8 to 16 weeks for a contractor-managed project: 1 to 2 weeks for permit pull, 1 week site prep, 2 weeks utility runs and inspections, 3 to 4 weeks for masonry block work and cure, 2 to 3 weeks for veneer and stone application, 2 to 4 weeks for countertop fabrication and set, and 1 to 2 weeks for appliance integration and final inspections. Permit reviews add 2 to 6 weeks pre-construction depending on jurisdiction. High-end luxury builds with multiple structural elements, integrated pergolas, and stamped concrete patios commonly run 4 to 6 months end to end.
DIY vs Professional Installation: Where the Line Should Be Drawn
The appropriate DIY-versus-pro split during outdoor kitchen installation is well-defined by code and insurance. Always DIY-acceptable: site marking, layout, cabinet assembly per manufacturer instructions, hardware mounting (pulls, knobs, drawer fronts), interior cabinet shelf placement, and final cleaning. Frequently DIY-acceptable with care: panel cladding application, sealant work at seams, stone or tile veneer if the homeowner has prior experience.
Always pro-only: gas line connections (legally required to be pulled by a licensed plumber in nearly every jurisdiction), electrical work beyond plug-in extension cords, plumbing supply and drain connections to the home system, structural masonry that ties into existing patio cover columns. The financial argument for professional installation usually hinges on three factors: whether the homeowner's time is more valuable than the labor savings, whether the home insurance policy will cover DIY-work damage (most will not for gas-related fires originating from owner-installed lines), and whether the local jurisdiction requires licensed signatures on permits. A common middle path is hiring pros for gas, electrical, plumbing, and countertop set, then DIY-ing cabinet assembly, panel work, and finish details. This typically saves 30 to 40 percent versus full pro install while preserving safety and warranty coverage.
Final Inspections and Commissioning the Kitchen
The last phase of any outdoor kitchen installation is inspection and commissioning. Most jurisdictions require three inspections: rough-in (after utility runs but before cabinet placement), gas pressure test (after gas line installation but before cabinet enclosure), and final (after everything is connected and sealed). Schedule each inspection 5 to 10 business days in advance. Failed inspections add 1 to 3 weeks to the timeline. Common failures: gas line undersized for total appliance BTU load, electrical conductor gauge too small for the breaker rating, plumbing missing required vent or backflow prevention, missing fire-stop sealant where utilities pass through walls.
Commissioning is the homeowner's final walkthrough where every system is tested. Light each grill burner and confirm flame quality and color (sharp blue with minimal yellow tipping). Run water through the sink and drain at full flow to check for leaks at all joints. Power up the refrigerator and verify temperature reaches 38 to 40 degrees Fahrenheit within 4 hours. Check every drawer and door for proper alignment, smooth motion, and proper closure. Photograph every utility connection point with timestamps for your records — these photos are invaluable for warranty claims and for any future maintenance access. Plan the first dinner party at least one week after commissioning so any small punch list items can be resolved before guests arrive.