How to Build an Outdoor Kitchen: Complete Step-by-Step Construction Guide
How to build an outdoor kitchen from foundation to first cookout in 4 to 12 weeks. Framing, utilities, countertops, finishes, and inspections in build order.
Outdoor Kitchen Setup Editorial Team
Outdoor living specialists with 15+ years of hands-on experience
Learning how to build an outdoor kitchen is one of the most rewarding home improvement projects you can tackle, whether you hire professionals for the technical work or take the full DIY approach with your own hands, tools, and sweat equity. The process involves far more than bolting a grill into a countertop. Building an outdoor kitchen properly means preparing a level, load-bearing foundation, constructing a weatherproof structural frame using steel studs or concrete masonry units, roughing in gas, electrical, and plumbing utilities to code, installing heat-resistant countertops and finishes, and weatherproofing every component to withstand years of sun, rain, freeze-thaw cycles, and heavy cooking use. The average outdoor kitchen construction project takes 4 to 12 weeks from groundbreaking to first cookout, depending on complexity, permits, and weather delays. Costs range from $5,000 for a simple DIY build with a single grill and concrete block base to $50,000 or more for a professionally constructed kitchen with premium appliances, natural stone countertops, covered structures, and full utility hookups. This guide walks you through every phase of construction in the exact order that experienced builders follow, from site selection and foundation prep through framing, utility rough-in, countertop installation, appliance mounting, finishing, and the final details that separate a kitchen that lasts 5 years from one that lasts 25. Whether you are a confident DIYer building your first outdoor kitchen or a homeowner who wants to understand the process before hiring a contractor, this step-by-step guide gives you the knowledge to make smart decisions at every stage.
Top Picks: Best How to Build an Outdoor Kitchen: Complete Step-by-Step Construction Guide in 2026
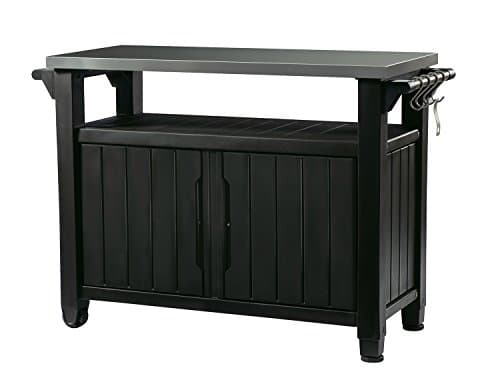
Keter Unity XL Portable Outdoor Table with Stainless Steel Top for Kitchen Prep and Outdoor Storage Cabinet for Grilling Accessories, Dark Grey
$220.99
Shop Now
TAOMAND Large 76 x 52 inches Under Grill Mats for Outdoor Grill | Double-Sided Fireproof | Waterproof | Oil-Proof | Easy to Clean | Indoor Fireplace/Fire Pit Mat | Quality BBQ Mat for Deck Patio Lawn
$33.99
Shop Now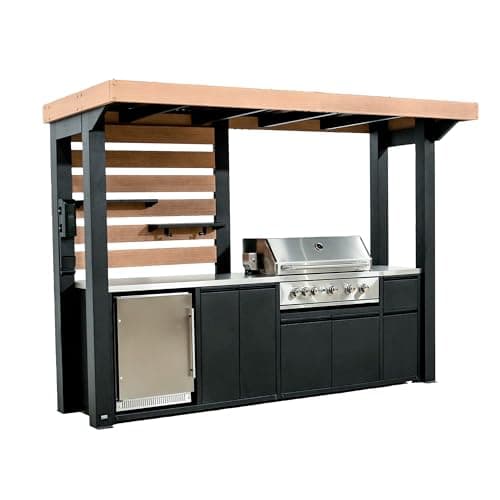
Backyard Discovery Fusion Flame Galvanized Steel Covered Outdoor Kitchen with 5-Burner Stainless, Grill, Refrigerator, Countertop, Storage, and, Roof for All-Season Outdoor Cooking, electric
$4,999.00
Shop Now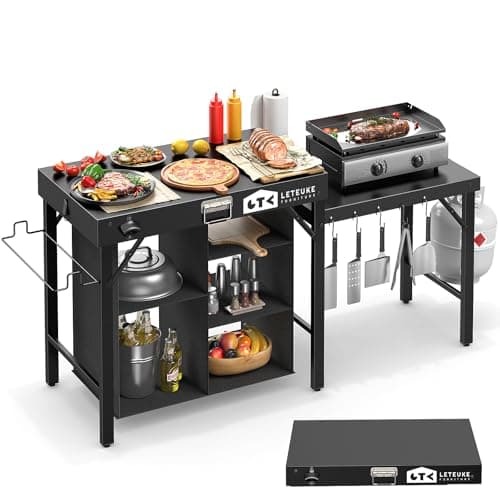
Leteuke Grill Table for Blackstone Griddle, Portable Foldable Grill Table with Storage Fits Ninja, Blackstone Griddle Stand for Outdoor Camping, Picnic, Garden, Patio, Dining, BBQ, Party
$159.99
Shop Now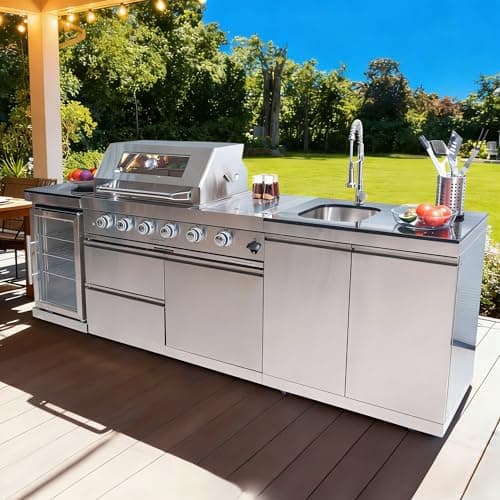
98 Inches Outdoor Kitchen Island, 4-Burner 72000 BTU Propane Stainless Steel BBQ with Side/Rear Burners, With Refrigerator and Sink, Rotisserie, Granite Countertops, Storage, For Backyard BBQ, Silver
$3,652.00
Shop Now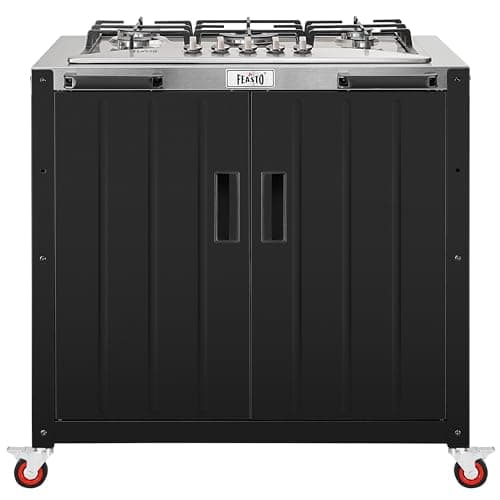
Feasto Gas Grill, Movable Outdoor Gas Stove Stainless Steel Top with Cabinet, 5 Burners with 36,200 BTUs, Outdoor Propane Grill for Outdoor Cooking, Ideal for Lawn & Garden, L35.4 x W24
$539.99
Shop Now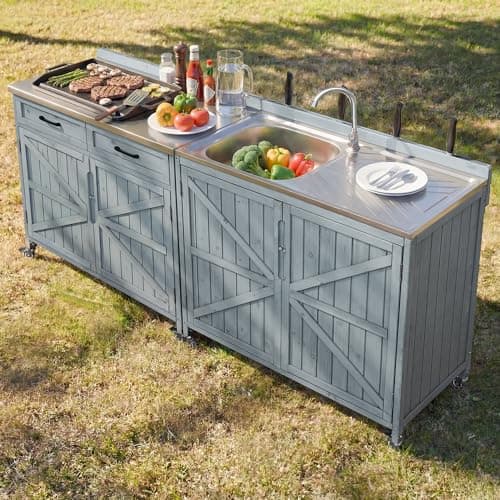
Merax 2 Piece Modular Outdoor Kitchen Series- Kitchen Grill Cart w/Stainless Steel Sink, Wood Rolling BBQ Prep Table w/Stainless Steel Top, Lockable Wheels for Patio & Outdoor Cooking, Grey Blue
$529.99
Shop Now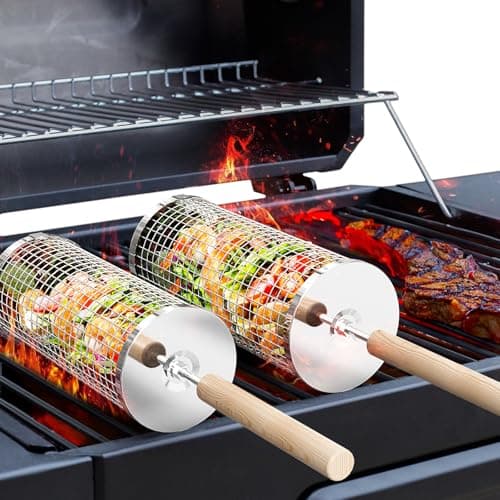
ivtivfu Rolling Grill Basket, Removable Wooden Handle, 304 Stainless Steel, Nesting BBQ Tools, Smoker Grilling Accessories for Vegetable, Outdoor Cooking Camping, Birthday Gifts for Men Dad Husband
$23.99
Shop NowKeter Unity XL Portable Outdoor Table with Stainless Steel Top for Kitchen Prep and Outdoor Storage Cabinet for Grilling Accessories, Dark Grey
$220.99
Shop NowTAOMAND Large 76 x 52 inches Under Grill Mats for Outdoor Grill | Double-Sided Fireproof | Waterproof | Oil-Proof | Easy to Clean | Indoor Fireplace/Fire Pit Mat | Quality BBQ Mat for Deck Patio Lawn
$33.99
Shop NowBackyard Discovery Fusion Flame Galvanized Steel Covered Outdoor Kitchen with 5-Burner Stainless, Grill, Refrigerator, Countertop, Storage, and, Roof for All-Season Outdoor Cooking, electric
$4,999.00
Shop NowLeteuke Grill Table for Blackstone Griddle, Portable Foldable Grill Table with Storage Fits Ninja, Blackstone Griddle Stand for Outdoor Camping, Picnic, Garden, Patio, Dining, BBQ, Party
$159.99
Shop Now98 Inches Outdoor Kitchen Island, 4-Burner 72000 BTU Propane Stainless Steel BBQ with Side/Rear Burners, With Refrigerator and Sink, Rotisserie, Granite Countertops, Storage, For Backyard BBQ, Silver
$3,652.00
Shop NowFeasto Gas Grill, Movable Outdoor Gas Stove Stainless Steel Top with Cabinet, 5 Burners with 36,200 BTUs, Outdoor Propane Grill for Outdoor Cooking, Ideal for Lawn & Garden, L35.4 x W24
$539.99
Shop NowMerax 2 Piece Modular Outdoor Kitchen Series- Kitchen Grill Cart w/Stainless Steel Sink, Wood Rolling BBQ Prep Table w/Stainless Steel Top, Lockable Wheels for Patio & Outdoor Cooking, Grey Blue
$529.99
Shop Nowivtivfu Rolling Grill Basket, Removable Wooden Handle, 304 Stainless Steel, Nesting BBQ Tools, Smoker Grilling Accessories for Vegetable, Outdoor Cooking Camping, Birthday Gifts for Men Dad Husband
$23.99
Shop NowStep 1: Site Selection and Foundation Preparation for Your Outdoor Kitchen
The single most important step in building an outdoor kitchen is choosing the right location and preparing a foundation that will support thousands of pounds of masonry, stone, and appliances without settling, cracking, or shifting over time. Start by selecting a site that is at least 10 feet from your home's exterior walls, preferably 15 to 20 feet if you plan to use charcoal or wood-burning equipment. The site should be accessible to existing utilities, because every additional foot of gas line trench, water supply extension, or electrical conduit run adds $15 to $40 in materials and labor. Check wind patterns by spending a few evenings in your backyard noting which direction smoke naturally drifts so you can orient the cooking zone to push smoke away from seating and the house.
Foundation options depend on your soil type and kitchen weight. A basic outdoor kitchen with a single grill, 8 feet of counter, and standard finishes weighs 2,000 to 4,000 pounds and can sit on an existing concrete patio slab that is at least 4 inches thick and in good condition with no major cracks or settling. If you are building on bare ground or your existing patio cannot handle the load, pour a new reinforced concrete pad. For most outdoor kitchens, a 4-inch-thick slab reinforced with number 3 rebar on 18-inch centers in both directions is sufficient, poured over 4 inches of compacted gravel base. Larger kitchens with stone veneer, granite countertops, and multiple heavy appliances should use a 6-inch slab with number 4 rebar. The concrete mix should be 4,000 PSI minimum for outdoor applications. Excavate to a depth that accommodates your gravel base, concrete thickness, and any utility trenches that need to pass under the slab. In cold climates with frost lines deeper than 24 inches, consider a thickened-edge slab or frost-protected shallow foundation to prevent heaving. Allow the concrete to cure for at least 7 days before beginning construction, with 28 days being ideal for full strength development. For deeper context on how this connects to a larger build, our main outdoor kitchen setup guide covers every related topic in detail.
Step 2: Structural Framing with Steel Studs or Concrete Masonry Units
The structural frame is the skeleton of your outdoor kitchen, and you have two primary options: light-gauge steel stud framing or concrete masonry units. Steel stud framing uses 20-gauge or 18-gauge galvanized steel studs, the same material used for interior commercial construction, assembled into a framework that is then sheathed with cement backer board. This method is faster, lighter, and easier to modify if you make a mistake. A typical 10-foot straight-line outdoor kitchen frame can be assembled in 4 to 6 hours by two people using self-tapping steel screws and a cordless impact driver. Purchase 3-5/8-inch steel studs for standard 25-inch-deep counter bases, spacing them at 16 inches on center. Frame the bottom track directly to the concrete slab using Tapcon concrete screws at 24-inch intervals. Build the front, back, and side walls separately on the ground, then tip them up and connect them with top track and cross bracing.
Concrete masonry unit construction uses standard 8-by-8-by-16-inch CMU blocks stacked and mortared into the counter base shape. CMU is heavier, takes longer to build, and costs more in labor, but it produces an incredibly rigid, heat-resistant, and virtually indestructible base. This method is preferred when building around high-heat appliances like offset smokers or wood-fired pizza ovens, and in hurricane-prone regions where wind resistance matters. Start by dry-laying your first course to verify dimensions, then set blocks in Type S mortar with 3/8-inch joints. Use a string line and 4-foot level on every course to maintain plumb and level. Fill cores with grout and insert number 4 rebar vertically every 48 inches for maximum strength. A 10-foot CMU kitchen base requires approximately 120 blocks at $1.50 to $3.00 each, 10 bags of mortar mix at $8 each, and 40 linear feet of rebar at $0.60 per foot. Regardless of framing method, create appliance openings by framing headers with doubled studs or using pre-formed CMU lintels that span the opening and transfer load to the sides. Verify all openings against your specific appliance manufacturer's cutout dimensions before proceeding.
Step 3: Utility Rough-In for Gas, Electrical, and Plumbing
Utility rough-in is the phase where most DIYers need to bring in licensed professionals, and for good reason. Gas, electrical, and plumbing work performed incorrectly creates genuine safety hazards including gas leaks, electrical fires, and water damage that can cost thousands to repair. Gas line installation must be performed by a licensed plumber or gas fitter in virtually every US jurisdiction. The standard approach is running a new gas line from your home's existing supply, typically a 3/4-inch black iron pipe or CSST flexible gas line, through a below-grade trench at least 18 inches deep, protected in a PVC sleeve if required by local code. The line enters the outdoor kitchen base through the foundation slab or a sidewall penetration sealed with fire-rated caulk. Install a manual shutoff valve accessible from outside the kitchen base, plus individual appliance shutoff valves within 6 feet of each gas connection point. After installation, the gas fitter performs a pressure test, typically holding 15 PSI of air pressure for 15 minutes with zero drop, before the inspector signs off.
Electrical rough-in requires a licensed electrician to run a minimum of one dedicated 20-amp circuit from your main panel to the outdoor kitchen for GFCI-protected receptacles. Use UF-rated (underground feeder) cable for any below-grade runs, or schedule 40 PVC conduit with individual THWN wires for above-grade runs that are exposed to weather. Position duplex outlets every 4 feet along the counter and at least 20 inches above the countertop surface, all on GFCI protection. If your plan includes an outdoor refrigerator, it needs its own dedicated 15 or 20-amp circuit because refrigerator compressor startup draws high amperage that can trip a shared circuit. For lighting, run a separate 15-amp circuit with a weatherproof switch. Plumbing rough-in for a sink requires 1/2-inch hot and cold supply lines run from an interior water source, along with a 1.5-inch drain line connected to your sewer system or a code-approved dry well. Install an anti-siphon backflow preventer on the supply side and ensure the drain line maintains a 1/4-inch-per-foot slope for proper gravity drainage. All utility work should be completed and inspected before closing up the frame with sheathing.
Step 4: Sheathing, Waterproofing, and Substrate Installation
Once your frame is built and utilities are roughed in and inspected, the next step is closing up the frame with sheathing material that creates a smooth, weather-resistant substrate for your finishing material. For steel stud frames, apply 1/2-inch cement backer board, such as James Hardie HardieBacker or USG Durock, to all exterior surfaces using 1-5/8-inch cement board screws at 8-inch intervals along each stud. Stagger the board joints so they do not align with stud seams, and leave a 1/8-inch gap between sheets filled with alkali-resistant mesh tape and thinset mortar to prevent cracking. Cement board is critical because it will not rot, swell, or deteriorate when exposed to moisture, unlike plywood or OSB, which should never be used in outdoor kitchen construction regardless of how well you think you have sealed them.
For CMU block bases, the block surface itself acts as the substrate, but you still need to apply a waterproof coating to the exterior and interior surfaces before finishing. Apply a brush-on or roll-on waterproofing membrane like RedGard or Laticrete Hydro Ban to all surfaces that will be covered by veneer or finish material. This membrane prevents moisture from wicking through the block and damaging adhesive bonds or creating efflorescence, the white mineral deposits that appear when moisture migrates through masonry. Pay particular attention to the top of the base where the countertop will sit. Apply two coats of waterproofing membrane to this surface and install a metal or rubber drip edge around the perimeter that directs water away from the base rather than allowing it to run down the face. For countertop support, install a layer of 3/4-inch exterior-grade plywood or cement board on top of the frame, supported by cross members at 12-inch intervals, creating a flat, level surface for the countertop material. Verify levelness across the entire surface within 1/8 inch using a 6-foot straightedge before proceeding to countertop installation. Any deviation greater than 1/8 inch will telegraph through thin stone countertops and create visible high or low spots.
Step 5: Countertop Selection and Installation
The countertop is the most visible element of your outdoor kitchen and the surface you interact with constantly, so choosing the right material and installing it correctly is essential for both aesthetics and long-term durability. Granite remains the most popular outdoor kitchen countertop, commanding approximately 45 percent of the market. It costs $40 to $100 per square foot installed, handles thermal shock from hot pots without cracking, and resists staining when sealed annually. For a 10-foot kitchen with 25 square feet of counter surface, expect to pay $1,000 to $2,500 for the granite alone. Order your granite slab from a local fabricator who will template on-site, cutting precise openings for your grill, sink, and any drop-in appliances using CNC water-jet or bridge-saw equipment. Templating takes about 1 hour, fabrication takes 5 to 10 business days, and installation takes 2 to 4 hours.
Concrete countertops are the preferred choice for budget-conscious builders and those wanting a truly custom look. Poured in place or pre-cast in forms, concrete countertops cost $15 to $30 per square foot for materials when you do the work yourself. Use a high-strength concrete mix like Quikrete 5000 (5,000 PSI) with a polymer additive like Fritz-Pak Super Plasticizer for improved workability and surface finish. Reinforce with 3/8-inch rebar or welded wire mesh positioned at mid-depth. Forms are built from melamine-coated particleboard, which produces a smooth finish and releases cleanly. After a minimum 3-day cure in the form, remove, flip, and seal with 3 to 4 coats of a penetrating concrete sealer like Ghostshield Lithi-Tek 4500 or Cheng Concrete Countertop Sealer. Concrete countertops require resealing every 1 to 2 years and may develop hairline cracks over time, which many homeowners consider part of the material's character. Other viable options include soapstone ($70 to $120 per square foot), which is naturally heat and stain resistant, and porcelain slab countertops like Dekton ($55 to $100 per square foot), which offer UV resistance and near-zero porosity. Avoid marble and standard quartz engineered stone, as marble stains instantly from BBQ sauce and quartz resin binders degrade in direct sunlight and crack above 300 degrees Fahrenheit.
Step 6: Appliance Installation and Gas/Electrical Connections
With the countertop in place, you can finally install the appliances that make your outdoor kitchen functional. Start with the heaviest item, typically the built-in grill. Most built-in grills are designed as drop-in units that rest on a support ledge or hang from the countertop cutout by a flange. Place the grill into its cutout and verify that the flange sits flush on the countertop surface with no gaps or rocking. If the grill includes a mounting bracket kit, secure it to the underside of the countertop or the internal frame using the provided hardware. Connect the gas supply line using a flexible stainless steel appliance connector, commonly 1/2-inch diameter and 24 to 48 inches long, available at any hardware store for $15 to $30. Apply gas-rated thread sealant tape, the yellow PTFE tape rated for gas, not the white tape intended for water, to all threaded connections. Tighten connections to manufacturer specifications, typically hand-tight plus one full turn with a wrench.
After connecting all gas appliances, perform a leak test by brushing every connection point with a soap-and-water solution, one tablespoon of dish soap per cup of water, and slowly turning on the gas supply. Bubbles at any connection point indicate a leak that must be corrected before using the appliance. Refrigerator installation is straightforward: slide the unit into its designated opening, verify level using the adjustable feet, and plug into the dedicated GFCI outlet. Leave 2 inches of clearance on all sides for ventilation, as outdoor refrigerator compressors run harder in warm ambient temperatures and need airflow to dissipate heat. Sink installation involves setting the basin into the countertop cutout, applying a bead of outdoor-rated silicone caulk around the rim, and connecting the hot and cold supply lines with braided stainless steel connectors. Attach the P-trap to the drain stub and run a water test, checking every connection for drips. For access doors and drawers, mount the frames to the steel stud structure using self-tapping screws, ensuring the doors swing freely without hitting the countertop edge. The entire appliance installation phase takes 1 to 2 days for a typical outdoor kitchen with 3 to 5 components.
Step 7: Exterior Finishing with Stone Veneer, Stucco, or Tile
The exterior finish transforms your outdoor kitchen from a raw construction project into a beautiful backyard centerpiece. Natural stone veneer is the most popular finishing material, chosen by roughly 40 percent of outdoor kitchen builders. Thin-cut stone veneer from manufacturers like Eldorado Stone, Cultured Stone, or Natural Stone Veneers International ranges from $8 to $25 per square foot for material, plus $10 to $18 per square foot for professional installation. Application begins with a scratch coat of mortar, a 3/8-inch layer of Type S mortar troweled onto the cement board substrate and raked with a notched trowel to create a bonding surface. Let the scratch coat cure 24 hours, then apply veneer stones from the bottom up using a 1/2-inch mortar bed, pressing each stone firmly and supporting it with temporary shims until the mortar sets. Grout the joints after 24 hours using a mortar bag, then tool smooth with a jointing tool.
Stucco is the most affordable exterior finish at $6 to $12 per square foot installed, and it delivers a clean, modern look that complements contemporary outdoor kitchen designs. A traditional three-coat stucco application includes a scratch coat, brown coat, and finish coat, each requiring a 24 to 48-hour cure between layers. Use a stucco mix rated for exterior applications with an acrylic additive for improved crack resistance and weather durability. Choose an integral color to avoid repainting; popular outdoor kitchen stucco colors include warm sand, desert tan, and slate gray. For tile finishes, outdoor-rated porcelain tiles with a minimum 0.60 slip resistance rating are the correct choice. Standard ceramic tile and glass mosaic tiles are not suitable for outdoor vertical applications because freeze-thaw cycling causes delamination within 2 to 3 seasons. Install porcelain tile using a polymer-modified thinset mortar rated for exterior use, such as Laticrete 254 Platinum or Custom Building Products MegaFlex, and grout with a sanded polyurethane grout like TEC Power Grout that resists moisture and UV degradation. Regardless of finish material, apply a penetrating sealer to all exterior surfaces after installation to protect against water absorption, staining, and efflorescence.
Construction Timeline, Final Inspections, and First Use
Understanding the realistic timeline for building an outdoor kitchen prevents frustration and helps you plan around weather, delivery delays, and inspector availability. A basic DIY outdoor kitchen built on an existing patio with a steel stud frame, cement board sheathing, stucco finish, concrete countertop, and a single built-in grill takes 5 to 8 weekends of work, assuming 6 to 8 hours per weekend day. Phase 1, framing and sheathing, takes 2 weekends. Phase 2, utility rough-in by licensed trades plus inspection, takes 1 to 2 weeks including scheduling. Phase 3, countertop fabrication and installation, takes 1 to 3 weeks depending on material and fabricator lead time. Phase 4, exterior finishing, takes 1 to 2 weekends. Phase 5, appliance installation and connections, takes 1 weekend. Add 1 to 2 weeks for drying and curing times between phases that cannot be rushed.
Professional builds compress this timeline significantly. An experienced outdoor kitchen contractor with a dedicated crew completes most mid-range projects in 2 to 4 weeks of active construction, though material lead times, especially for granite countertops and custom appliances, can stretch the total project duration to 6 to 10 weeks from contract signing to completion. Before your first use, schedule all required final inspections. Most jurisdictions require separate inspections for gas installation, electrical work, plumbing, and the overall structure. Failed inspections must be corrected and re-inspected before you can legally use the kitchen. Common inspection failure points include insufficient gas line pressure test results, GFCI outlets that are not correctly wired, drain lines without proper slope, and structural connections that do not match the approved plans. Once inspections pass, do a complete dry run: fire up the grill, run all burners on high for 30 minutes to burn off manufacturing residues, run water through the sink checking every connection, and test every outlet with a circuit tester. Your outdoor kitchen is now ready for its inaugural cook, and after all the planning and construction work, that first meal tastes better than anything you have ever made indoors.