Outdoor Kitchen Kits: Best Ready-to-Build Kits Reviewed for 2026
Outdoor kitchen kits bundle frame, finish, and countertop into weekend-assembly packages. Compare $2K compact units to $20K multi-section systems by build time.
Outdoor Kitchen Setup Editorial Team
Outdoor living specialists with 15+ years of hands-on experience
Top Picks: Best Outdoor Kitchen Kits: Best Ready-to-Build Kits Reviewed for 2026 in 2026
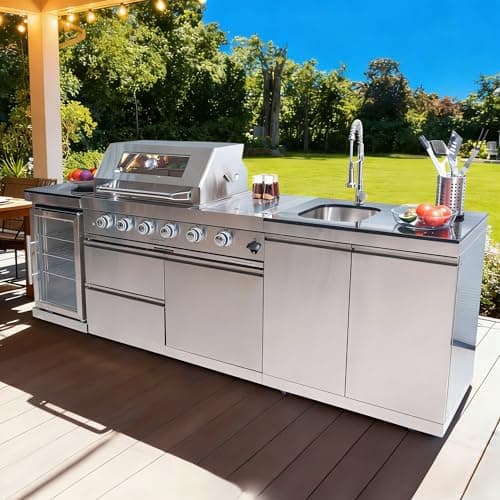
98 Inches Outdoor Kitchen Island, 4-Burner 72000 BTU Propane Stainless Steel BBQ with Side/Rear Burners, With Refrigerator and Sink, Rotisserie, Granite Countertops, Storage, For Backyard BBQ, Silver
$3,652.00
Shop Now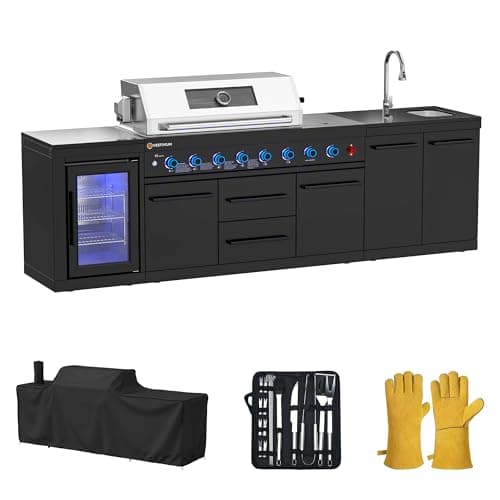
VESTIVIUM 112" All-in-One Outdoor Kitchen, 8-Burner Modular Grill Station, Powder Coating Black SS304 & Black Granite, Sink, Fridge, Complete BBQ Set for Large Patios & Backyards (Propane)
$5,599.00
Shop Now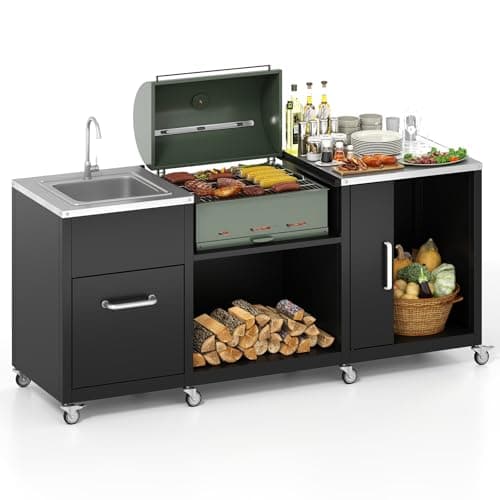
Happygrill 80” Outdoor Grill Table with Sink & Drainage, Heavy Duty Metal Grill Cart w/Cabinet & Removable Stainless Steel Top, Portable Prep Cooking Table w/Wheels for BBQ, Patio, Camping & Backyard
$459.99
Shop Now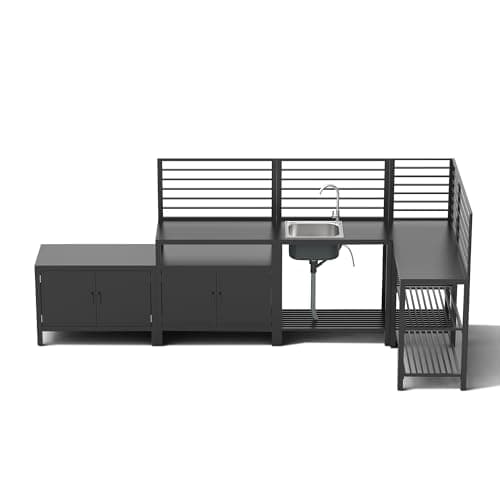
Domi Outdoor Kitchen Island, 5-Piece Modular Kitchens Counter with Whole Aluminum Finish & Shelf & Wall Hanging & Countertop & Sink & Storage Box & Cover, Kitchen Series for Deck Patio, Dark Gray
$1,249.99
Shop Now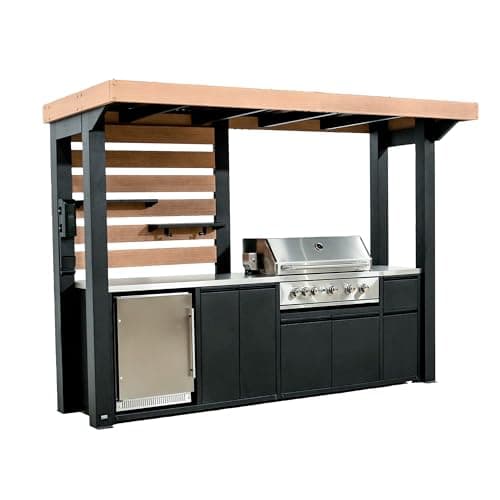
Backyard Discovery Fusion Flame Galvanized Steel Covered Outdoor Kitchen with 5-Burner Stainless, Grill, Refrigerator, Countertop, Storage, and, Roof for All-Season Outdoor Cooking, electric
$4,999.00
Shop Now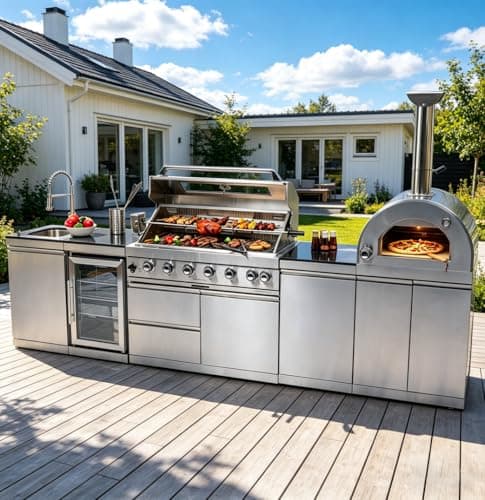
128-Inch Stainless Steel Outdoor Kitchen Island, Propane BBQ Grill with Pizza Oven, Rotisserie, Refrigerator, Granite Countertop, Storage Cabinets & Drawers 120,000 BTU
$6,999.99
Shop Now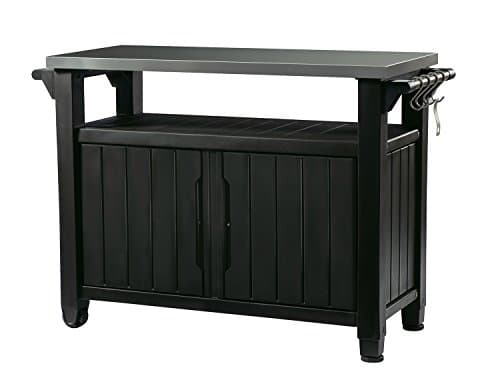
Keter Unity XL Portable Outdoor Table with Stainless Steel Top for Kitchen Prep and Outdoor Storage Cabinet for Grilling Accessories, Dark Grey
$220.99
Shop Now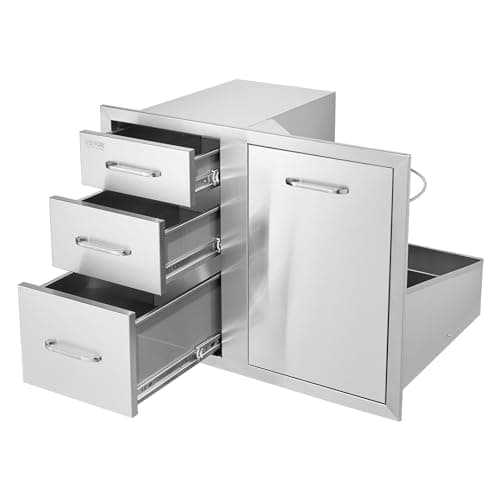
VEVOR Stainless Steel Cabinet, Outdoor Kitchen Door Drawer Combo 29.5" W x 22.6" H x 21.7" D, Access Door/Triple Drawers, Propane Drawer, Adjustable Garbage Ring, BBQ Island Patio Grill Station
$341.99
Shop Now98 Inches Outdoor Kitchen Island, 4-Burner 72000 BTU Propane Stainless Steel BBQ with Side/Rear Burners, With Refrigerator and Sink, Rotisserie, Granite Countertops, Storage, For Backyard BBQ, Silver
$3,652.00
Shop NowVESTIVIUM 112" All-in-One Outdoor Kitchen, 8-Burner Modular Grill Station, Powder Coating Black SS304 & Black Granite, Sink, Fridge, Complete BBQ Set for Large Patios & Backyards (Propane)
$5,599.00
Shop NowHappygrill 80” Outdoor Grill Table with Sink & Drainage, Heavy Duty Metal Grill Cart w/Cabinet & Removable Stainless Steel Top, Portable Prep Cooking Table w/Wheels for BBQ, Patio, Camping & Backyard
$459.99
Shop NowDomi Outdoor Kitchen Island, 5-Piece Modular Kitchens Counter with Whole Aluminum Finish & Shelf & Wall Hanging & Countertop & Sink & Storage Box & Cover, Kitchen Series for Deck Patio, Dark Gray
$1,249.99
Shop NowBackyard Discovery Fusion Flame Galvanized Steel Covered Outdoor Kitchen with 5-Burner Stainless, Grill, Refrigerator, Countertop, Storage, and, Roof for All-Season Outdoor Cooking, electric
$4,999.00
Shop Now128-Inch Stainless Steel Outdoor Kitchen Island, Propane BBQ Grill with Pizza Oven, Rotisserie, Refrigerator, Granite Countertop, Storage Cabinets & Drawers 120,000 BTU
$6,999.99
Shop NowKeter Unity XL Portable Outdoor Table with Stainless Steel Top for Kitchen Prep and Outdoor Storage Cabinet for Grilling Accessories, Dark Grey
$220.99
Shop NowVEVOR Stainless Steel Cabinet, Outdoor Kitchen Door Drawer Combo 29.5" W x 22.6" H x 21.7" D, Access Door/Triple Drawers, Propane Drawer, Adjustable Garbage Ring, BBQ Island Patio Grill Station
$341.99
Shop NowWhat Comes in an Outdoor Kitchen Kit and What You Need to Supply
The contents of an outdoor kitchen kit vary significantly by manufacturer and price point, so understanding exactly what is included and what you need to supply separately is critical for accurate budgeting. At minimum, most kits include the structural frame, which is typically a welded steel chassis or a concrete board panel system with metal framing, and the exterior finish material, which may be pre-applied stone veneer panels, stucco-finished panels, or tile-ready cement board. Many mid-range and premium kits also include a countertop, either a granite slab, a concrete composite, or a porcelain panel that ships pre-cut with grill and sink cutouts.
What kits typically do not include falls into two categories: appliances and utilities. Most kits at the entry and mid-range level are designed as appliance-ready frameworks, meaning you purchase your grill, refrigerator, sink, and other appliances separately and drop them into the pre-cut openings. This approach gives you flexibility to select your preferred brands and models but adds $1,500 to $8,000 to the total project cost depending on your appliance choices. On the utility side, no kit includes gas piping, water supply lines, drain plumbing, or electrical wiring, and these connections require a licensed professional in most jurisdictions. Budget $500 to $2,000 for professional utility hookups depending on the distance from existing supply lines. A few premium kit brands like RTF Systems and RTA Outdoor Living offer all-inclusive packages that bundle compatible appliances at a discounted package price, which simplifies the buying process and ensures everything fits perfectly. Always request a complete contents list from the manufacturer before purchasing so you can calculate the true all-in cost. For a full overview of every component, layout option, and design path, see our complete outdoor kitchen setup guide.
Types of Outdoor Kitchen Kits: Frame-Only, Finish-Ready, and Complete Systems
Outdoor kitchen kits fall into three general categories, each offering a different balance of cost, customization, and assembly effort. Frame-only kits provide the structural skeleton, typically welded steel or aluminum, with pre-cut openings for appliances and access doors. You supply and install the exterior finish, countertop, and all appliances. Frame-only kits are the most affordable option at $800 to $3,000 and offer the most customization since you choose your own finish materials. However, they require the most additional work and material purchasing, making the total project cost and timeline comparable to a semi-custom build.
Finish-ready kits include the frame and pre-applied or easy-to-install exterior panels, but leave the countertop and appliance selection to you. The exterior panels typically feature a realistic stone, brick, or stucco texture and attach to the frame with screws or clips. This category represents the sweet spot for most homeowners, costing $2,000 to $8,000 for the kit alone and delivering an attractive finished look with significantly less labor than applying stone veneer or stucco from scratch. Complete system kits are the most comprehensive option, bundling the frame, finish panels, countertop, and in some cases a matched set of appliances into a single shipment. Prices range from $5,000 to $20,000 depending on size and appliance quality. Complete systems minimize decision fatigue and ensure component compatibility, making them ideal for buyers who want a turnkey solution. The trade-off is reduced customization since you accept the manufacturer's chosen countertop material, finish style, and included appliance brands.
How to Evaluate Outdoor Kitchen Kit Quality Before You Buy
Not all outdoor kitchen kits are created equal, and the difference between a kit that lasts a decade and one that deteriorates in two years often comes down to material quality and engineering details that are not immediately obvious from marketing photos. Start by examining the frame material and gauge. Premium kits use 16-gauge or thicker galvanized steel or aluminum frames with welded joints. Budget kits may use 20-gauge steel with riveted connections that can loosen over time. Ask the manufacturer for the specific gauge and material grade if it is not listed in the product specifications.
Next, evaluate the exterior finish system. Pre-applied stone veneer panels should be made from high-density polyurethane or natural thin-cut stone bonded to cement board, not lightweight plastic that fades and warps under UV exposure. Check whether the panels connect with tongue-and-groove joints or simple butt joints. Tongue-and-groove connections create a tighter, more weatherproof seam. For countertops, verify the material thickness. Granite and quartzite countertops should be at least three-quarters of an inch thick, and ideally one and a quarter inches, to resist cracking from thermal shock when a hot pan is placed on the surface. Concrete composite tops should be at least one and a half inches thick and fiber-reinforced. Also investigate the warranty terms. Quality manufacturers offer a structural warranty of five to ten years on the frame and one to three years on finish materials. Avoid kits with warranties under two years or those that exclude weather-related damage, which is the primary degradation mechanism for any outdoor product. Finally, read verified buyer reviews focusing on three to five year ownership experiences rather than initial impressions, as material quality issues typically surface after the first or second year of weather exposure.
Assembly Difficulty: What It Really Takes to Build an Outdoor Kitchen Kit
Manufacturers universally describe their kits as easy to assemble, but real-world assembly difficulty varies considerably. Having reviewed and consulted on dozens of kit installations, we can provide a realistic assessment of what to expect. The simplest kits are compact single-island systems with a pre-welded frame, pre-attached finish panels, and a one-piece countertop. These can genuinely be assembled by two people in three to five hours using only a drill, adjustable wrench, and level. You are essentially setting the frame in position, leveling it, and placing the countertop on top. Drop in the grill and connect the gas line, and you are cooking.
Mid-range kits with separate frame sections, individual finish panels, and multi-piece countertops require more effort and attention to detail. Expect a full day of work for two people, including time spent aligning panels, shimming for level, and making precise cutout adjustments if your appliances differ slightly from the manufacturer's reference dimensions. The most common assembly challenges at this level are achieving perfectly flush panel seams and getting the countertop sections to align without visible gaps. A tube of color-matched exterior caulk solves most cosmetic imperfections. Large multi-section kits with L-shaped or U-shaped configurations, multiple countertop pieces, and integrated electrical or plumbing provisions are legitimately two-day projects for two experienced DIYers. These kits often have 200-plus individual components and assembly instructions that span 40 or more pages. If you are uncomfortable with this level of complexity, most kit manufacturers offer professional assembly services for $500 to $2,000, which is still dramatically less than building a custom kitchen from scratch.
Best Outdoor Kitchen Kits for 2026: Top Picks by Budget
After extensive research, testing, and feedback analysis, here are our top outdoor kitchen kit recommendations for 2026 across three budget tiers. In the budget category under $5,000, the best overall value comes from kits that use a galvanized steel frame with stacked-stone style polyurethane panels and a concrete composite countertop. These kits typically include a straight-line island measuring 6 to 8 feet long with a grill cutout, one double-door storage cabinet, and a countertop with a built-in condiment tray. The build quality at this price has improved dramatically, with thicker frames and more realistic finish textures than budget kits from even two years ago. You will need to purchase the grill separately, so factor in an additional $500 to $2,000 depending on the brand you choose.
In the mid-range $5,000 to $12,000 tier, the best kits add an L-shaped configuration, a sink station with a pre-plumbed basin, a dedicated refrigerator cabinet, and a natural granite or quartzite countertop. The frame construction at this price typically steps up to 16-gauge galvanized steel with welded connections, and the finish panels use higher-quality materials that better withstand prolonged UV and moisture exposure. Several brands in this tier offer a choice of finish styles, letting you match your home's exterior architecture. For the premium tier above $12,000, the top kits provide a U-shaped or large L-shaped configuration with full-thickness granite countertops, soft-close storage doors, integrated LED lighting, and in some cases bundled appliances from brands like Blaze or Bull. These premium kits approach the look and functionality of a $30,000 custom build at a fraction of the cost and are best suited for homeowners who plan to stay in their home long-term and want a showpiece outdoor entertaining space.
Outdoor Kitchen Kits vs DIY Custom Builds: A Direct Comparison
The decision between an outdoor kitchen kit and a ground-up DIY custom build depends on your skills, time availability, budget flexibility, and desired outcome. A kit wins decisively on speed and simplicity. What takes a skilled DIYer four to eight weekends to build from scratch can be assembled from a kit in one to two days. Kits also eliminate design risk because the proportions, structural engineering, and component compatibility have been worked out by the manufacturer. You know exactly what the finished product will look like before you buy it, whereas a DIY build requires you to visualize and execute the design simultaneously.
A custom DIY build wins on flexibility, potential cost savings, and the satisfaction of building something entirely your own. You can create any layout, accommodate unusual site conditions, choose from the full range of finish materials rather than being limited to what a kit manufacturer offers, and potentially save 20 to 30 percent compared to a premium kit by sourcing materials directly. The custom route also allows you to build in phases, completing the structure first and adding finish details and appliances as your budget allows. The best candidates for a kit are homeowners who value convenience, have a standard patio space, and want a predictable result with minimal construction experience. The best candidates for a custom DIY build are experienced builders who enjoy the construction process, have a non-standard space or specific design vision, and are comfortable troubleshooting issues that arise during construction. A hybrid approach also works well: purchase a frame-only kit for the proven structural engineering and then customize the exterior finish, countertop, and appliances to your exact preferences.
Site Preparation and Foundation Requirements for Outdoor Kitchen Kits
Proper site preparation is essential for a successful outdoor kitchen kit installation, yet it is the step most often overlooked by eager buyers who want to jump straight into assembly. Every kit manufacturer requires a level, stable surface capable of supporting the weight of the completed kitchen, which typically ranges from 1,500 to 6,000 pounds depending on size and material. If you have an existing concrete patio in good condition, you may be ready to assemble immediately after confirming the surface is level within one-quarter inch across the kitchen footprint. Use a long straightedge and level to check, and note any low spots that might need to be addressed with self-leveling compound.
If you do not have an existing patio or your current surface is inadequate, you have two primary options. The first is pouring a concrete pad, which is the most stable and permanent foundation. Excavate to six inches below grade, add four inches of compacted gravel, and pour a four-inch reinforced concrete slab. Allow 48 hours of curing before placing the kit. The second option is installing a compacted paver base. Excavate to eight inches below grade, add six inches of compacted gravel in two-inch lifts, spread one inch of leveling sand, and lay pavers in a running bond or herringbone pattern. Pavers provide a solid base for most kits, though very heavy premium configurations with thick granite countertops are better served by a poured slab. Regardless of foundation type, ensure the surface drains away from your home and any adjacent structures at a minimum slope of one-quarter inch per foot. Also verify that the planned location provides adequate clearance from combustible materials such as wood fences, vinyl siding, and overhead structures. Most grill manufacturers require a minimum of 36 inches of clearance on all sides from combustible surfaces.
Long-Term Maintenance and Warranty Considerations for Outdoor Kitchen Kits
Maintaining an outdoor kitchen kit is generally simpler than maintaining a custom masonry build because the manufactured panels and coatings are engineered for weather resistance from the factory. However, regular maintenance is still necessary to maximize the kit's lifespan and keep it looking like new. Clean the exterior finish panels quarterly using a mild soap solution and a soft bristle brush. Avoid pressure washers on stone veneer panels, as the high-pressure spray can dislodge individual stones or penetrate the panel bond and cause delamination from behind. For stainless steel components, use a dedicated stainless cleaner monthly, always wiping in the direction of the grain to avoid scratching.
Countertop maintenance depends on the material. Granite and quartzite should be sealed with a penetrating stone sealer every 12 months. Apply the sealer to a clean, dry surface, allow it to absorb for 15 minutes, then buff off the excess. Concrete composite countertops benefit from the same sealing schedule using a concrete-specific sealer. Inspect all hardware connections, including panel mounting screws, countertop clips, and frame bolts, every spring and tighten any that have loosened from thermal expansion cycles. Check caulked seams between panels and between the countertop and base for signs of cracking or peeling, and re-caulk as needed with an exterior-grade silicone sealant. On the warranty front, register your kit with the manufacturer immediately after purchase, as many warranties require registration within 30 days. Keep your receipt and take photos during assembly showing proper installation, as warranty claims are sometimes denied when the manufacturer determines that assembly errors caused the failure. A well-maintained outdoor kitchen kit should deliver 10 to 20 years of reliable service, and many manufacturers offer replacement panels and hardware for kits that are no longer in production.