Outdoor Kitchen Planning: A Complete Phase-by-Phase Guide From Idea to Install
Outdoor kitchen planning explained step by step — site selection, sizing, utilities, permits, timelines, climate prep,
Outdoor Kitchen Setup Editorial Team
Outdoor living specialists with 15+ years of hands-on experience
Top Picks: Best Outdoor Kitchen Planning: A Complete Phase-by-Phase Guide From Idea to Install in 2026
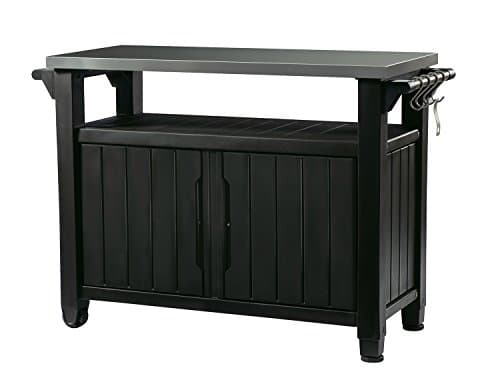
Keter Unity XL Portable Outdoor Table with Stainless Steel Top for Kitchen Prep and Outdoor Storage Cabinet for Grilling Accessories, Dark Grey
$220.99
Shop Now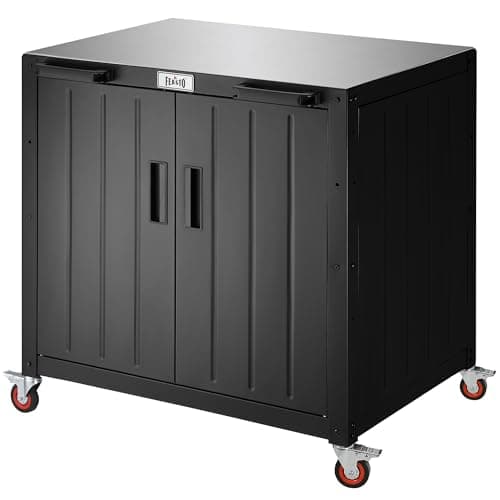
Feasto Outdoor Grill Cart with Storage Cabinet and Stainless Steel Top, 35-Inch Outdoor Grill Station with Door, Modular Kitchen Island for Food Prep and BBQ, Black & Silver
$219.99
Shop Now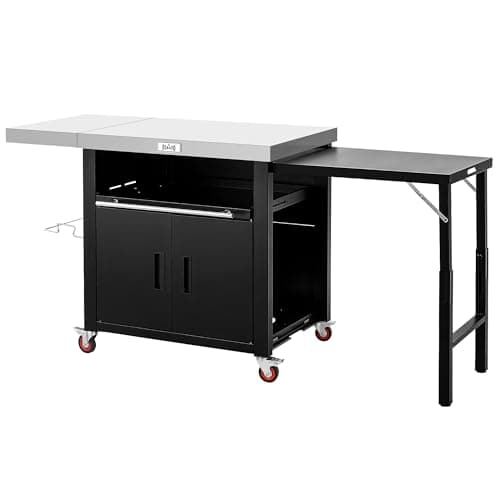
Feasto Outdoor Kitchen Island with Cabinet, Outdoor Grill Table with Stainless Steel Top for Pizza Oven& Griddles, Movable Bar Cart with Pull-Out Plate for Parties& Gathering, Heavy-Duty, L74”x W24”
$259.99
Shop Now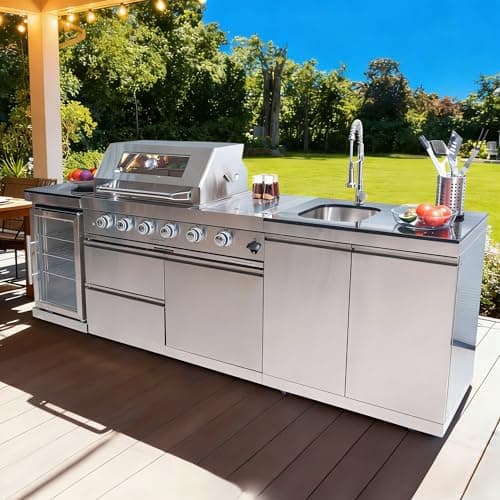
98 Inches Outdoor Kitchen Island, 4-Burner 72000 BTU Propane Stainless Steel BBQ with Side/Rear Burners, With Refrigerator and Sink, Rotisserie, Granite Countertops, Storage, For Backyard BBQ, Silver
$3,652.00
Shop Now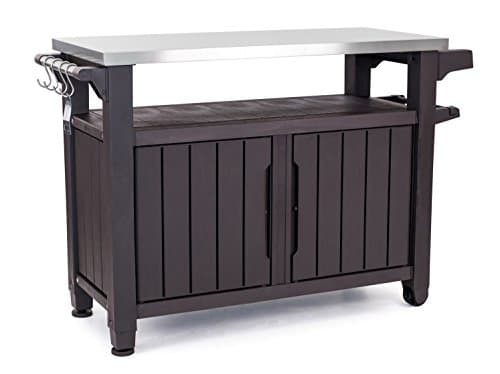
Keter Outdoor Rolling Table Cart for Food Prep, Storage, Bar & Grill, Dark Brown - Portable Kitchen Island Tabletop with Wheels for Drinks, Snacks, and Cooking
$265.99
Shop Now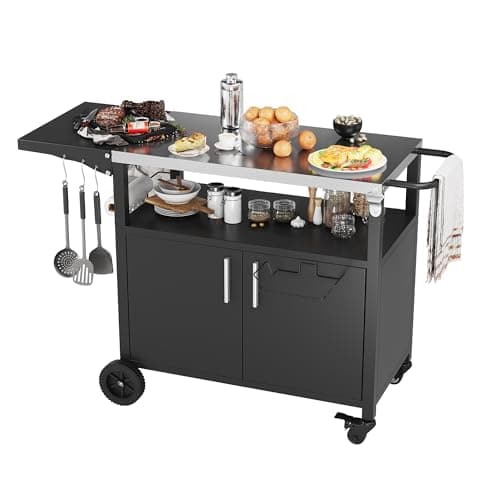
JY QAQA Outdoor Grill Cart with Storage,Patio Kitchen Island Outdoor Grill Table with Wheels,BBQ Cart Movable Pizza Oven Table Stand, Storage Cabinet, Foldable Tabletop, (Black)
$135.98
Shop Now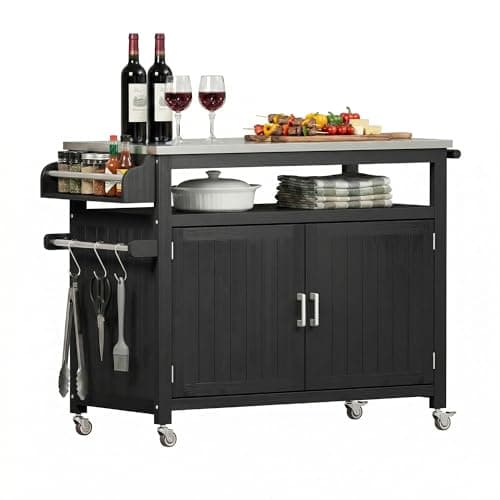
FUQARHY 43.3-Inch Outdoor Kitchen Island with Storage Cabinet and Stainless Steel Top, Solid Wood Prep Station Grill Table with Lockable Wheels for Patio, Backyard, Party (Black)
$199.99
Shop Now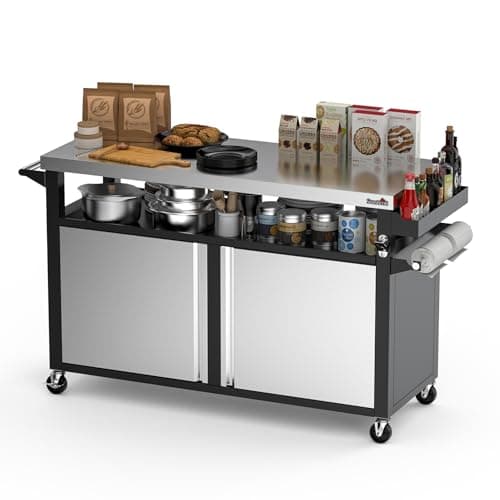
Stanbroil Rolling Outdoor Kitchen Island, BBQ Grill Cart with Stainless Steel Table Top, Double-Door Storage Cabinet & Pull-Out Shelf, Grill Table Cart for Outdoor Indoor, Large
$519.99
Shop NowKeter Unity XL Portable Outdoor Table with Stainless Steel Top for Kitchen Prep and Outdoor Storage Cabinet for Grilling Accessories, Dark Grey
$220.99
Shop NowFeasto Outdoor Grill Cart with Storage Cabinet and Stainless Steel Top, 35-Inch Outdoor Grill Station with Door, Modular Kitchen Island for Food Prep and BBQ, Black & Silver
$219.99
Shop NowFeasto Outdoor Kitchen Island with Cabinet, Outdoor Grill Table with Stainless Steel Top for Pizza Oven& Griddles, Movable Bar Cart with Pull-Out Plate for Parties& Gathering, Heavy-Duty, L74”x W24”
$259.99
Shop Now98 Inches Outdoor Kitchen Island, 4-Burner 72000 BTU Propane Stainless Steel BBQ with Side/Rear Burners, With Refrigerator and Sink, Rotisserie, Granite Countertops, Storage, For Backyard BBQ, Silver
$3,652.00
Shop NowKeter Outdoor Rolling Table Cart for Food Prep, Storage, Bar & Grill, Dark Brown - Portable Kitchen Island Tabletop with Wheels for Drinks, Snacks, and Cooking
$265.99
Shop NowJY QAQA Outdoor Grill Cart with Storage,Patio Kitchen Island Outdoor Grill Table with Wheels,BBQ Cart Movable Pizza Oven Table Stand, Storage Cabinet, Foldable Tabletop, (Black)
$135.98
Shop NowFUQARHY 43.3-Inch Outdoor Kitchen Island with Storage Cabinet and Stainless Steel Top, Solid Wood Prep Station Grill Table with Lockable Wheels for Patio, Backyard, Party (Black)
$199.99
Shop NowStanbroil Rolling Outdoor Kitchen Island, BBQ Grill Cart with Stainless Steel Table Top, Double-Door Storage Cabinet & Pull-Out Shelf, Grill Table Cart for Outdoor Indoor, Large
$519.99
Shop NowPhase 1: Concept and Lifestyle Audit (Week 1-2)
Solid outdoor kitchen planning begins not with a Pinterest board but with an honest lifestyle audit. Spend the first one to two weeks answering specific questions before you draw a single line. How many people do you cook for on a typical weekend — four, eight, or sixteen? Do you grill primarily (steak, burgers, vegetables) or do you also smoke (brisket, ribs), bake (pizza, bread), or fry (turkey, fish)? Each cooking style implies different appliances and clearances. A pellet smoker like the Traeger Ironwood XL needs 12 inches of side clearance and a 120V outlet, while a built-in pizza oven such as the Alfa Forninox runs around 800 degrees Fahrenheit and requires a non-combustible surround.
Document how often you actually entertain. The National Association of Home Builders found that homeowners overestimate entertaining frequency by roughly 40 percent — meaning a $50,000 U-shape kitchen designed for parties of 20 may sit unused 51 weekends per year. Be ruthlessly honest. Build a written brief covering daily use, monthly use, and once-a-year use scenarios, then prioritize features that serve the first two. Save this brief; it becomes the rubric your contractor and designer will reference at every decision point.
Phase 2: Site Selection and Backyard Survey (Week 2-3)
The second outdoor kitchen planning phase is the site survey, and it is the step DIY homeowners most often skip. Walk your property with a tape measure, a compass, and a notepad at three different times of day — 10 a.m., 2 p.m., and 6 p.m. — to map sun, shade, and prevailing wind direction. Smoke from a charcoal grill drifts roughly 20 to 40 feet downwind, so position the grill where the prevailing breeze carries smoke away from the house, not toward dining areas or open windows.
Measure setbacks from the property line (typically 5 to 10 feet for accessory structures), septic fields (usually 10 feet minimum), well heads (often 25 to 50 feet), and the house itself (3 feet minimum from any combustible siding for an open grill, more for a wood-fired oven). Note the slope of the existing grade — anything over 2 percent will require leveling or a stepped design. Locate buried utilities by calling 811 (free in the U.S., 2-3 business day response). Photograph everything from four cardinal directions. This documentation protects you when zoning officials, contractors, or HOAs ask follow-up questions later.
Phase 3: Sizing and Capacity Decisions (Week 3-4)
Sizing is where outdoor kitchen planning translates wishful thinking into real square footage. The general rule of thumb: budget 4 to 6 linear feet of countertop per cook, plus a minimum 36-inch clear walkway behind any work zone. A two-cook kitchen serving 6 to 8 guests typically needs an 8-to-10-foot run; a four-cook kitchen serving 16 needs 14 to 18 linear feet, often arranged in an L or U.
Match capacity to your appliances. A 36-inch built-in grill cooks roughly 25 burgers at once or 3 racks of ribs — adequate for parties up to 12. Step up to a 42-inch grill (Lynx 42, DCS Series 9) for groups of 12 to 20. For refrigeration, plan 5.5 cubic feet per 8 guests; a 24-inch outdoor refrigerator like the Blaze BLZ-SSRF130 holds about 5.2 cu ft and serves a typical family. Add a separate 15-inch beverage center if you entertain frequently. For seating, a bar-height counter at 42 inches accommodates 30-inch barstools and seats one person per 24 inches of length comfortably. Document each appliance's exact cutout dimensions before designing the cabinet runs — manufacturer spec sheets are available as PDFs from every major brand.
Phase 4: Utility Planning — Gas, Electric, Water, and Drainage (Week 4-6)
Utility planning is the most technically demanding stage of outdoor kitchen planning, and it is where unlicensed DIY work most often fails inspection. For gas, calculate total BTU load: a typical built-in grill draws 60,000 to 90,000 BTU/hr, a side burner adds 20,000 to 30,000, a pizza oven adds 40,000 to 70,000, and a power burner adds 60,000. A 1/2-inch gas line at 20 feet from the meter delivers about 110,000 BTU; a 3/4-inch line at the same distance carries 230,000 BTU. Most full outdoor kitchens require a 3/4-inch or 1-inch supply line, sometimes with a dedicated regulator.
For electrical, plan a minimum of one 20-amp GFCI-protected circuit per appliance with a motor or heating element. Refrigerators, ice makers, beverage centers, and pellet grills each draw their own circuit. A complete outdoor kitchen typically needs 40 to 80 amps of dedicated capacity, often pulled from a sub-panel. For water, run 1/2-inch PEX or copper supply with a frost-free hose bib and an isolation valve indoors so you can winterize without crawling underneath. Drain to a 2-inch waste line tied into the home's sanitary sewer or a permitted gray-water dry well — not into a flower bed, which violates code in most jurisdictions.
Phase 5: Layout Selection and Workflow Design (Week 5-6)
With sizing and utilities locked, outdoor kitchen planning moves to layout. Apply the kitchen work-triangle principle adapted for outdoor cooking: grill (heat zone), prep counter (cold zone with sink), and refrigeration (storage zone) should form a triangle with each leg between 4 and 9 feet. Anything tighter creates congestion; anything wider wastes steps.
For a single-cook layout, a straight 10-foot linear run with grill in the center, 24 inches of prep counter on one side, and a sink with refrigerator below on the other works beautifully. For a two-cook layout, an L-shape with the grill on the long leg and prep/sink on the short leg keeps cooks from crossing paths. For entertaining-heavy households, a U-shape or a separate island bar lets guests sit and chat without crowding the cook. Plan a minimum 15-inch landing zone on each side of the grill (NKBA recommendation) for hot platters, a 36-inch deep counter behind the cook for assembly work, and a 42-inch aisle (48 inches if two cooks pass back-to-back). Sketch three options at scale on graph paper before finalizing — small changes to a corner or an aisle can yield large gains in flow.
Phase 6: Permits, Zoning, and HOA Approvals (Week 6-8)
Permits are unavoidable for any outdoor kitchen with gas, plumbing, or electrical, and outdoor kitchen planning that ignores them creates expensive problems later. Most U.S. municipalities require a building permit ($250 to $1,500), a separate gas permit ($75 to $300), an electrical permit ($100 to $400), and a plumbing permit ($100 to $400). Some jurisdictions also require a mechanical permit if you install a vent hood. Permit timelines run 2 to 6 weeks for a typical residential project; complex builds in coastal or wildfire zones can take 8 to 12 weeks.
Pull a copy of your local zoning ordinance — usually free online — and confirm setback distances, maximum impervious-surface coverage (often 35 to 50 percent of lot area), and any special rules for fire features. If your home is in a Homeowners Association, submit drawings to the architectural review committee before applying for permits; HOA approval often takes 30 to 60 days and may have its own materials and color requirements. Photograph the existing site before construction begins; this documentation supports both the permit application and any future insurance or property-line disputes.
Phase 7: Phased Budgeting From Foundation to Finishing
Budgeting is the connective tissue running through every outdoor kitchen planning phase. Break the total budget into six buckets so nothing surprises you. Site work (grading, foundation, drainage) typically runs 8 to 15 percent of the total — $1,500 to $4,500 on a $30,000 build. Utilities (gas line extension, electrical sub-panel, plumbing rough-in) consume another 15 to 25 percent — $4,500 to $7,500. Cabinetry and structure (modular kit, masonry, or stainless steel framework) take 20 to 30 percent.
Appliances are usually the single largest line item at 25 to 40 percent — $7,500 to $12,000 on a mid-range build, more if you specify Lynx, Hestan, or Kalamazoo. Countertops add 8 to 15 percent ($800 to $4,500 depending on material). Finishing, lighting, ventilation, and landscaping round out the last 10 to 15 percent. Hold a 10 percent contingency for change orders — this number is not optional. Pay deposits in stages tied to milestones (10 percent at contract, 30 percent at rough-in, 30 percent at appliance install, 20 percent at substantial completion, 10 percent retention until final inspection) and never pay 100 percent up front.
Phase 8: Climate-Aware Planning by Region
The final outdoor kitchen planning stage tailors your specifications to your local climate, because a kitchen built for Phoenix would fail in Buffalo and vice versa. In cold climates (USDA zones 3-6), specify frost-free water lines buried 12 to 18 inches below the local frost line, freeze-rated faucets such as the Woodford 22 series, and PEX rather than rigid copper for any exposed runs. Choose granite or sintered stone countertops over concrete (concrete spalls in repeated freeze-thaw cycles), and design overhead structures to handle local snow loads — typically 20 to 50 psf depending on jurisdiction. Plan a winterization shutoff valve indoors and a removable air-compressor fitting to blow out the lines each November.
In hot, humid climates (zones 8-10, especially Gulf Coast), specify 316L marine-grade stainless steel rather than the cheaper 304 grade, ventilate cabinet interiors with louvered doors to reduce mildew, and install a dehumidifying minisplit if the kitchen is enclosed. In arid Southwest climates, UV is the silent killer — choose powder-coated aluminum substructures (HDPE polymers crack within 5 years under desert sun), porcelain or quartzite tops (granite fades over 10-15 years of full exposure), and Sunbrella or Ferrari fabric shade structures rated for 1,500+ hours of UV. In wildfire-prone areas (much of the West), follow your state's Wildland-Urban Interface code: non-combustible exterior cladding, ember-resistant vents, and at least 5 feet of defensible space around any open flame. Coastal homeowners within 2 miles of saltwater should also upgrade every fastener to 316 stainless and rinse all surfaces with fresh water at least monthly to delay corrosion.