How To Build Outdoor Kitchen
How to build outdoor kitchen on a weekend or full DIY: cinder block plans, materials shopping list, tool checklist, cost breakdowns, and finished examples.
Outdoor Kitchen Setup Editorial Team
Outdoor living specialists with 15+ years of hands-on experience
Top Picks: Best How To Build Outdoor Kitchen in 2026
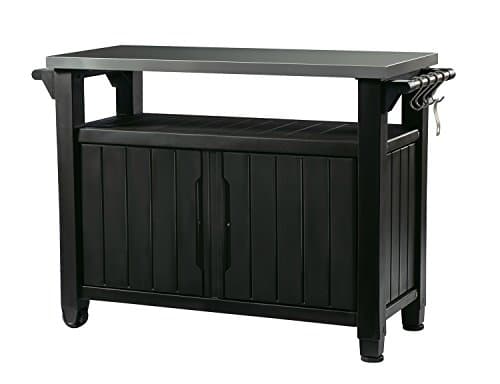
Keter Unity XL Portable Outdoor Table with Stainless Steel Top for Kitchen Prep and Outdoor Storage Cabinet for Grilling Accessories, Dark Grey
$220.99
Shop Now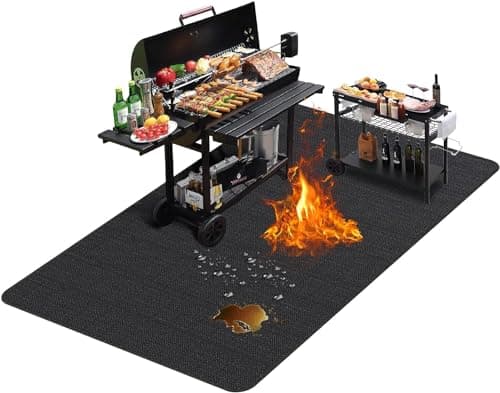
TAOMAND Large 76 x 52 inches Under Grill Mats for Outdoor Grill | Double-Sided Fireproof | Waterproof | Oil-Proof | Easy to Clean | Indoor Fireplace/Fire Pit Mat | Quality BBQ Mat for Deck Patio Lawn
$33.99
Shop Now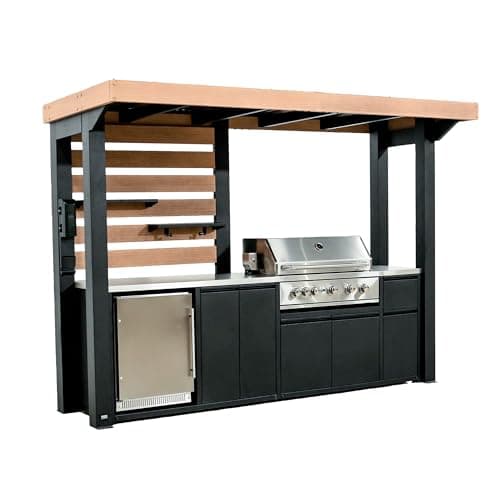
Backyard Discovery Fusion Flame Galvanized Steel Covered Outdoor Kitchen with 5-Burner Stainless, Grill, Refrigerator, Countertop, Storage, and, Roof for All-Season Outdoor Cooking, electric
$4,999.00
Shop Now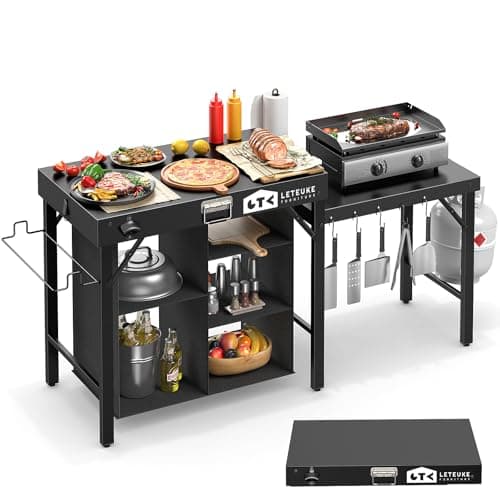
Leteuke Grill Table for Blackstone Griddle, Portable Foldable Grill Table with Storage Fits Ninja, Blackstone Griddle Stand for Outdoor Camping, Picnic, Garden, Patio, Dining, BBQ, Party
$159.99
Shop Now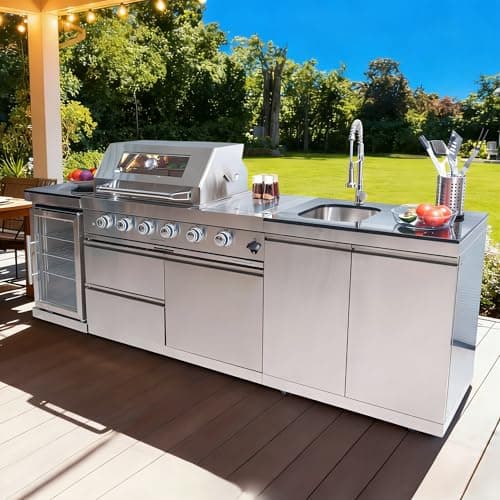
98 Inches Outdoor Kitchen Island, 4-Burner 72000 BTU Propane Stainless Steel BBQ with Side/Rear Burners, With Refrigerator and Sink, Rotisserie, Granite Countertops, Storage, For Backyard BBQ, Silver
$3,652.00
Shop Now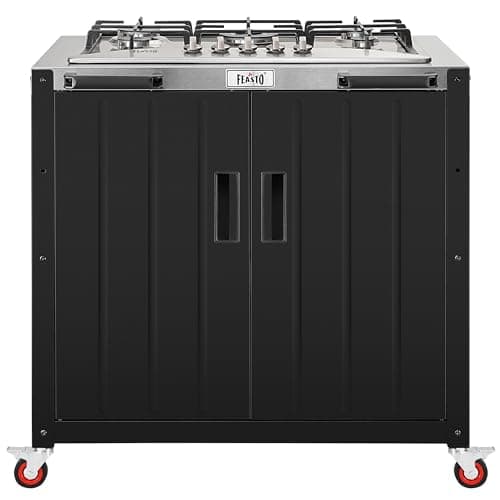
Feasto Gas Grill, Movable Outdoor Gas Stove Stainless Steel Top with Cabinet, 5 Burners with 36,200 BTUs, Outdoor Propane Grill for Outdoor Cooking, Ideal for Lawn & Garden, L35.4 x W24
$539.99
Shop Now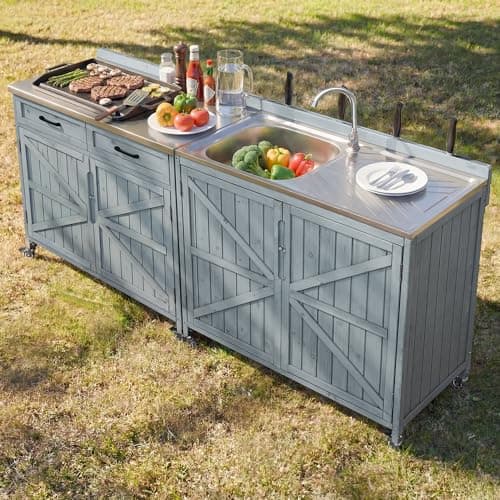
Merax 2 Piece Modular Outdoor Kitchen Series- Kitchen Grill Cart w/Stainless Steel Sink, Wood Rolling BBQ Prep Table w/Stainless Steel Top, Lockable Wheels for Patio & Outdoor Cooking, Grey Blue
$529.99
Shop Now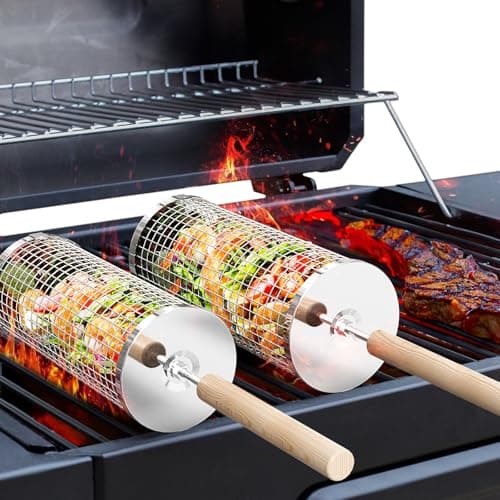
ivtivfu Rolling Grill Basket, Removable Wooden Handle, 304 Stainless Steel, Nesting BBQ Tools, Smoker Grilling Accessories for Vegetable, Outdoor Cooking Camping, Birthday Gifts for Men Dad Husband
$23.99
Shop NowKeter Unity XL Portable Outdoor Table with Stainless Steel Top for Kitchen Prep and Outdoor Storage Cabinet for Grilling Accessories, Dark Grey
$220.99
Shop NowTAOMAND Large 76 x 52 inches Under Grill Mats for Outdoor Grill | Double-Sided Fireproof | Waterproof | Oil-Proof | Easy to Clean | Indoor Fireplace/Fire Pit Mat | Quality BBQ Mat for Deck Patio Lawn
$33.99
Shop NowBackyard Discovery Fusion Flame Galvanized Steel Covered Outdoor Kitchen with 5-Burner Stainless, Grill, Refrigerator, Countertop, Storage, and, Roof for All-Season Outdoor Cooking, electric
$4,999.00
Shop NowLeteuke Grill Table for Blackstone Griddle, Portable Foldable Grill Table with Storage Fits Ninja, Blackstone Griddle Stand for Outdoor Camping, Picnic, Garden, Patio, Dining, BBQ, Party
$159.99
Shop Now98 Inches Outdoor Kitchen Island, 4-Burner 72000 BTU Propane Stainless Steel BBQ with Side/Rear Burners, With Refrigerator and Sink, Rotisserie, Granite Countertops, Storage, For Backyard BBQ, Silver
$3,652.00
Shop NowFeasto Gas Grill, Movable Outdoor Gas Stove Stainless Steel Top with Cabinet, 5 Burners with 36,200 BTUs, Outdoor Propane Grill for Outdoor Cooking, Ideal for Lawn & Garden, L35.4 x W24
$539.99
Shop NowMerax 2 Piece Modular Outdoor Kitchen Series- Kitchen Grill Cart w/Stainless Steel Sink, Wood Rolling BBQ Prep Table w/Stainless Steel Top, Lockable Wheels for Patio & Outdoor Cooking, Grey Blue
$529.99
Shop Nowivtivfu Rolling Grill Basket, Removable Wooden Handle, 304 Stainless Steel, Nesting BBQ Tools, Smoker Grilling Accessories for Vegetable, Outdoor Cooking Camping, Birthday Gifts for Men Dad Husband
$23.99
Shop NowHow to Build Outdoor Kitchen Tier 1: Weekend Modular Assembly
The fastest answer to how to build outdoor kitchen is the modular flat-pack approach. Brands like NewAge Products Bold Series, RTA Outdoor Living BBQ Coach, and Sunjoy Brookhaven ship pre-engineered outdoor kitchen frames that bolt together with hex hardware in 6 to 12 hours of labor. The NewAge Bold 7-piece L-shape configuration ($3,799) is the most popular DIY choice — it ships in 9 boxes weighing 80 to 120 pounds each, requires no welding, and uses pre-drilled holes that align perfectly when you follow the included sequence diagram.
Tools needed for tier-one builds are minimal: a 4-foot level, a Phillips and flathead screwdriver, a 12mm and 14mm socket set, an electric drill with a magnetic bit holder, a tape measure, and a rubber mallet. Set aside one full Saturday for the structural assembly and Sunday for grill installation, gas line connection (handled by a licensed plumber), and final caulking. Skip the included countertop and instead measure for a custom granite remnant from a local stone yard ($300 to $700 for a 2-piece L-shape top) — this single upgrade transforms the look of an off-the-shelf kit and adds 20 years of durability versus the thin porcelain or aluminum tops that ship from the factory.
How to Build Outdoor Kitchen Tier 2: Cinder Block and Stucco Build
The classic intermediate approach to how to build outdoor kitchen uses standard 8x8x16 concrete masonry units stacked two courses high, mortared together with type S mortar, and finished with manufactured stone veneer or three-coat stucco. For an 8-foot linear island, you need approximately 32 cinder blocks ($1.85 to $2.40 each at Home Depot), 4 bags of type S mortar mix ($8 each), 2 lengths of #4 rebar ($6 each), and a 60-pound bag of pea gravel for the cell fill ($4). Total structural materials cost: roughly $115.
Day 1, mix mortar in a wheelbarrow with a hoe (or rent a 2 cubic foot mortar mixer for $45 per day), spread a half-inch bed on the slab, and lay your first course with corner blocks first. Use a 4-foot level on every block and tap with a rubber mallet to seat. Day 2, lay the second course with the seams offset (running bond pattern) and insert vertical rebar in two cells per side, then fill those cells with grout. Day 3, install ½-inch HardieBacker cement board on the back side where you want the rear-facing veneer to terminate. Day 4 through 6 is veneer or stucco application. Total tier-two timeline: 4 to 6 weekends, with finished cost ranging from $3,200 to $7,500 depending on cladding choice.
Tools and Materials Shopping List for How to Build Outdoor Kitchen
The shopping list for how to build outdoor kitchen at the cinder block tier divides into structural, finish, and tool categories. For structural materials on an 8-foot linear island: 32 cinder blocks, 4 bags type S mortar, ½ cubic yard pea gravel, 2 lengths #4 rebar, 50 lbs of grout mix, and 4 sheets of ½-inch HardieBacker cement board (about $14 each). Finish materials depend on aesthetic — natural stacked stone veneer runs $13 to $22 per square foot uninstalled, while three-coat stucco materials cost about $1.80 per square foot. A typical 8-foot island has 60 square feet of vertical wall surface to clad.
Tools you will use repeatedly: 4-foot level ($35), 2-foot level ($18), brick trowel ($16), pointed mason's trowel ($14), rubber mallet ($12), 4-pound mason's hammer ($22), wheelbarrow ($85), mortar mixing hoe ($25), tape measure ($15), chalk line ($8), and a circular saw with a diamond blade for cutting block ($40 for the blade). Specialty rentals: rotary hammer drill ($45 per day) for fastening into concrete and a wet tile saw ($65 per day) for trimming veneer pieces. If you do not own a truck, factor in $89 to $250 for delivery from Home Depot or your local masonry supply yard — block and mortar weights up fast.
Plumbing the Gas Line: The One Phase to Hire Out
Every guide to how to build outdoor kitchen has to be honest about the gas line: this is the one phase you should hire a licensed plumber for, even if you DIY everything else. Most municipalities require a permit and a licensed gas fitter for any extension of natural gas service from your home's meter or for any new propane installation that is hard-piped (versus a portable tank). The labor saved by DIY gas work is not worth the risk of a leak, and any insurance claim from a gas fire on a DIY line will be denied.
Typical gas line work runs $300 to $1,500 for a 20 to 50-foot extension from your existing manifold. Black iron pipe is the standard material, sized at ¾-inch for runs over 25 feet to deliver adequate inlet pressure to a four-burner grill plus side burner. The plumber will install a quarter-turn shutoff valve immediately upstream of the appliance and a flexible appliance connector for the final 18 inches. Schedule the plumbing rough-in immediately after your foundation slab cures and before you start any framing — running gas through cinder block walls means coordinating cell openings during the masonry phase. As detailed in our complete outdoor kitchen setup guide, the smart sequence is foundation, then plumbing rough-in and inspection, then framing and finishes.
How to Build Outdoor Kitchen Countertop: Granite, Concrete, or Tile
The countertop is where most homeowners decide to either DIY or hire a fabricator when figuring out how to build outdoor kitchen. Granite remnants from a local stone yard are the easiest professional-grade option — call three local fabricators, ask for their granite remnant pile, and you can typically find a 30 by 96-inch slab for $250 to $600. The fabricator will template, cut, and edge-finish the slab for an additional $300 to $500, then deliver and set it. Total: $550 to $1,100 for a finished granite top.
DIY concrete countertops are a popular alternative for the willing builder. Cast a 1.5-inch-thick reinforced concrete top in melamine forms with fiber-reinforced GFRC mix ($45 per 50-pound bag from Buddy Rhodes or Cheng Concrete Exchange), let cure for 7 days, demold, polish with diamond pads (a 7-piece kit runs $79 on Amazon), and seal with a food-safe penetrating sealer like Sealmaster ($89 per quart). Total DIY cost for a 30-square-foot concrete top: $400 to $650 in materials. Tile countertops are the cheapest option at $4 to $12 per square foot for porcelain or large-format ceramic, set on top of a HardieBacker substrate with thinset mortar. The downside is grout lines that collect grease and require sealing every year, which is why granite has become the dominant choice in modern outdoor kitchens.
Sequencing the Build: What to Do Each Weekend
The single most-overlooked aspect of how to build outdoor kitchen is sequencing — doing the right phase in the right order so dependencies are not blocked and inspections fall at the right time. Weekend 1: Site prep, layout marking, excavation, gravel base, and rebar grid. Weekend 2: Pour concrete slab, screed, finish, cover with curing blankets. Weekends 3-4: Concrete cures (no work — this is non-negotiable). Weekend 5: Plumber installs gas rough-in, electrician installs electrical rough-in, both pass inspection.
Weekend 6-7: Lay cinder block courses, fill cells with rebar and grout, allow mortar to set. Weekend 8: Install cement board substrate where needed, apply weather-resistant barrier. Weekend 9-10: Install stone veneer or apply three-coat stucco (allow drying time between coats). Weekend 11: Have countertop fabricator template the cabinet, fabricate at the shop. Weekend 12: Install countertop, drop in grill and other appliances, plumber and electrician make final connections, schedule final inspection. This 12-week timeline assumes a single homeowner working alone — speed up dramatically with a crew or paid help on the masonry phase.
Common DIY Outdoor Kitchen Build Mistakes
The mistakes that most consistently derail a how to build outdoor kitchen project share a common theme: rushing or skipping the prep phases to get to the visible building. Mistake number one is pouring the concrete slab without a proper compacted gravel base, which causes settlement and cracking within 12 to 24 months. Always compact the gravel in 2-inch lifts using a rented plate compactor and verify firmness by walking on it — if your boot prints stay visible, it is not compacted enough.
Mistake number two is sizing the gas line based on the current grill rather than future capacity. Buying a four-burner grill today and adding a side burner and pizza oven in 2 years is extremely common, but ½-inch black iron cannot deliver enough volume. Run ¾-inch line on day one to avoid digging up the patio later. Mistake number three is using indoor-grade refrigerators and ice makers in the outdoor build to save money — they fail within 18 months due to humidity and temperature swings, and the warranty is voided. Always specify outdoor-rated UL listed appliances. Mistake number four is grouting cinder block cells without rebar or insufficient lateral bracing in tall walls, which leads to wall failure under wind load. Always tie vertical rebar at corners and grout-fill the corner cells.
Realistic Total Cost to Build Outdoor Kitchen DIY
Honest budgeting for how to build outdoor kitchen depends entirely on tier. Tier one weekend modular: $3,500 to $7,500 all-in for a complete L-shape with grill, cabinets, and basic countertop. Tier two cinder block with stone veneer cladding: $7,500 to $14,000 all-in for a similar L-shape with mid-tier built-in grill, granite countertop, integrated storage, and basic lighting. Tier three custom build with structural framing, premium grill, refrigerator, sink, side burner, and full natural stone cladding: $18,000 to $35,000 all-in for a comparable footprint.
The single biggest cost variables across all three tiers are the appliances and the cladding material. A Lion L75000 four-burner built-in grill ($1,899) versus a Lynx Professional 36-inch ($6,799) is a $4,900 swing on one component. Manufactured stone veneer at $14 per square foot installed versus full-thickness natural stone at $42 per square foot installed is another $1,700 swing on a typical 60-square-foot cladding job. Set your budget tier first, then make appliance and cladding choices that match — fancy appliances on a basic frame look out of place, and basic appliances on premium cladding feel like a missed opportunity. The right outdoor kitchen feels coherent at every level of investment.
Frequently Asked Questions
01Can I build an outdoor kitchen in one weekend?
02What's the cheapest way to build an outdoor kitchen?
03Do you need a concrete slab for an outdoor kitchen?
04How thick should the concrete pad be for an outdoor kitchen?
05What size cinder block should I use for an outdoor kitchen?
06Should I hire a contractor or build my outdoor kitchen myself?
07What's the easiest countertop material for a DIY outdoor kitchen?
08How long does it take to build an outdoor kitchen from scratch?
09What grill should I buy for a DIY outdoor kitchen build?
10Do I need permits to build my own outdoor kitchen?
Related Guides
Outdoor Kitchen Stainless Steel: Grades, Maintenance & Complete Buying Guide
Read guide →
GuideOutdoor Kitchen Stone: Natural Stone Types, Veneer Options & Cost Comparisons
Read guide →
GuideModular Outdoor Kitchen: Complete Buyer's Guide to Prefab Modular Systems in 2026
Read guide →
GuideOutdoor Kitchen Gazebo: Hardtop Styles, Sizing, Wind Ratings & Top Brands for 2026
Read guide →