Outdoor Mud Kitchen: Kid-Friendly DIY Plans, Materials & Safety 2026
Outdoor mud kitchen plans for kids — pallet, IKEA hack, and storebought options. Cedar, IPE, and pine compared. Tools, safety, ages 2 to 10,
Outdoor Kitchen Setup Editorial Team
Outdoor living specialists with 15+ years of hands-on experience
Top Picks: Best Outdoor Mud Kitchen: Kid-Friendly DIY Plans, Materials & Safety 2026 in 2026
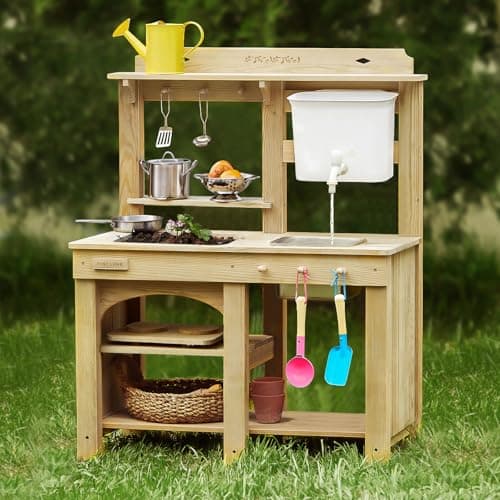
Tiny Land Outdoor Mud Kitchen for Kids, Wooden Play Kitchen with Water Tank, Water & Cooking Play, Sensory Fun, Weather-Resistant with Storage, Ideal for Toddlers Ages 3+
$209.99
Shop Now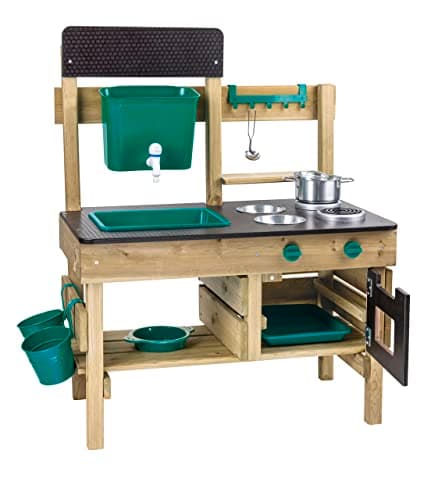
Hape Outdoor Kitchen | Mud Kitchen Wooden Toy Playset with Accessories, for Children Ages 3+ Years
$189.99
Shop Now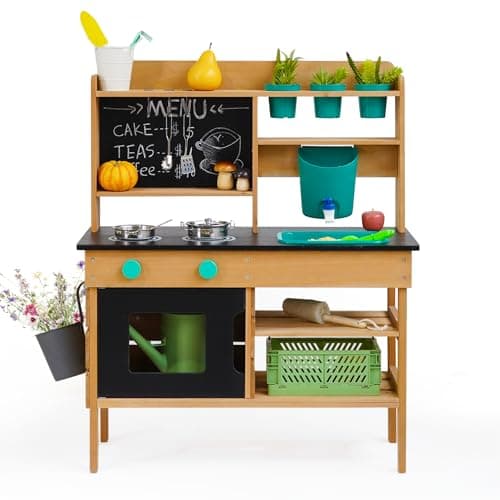
Mud Kitchen for Kids Outdoor, Wooden Play Kitchen with Real Working Faucet & Water Tank, Sensory Montessori Kitchen Playset with Sink, Chalkboard, Pots & Pans for Toddlers & Kids Ages 3+
$104.99
Shop Now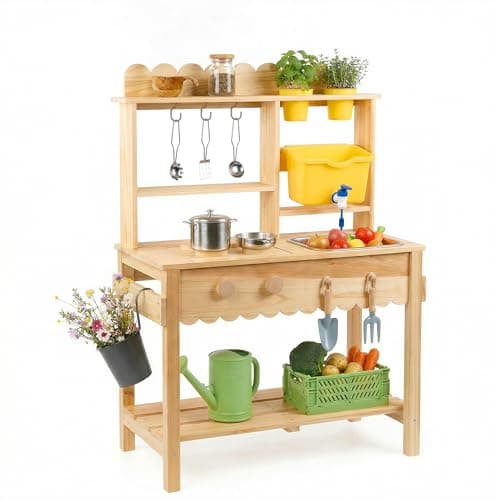
Wooden Mud Kitchen for Kids Outdoor - Play Kitchen with Real Running Water Sink & Removable Sink, 10-Piece Accessory Set with Stainless Steel Cookware & Planter Pots, Montessori Toy Gift for Ages 3+
$94.99
Shop Now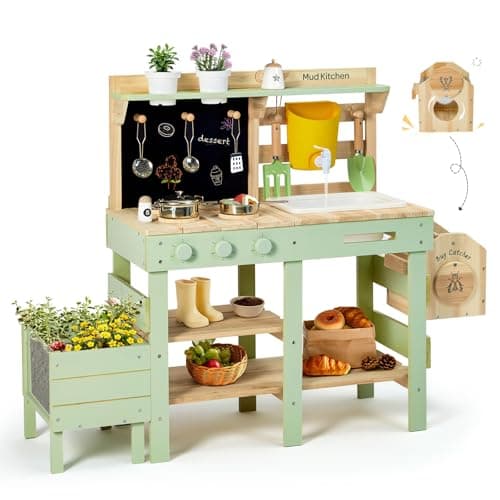
Frogprin Mud Kitchen for Kids, Outdoor Play Kitchen with Insect Observation Box & Planter Box, Kitchen Accessories, Gardening Tool Toy, Removable Sink Faucet, Wooden Pretend Kitchen for Boys Girls 3+
$139.99
Shop Now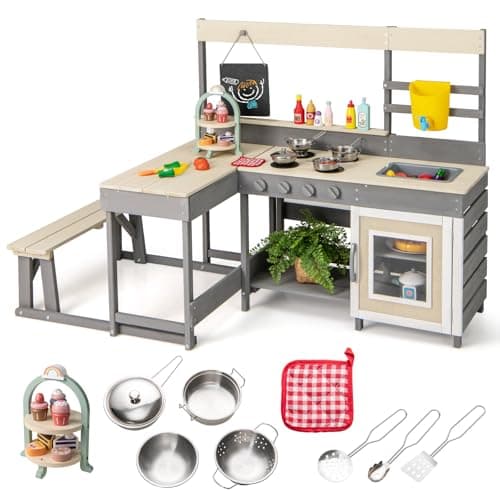
INFANS Mud Kitchen, Outdoor Play Kitchen with Faucet Chalkboard Stoves Removable Sink Cooking Accessories Wooden Kids Kitchen Playset Backyard Garden Toys Gift for Boys Girls Ages 3+
$179.99
Shop Now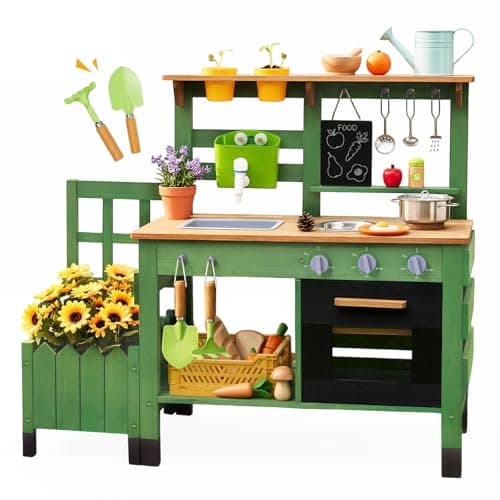
Mud Kitchen for Kids Outdoor, Vintage Mud Kitchen with Planter Box - Includes Rich Gardening Tools & Cooking Accessories, Wooden Kids Play Kitchen with Faucet, Stove, Sink, Oven, Flowerpots
$129.99
Shop Now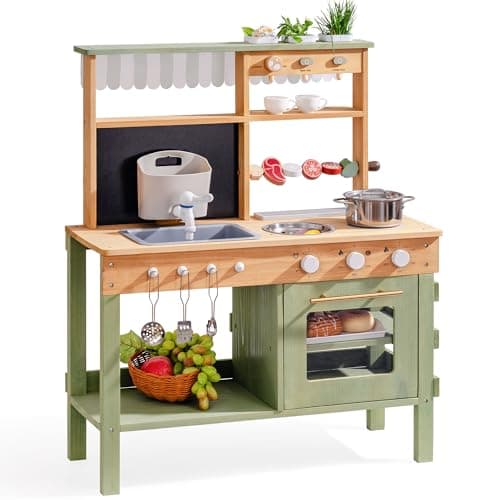
ROBOTIME Wooden Mud Kitchen for Kids, Outdoor Playset with Sink, BBQ Grill, Coffee Maker, Planting Area & Oven, Pretend Play Mud Kitchen Toy for 3+ Years Old Children
$119.99
Shop NowTiny Land Outdoor Mud Kitchen for Kids, Wooden Play Kitchen with Water Tank, Water & Cooking Play, Sensory Fun, Weather-Resistant with Storage, Ideal for Toddlers Ages 3+
$209.99
Shop NowHape Outdoor Kitchen | Mud Kitchen Wooden Toy Playset with Accessories, for Children Ages 3+ Years
$189.99
Shop NowMud Kitchen for Kids Outdoor, Wooden Play Kitchen with Real Working Faucet & Water Tank, Sensory Montessori Kitchen Playset with Sink, Chalkboard, Pots & Pans for Toddlers & Kids Ages 3+
$104.99
Shop NowWooden Mud Kitchen for Kids Outdoor - Play Kitchen with Real Running Water Sink & Removable Sink, 10-Piece Accessory Set with Stainless Steel Cookware & Planter Pots, Montessori Toy Gift for Ages 3+
$94.99
Shop NowFrogprin Mud Kitchen for Kids, Outdoor Play Kitchen with Insect Observation Box & Planter Box, Kitchen Accessories, Gardening Tool Toy, Removable Sink Faucet, Wooden Pretend Kitchen for Boys Girls 3+
$139.99
Shop NowINFANS Mud Kitchen, Outdoor Play Kitchen with Faucet Chalkboard Stoves Removable Sink Cooking Accessories Wooden Kids Kitchen Playset Backyard Garden Toys Gift for Boys Girls Ages 3+
$179.99
Shop NowMud Kitchen for Kids Outdoor, Vintage Mud Kitchen with Planter Box - Includes Rich Gardening Tools & Cooking Accessories, Wooden Kids Play Kitchen with Faucet, Stove, Sink, Oven, Flowerpots
$129.99
Shop NowROBOTIME Wooden Mud Kitchen for Kids, Outdoor Playset with Sink, BBQ Grill, Coffee Maker, Planting Area & Oven, Pretend Play Mud Kitchen Toy for 3+ Years Old Children
$119.99
Shop NowWhy Outdoor Mud Kitchens Are So Valuable for Kids
Mud kitchen play activates an unusually wide range of developmental skills simultaneously. Researchers at the University of Cambridge documented that children ages 3 to 8 engaged in regular outdoor sensory play with mud, water, and natural materials show statistically significant gains in fine motor coordination, vocabulary acquisition, social negotiation skills, and self-regulation compared to peers without similar access. The unstructured nature is the magic ingredient: mud kitchens have no goal, no winner, no instruction manual, which forces creative direction-setting from the children themselves.
The sensory benefits are equally important. Touching cool wet mud, feeling the texture shift as more water is added, smelling damp leaves and herbs all stimulate proprioceptive and tactile pathways that screen-based play simply cannot reach. Occupational therapists routinely recommend outdoor mud kitchen play for children with sensory processing differences and even for typically developing kids who spend too much time indoors. Beyond the cognitive benefits, mud kitchens are also gloriously durable: kids cannot break a tree stump or a metal pot, which means parents can let go of the constant 'be careful' refrain that limits play in the rest of the home.
Best Materials for an Outdoor Mud Kitchen Build
Material selection determines how long your outdoor mud kitchen survives weather, water exposure, and enthusiastic toddler use. Cedar (Western Red Cedar specifically) is the gold standard — naturally rot-resistant, splinter-free when sanded, lightweight enough for a parent to move, and ages to a beautiful silver-gray. A cedar mud kitchen built from 1x6 fence boards costs around $80 to $120 in lumber and lasts 8 to 12 years outdoors with minimal maintenance.
Pressure-treated pine (the .25 retention 'above-ground' variety) is acceptable for the structural frame but should never be used for surfaces children directly touch, due to copper-based preservatives. White cedar, redwood, and ipe are also excellent. Avoid raw pine (rots within 2 years), painted MDF or particleboard (breaks down rapidly when wet), and any wood treated with creosote or older CCA preservatives. For surfaces that will hold water, a stainless steel insert (a kitchen mixing bowl from Goodwill works perfectly) is the most kid-safe option. Finish wood with a non-toxic, child-safe oil like Tried & True Original Wood Finish or pure tung oil — never use stains, polyurethane, or solvent-based deck finishes on surfaces children might mouth.
DIY Pallet Wood Mud Kitchen: Complete Build Plan
The most popular DIY outdoor mud kitchen design uses two reclaimed wood pallets and costs $20 to $50 in additional hardware. Source HT-stamped (heat-treated, not chemically treated) pallets from any hardware store dumpster — never use MB-stamped (methyl bromide) pallets, which contain toxic fumigation residue. Disassemble the pallets with a reciprocating saw, then sand all boards to remove splinters using 80-grit then 120-grit sandpaper.
The basic structure is a 36-inch-tall by 30-inch-wide by 18-inch-deep box with a single shelf 12 inches off the ground for under-storage and a counter surface at 24 inches (toddler-appropriate height). Cut a 9-inch round hole in the counter to drop in a stainless mixing bowl as a sink. Add hooks beneath the counter from a 2x4 cleat to hang utensils. Total build time is 4 to 6 hours including sanding. Optional upgrades include a backsplash with chalkboard paint for play menus, a hose bib mounted to a vertical 4x4 post for a real running-water faucet, and a small herb planter at the side. Free PDF plans are widely available on Pinterest and Ana White's website. Finish with food-safe mineral oil or tung oil, never polyurethane.
IKEA Hack Mud Kitchens: DUKTIG and Beyond
The IKEA DUKTIG kitchen at $129 is the world's most popular indoor play kitchen, and a small but vibrant DIY community has perfected the conversion of DUKTIG units into outdoor mud kitchens. The conversion process: disassemble the DUKTIG, sand off the existing factory finish, apply 2 coats of exterior-grade Thompson's Water Seal or Total Boat Halcyon clear marine varnish to every surface, replace the included plastic stove burner with a galvanized round stovepipe end-cap (looks identical), and add a hose-bib spigot to the existing faucet area for real water flow.
The DUKTIG's MDF construction is the limiting factor — even with sealing, expect 2 to 4 years of outdoor service before swelling and surface chipping become significant. For longer service, the FLISAT children's table ($75) makes an excellent base for a wholly weatherproof DIY mud kitchen built from solid pine that holds up far better than DUKTIG MDF. Add a stainless mixing bowl as a sink, a chalkboard side panel, and hooks for utensils. IKEA hacks suit families wanting a polished aesthetic without full DIY carpentry skills, and they integrate beautifully with the rest of an IKEA-furnished outdoor space.
Top Pre-Built Outdoor Mud Kitchens from Amazon and Etsy
For families who prefer a ready-made outdoor mud kitchen, several models stand out. The Step2 Naturally Playful Welcome Home Kitchen ($249) is durable plastic, weatherproof, and survives 5-plus years of outdoor use without maintenance. The Lifetime Children's Mud Pie Kitchen ($379) is steel-framed with a stainless surface and cedar accents, designed for institutional use in preschools. The Costway Wooden Children's Outdoor Kitchen ($229) offers a classic cedar look at a moderate price.
Etsy sellers like LittleColorado, OakRidgeWood, and HappyDayDesigns produce custom cedar and IPE mud kitchens ranging from $300 to $700, with options to add chalkboard panels, working spigots, herb planters, and engraved name plates. Lead times typically run 2 to 6 weeks for handmade options. When evaluating storebought models, prioritize: real solid wood (cedar, eucalyptus, or pine) over MDF, stainless steel sink inserts over plastic, weight-bearing capacity for kids who climb (look for at least 100 lb static load rating), and tip-resistance with a stable base wider than the top. Avoid models with sharp metal hinges, exposed screw heads at toddler eye level, or surfaces that retain standing water.
Sensory Accessories: Pots, Spoons, and Natural Materials
An empty outdoor mud kitchen is just a structure — what makes it magical is the accessory ecosystem. Stock the kitchen with thrift-store stainless mixing bowls (3 to 5 in graduated sizes), wooden spoons of varying sizes, a slotted spoon, a small whisk, a strainer or colander, a small pitcher, measuring cups, mortar and pestle, an egg beater, and a small mortar slate or cutting board. Aim for 12 to 20 tools total. Avoid ceramic or glass anything (breakable), small parts that children under 3 might choke on, and metal items with sharp edges.
Beyond manufactured tools, build a 'natural materials basket' that you refresh weekly with seasonal finds: pinecones, smooth river stones, dried seed pods, leaves, bark pieces, dried herbs from the garden, and flower petals. These free natural ingredients become 'pizza toppings,' 'soup garnishes,' and 'magical potions' in kid imaginations. Store accessories in a weatherproof bin or hanging from hooks beneath the counter so kids can independently access and clean up. Replace tools that get genuinely worn out 1 to 2 times per year — a $20 trip to Goodwill restocks the entire kitchen.
Water and Mud Sources: Setting Up the Supply
The water side of an outdoor mud kitchen is what separates a memorable play setup from a forgotten one. The simplest approach is a covered 5-gallon bucket of water that parents refill twice daily — kids dip pitchers and pour. The next level up is a small water jug with a built-in spigot (Coleman 5-gallon water cooler at $25 works perfectly), mounted at child height for self-service pouring. The most elaborate option is a real outdoor hose bib plumbed to a small hand-pump faucet at the kitchen, which delivers 'real cooking' authenticity at the cost of mud and water management.
For mud, designate a specific 'mud pit' in your yard — a 3-foot square area of bare topsoil where children can scoop without damaging your lawn. Top this off with a wheelbarrow of clean topsoil from a garden center every spring (about $20 worth) to keep it fresh. Some families add a 'sand pit' alongside as a complementary sensory material. Avoid chemically treated lawn areas as mud sources, because lawn herbicides and fertilizers stay active in soil for weeks. Set boundaries around what mud can be done with — for instance, mud stays in the mud kitchen and dedicated play area, not on the patio or inside the house. Kids adapt quickly to clear rules.
Cleanup, Maintenance, and Winterization
Long-term outdoor mud kitchen success hinges on a sustainable cleanup routine. After each play session, dump any water from the sink, hose down the surfaces lightly, and stack tools in their bin or on hooks. Once a week, give the kitchen a deeper clean with a mild soap-and-water wipedown and inspect for any splinters or loose hardware. Sand any rough spots that have developed and re-tighten screws as needed. Twice a year, apply a fresh coat of food-safe wood oil to wooden surfaces (Tried & True Original or pure tung oil) to maintain water resistance.
For winter, drain all water entirely (frozen water in a stainless bowl can crack the bowl), bring soft accessories indoors (any plush items, paper, or cloth), and either move the kitchen under a covered patio or leave it in place with a fitted weatherproof cover from Classic Accessories or Duck Covers ($30 to $60). Cedar and ipe kitchens can simply be left out year-round in most climates with no harm. Pallet wood and pine kitchens benefit from winter storage in a garage or shed to extend their lifespan from 3 years to 6-plus years. Once the spring thaw arrives, reset everything with fresh accessories and a new natural materials basket.