Building Outdoor Kitchen
Building outdoor kitchen as a project: timelines, contractor sequencing, payment schedules, change orders, and how to keep a 6-week build on track.
Outdoor Kitchen Setup Editorial Team
Outdoor living specialists with 15+ years of hands-on experience
Top Picks: Best Building Outdoor Kitchen in 2026
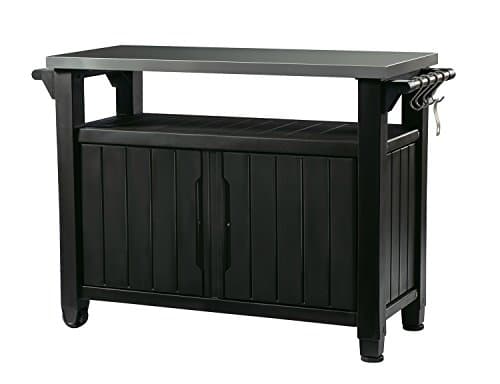
Keter Unity XL Portable Outdoor Table with Stainless Steel Top for Kitchen Prep and Outdoor Storage Cabinet for Grilling Accessories, Dark Grey
$220.99
Shop Now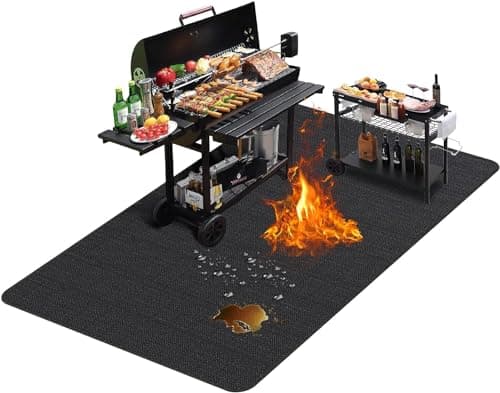
TAOMAND Large 76 x 52 inches Under Grill Mats for Outdoor Grill | Double-Sided Fireproof | Waterproof | Oil-Proof | Easy to Clean | Indoor Fireplace/Fire Pit Mat | Quality BBQ Mat for Deck Patio Lawn
$33.99
Shop Now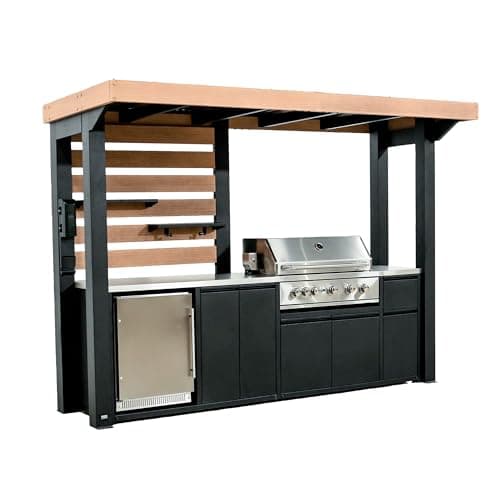
Backyard Discovery Fusion Flame Galvanized Steel Covered Outdoor Kitchen with 5-Burner Stainless, Grill, Refrigerator, Countertop, Storage, and, Roof for All-Season Outdoor Cooking, electric
$4,999.00
Shop Now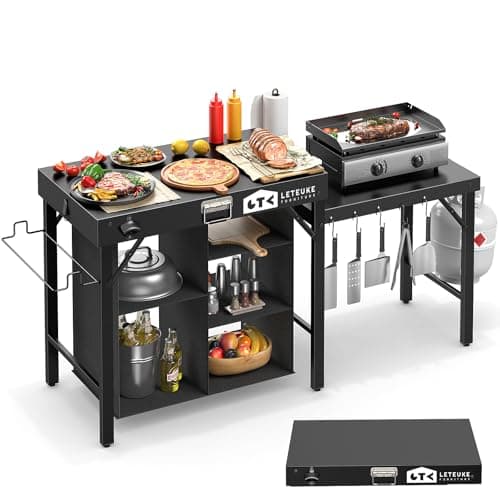
Leteuke Grill Table for Blackstone Griddle, Portable Foldable Grill Table with Storage Fits Ninja, Blackstone Griddle Stand for Outdoor Camping, Picnic, Garden, Patio, Dining, BBQ, Party
$159.99
Shop Now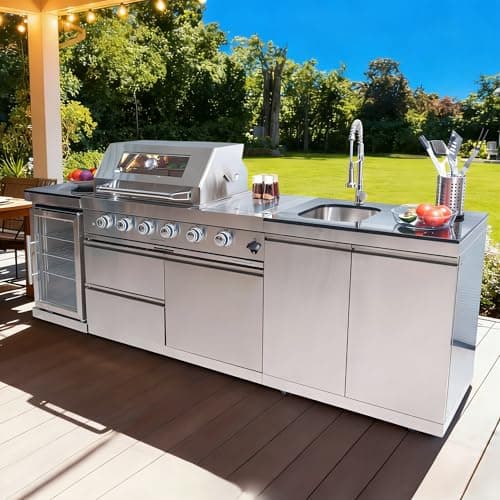
98 Inches Outdoor Kitchen Island, 4-Burner 72000 BTU Propane Stainless Steel BBQ with Side/Rear Burners, With Refrigerator and Sink, Rotisserie, Granite Countertops, Storage, For Backyard BBQ, Silver
$3,652.00
Shop Now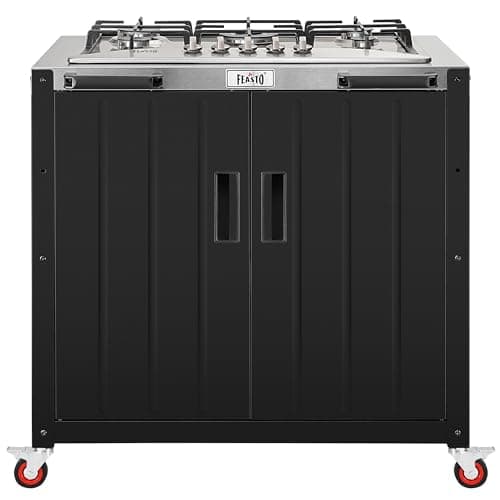
Feasto Gas Grill, Movable Outdoor Gas Stove Stainless Steel Top with Cabinet, 5 Burners with 36,200 BTUs, Outdoor Propane Grill for Outdoor Cooking, Ideal for Lawn & Garden, L35.4 x W24
$539.99
Shop Now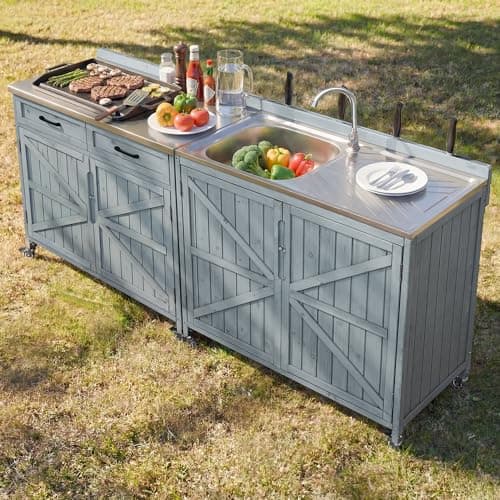
Merax 2 Piece Modular Outdoor Kitchen Series- Kitchen Grill Cart w/Stainless Steel Sink, Wood Rolling BBQ Prep Table w/Stainless Steel Top, Lockable Wheels for Patio & Outdoor Cooking, Grey Blue
$529.99
Shop Now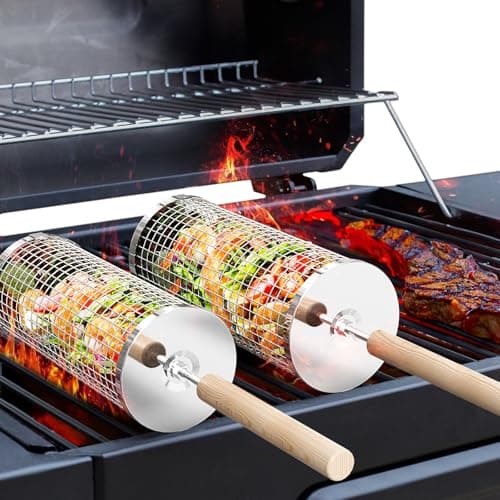
ivtivfu Rolling Grill Basket, Removable Wooden Handle, 304 Stainless Steel, Nesting BBQ Tools, Smoker Grilling Accessories for Vegetable, Outdoor Cooking Camping, Birthday Gifts for Men Dad Husband
$23.99
Shop NowKeter Unity XL Portable Outdoor Table with Stainless Steel Top for Kitchen Prep and Outdoor Storage Cabinet for Grilling Accessories, Dark Grey
$220.99
Shop NowTAOMAND Large 76 x 52 inches Under Grill Mats for Outdoor Grill | Double-Sided Fireproof | Waterproof | Oil-Proof | Easy to Clean | Indoor Fireplace/Fire Pit Mat | Quality BBQ Mat for Deck Patio Lawn
$33.99
Shop NowBackyard Discovery Fusion Flame Galvanized Steel Covered Outdoor Kitchen with 5-Burner Stainless, Grill, Refrigerator, Countertop, Storage, and, Roof for All-Season Outdoor Cooking, electric
$4,999.00
Shop NowLeteuke Grill Table for Blackstone Griddle, Portable Foldable Grill Table with Storage Fits Ninja, Blackstone Griddle Stand for Outdoor Camping, Picnic, Garden, Patio, Dining, BBQ, Party
$159.99
Shop Now98 Inches Outdoor Kitchen Island, 4-Burner 72000 BTU Propane Stainless Steel BBQ with Side/Rear Burners, With Refrigerator and Sink, Rotisserie, Granite Countertops, Storage, For Backyard BBQ, Silver
$3,652.00
Shop NowFeasto Gas Grill, Movable Outdoor Gas Stove Stainless Steel Top with Cabinet, 5 Burners with 36,200 BTUs, Outdoor Propane Grill for Outdoor Cooking, Ideal for Lawn & Garden, L35.4 x W24
$539.99
Shop NowMerax 2 Piece Modular Outdoor Kitchen Series- Kitchen Grill Cart w/Stainless Steel Sink, Wood Rolling BBQ Prep Table w/Stainless Steel Top, Lockable Wheels for Patio & Outdoor Cooking, Grey Blue
$529.99
Shop Nowivtivfu Rolling Grill Basket, Removable Wooden Handle, 304 Stainless Steel, Nesting BBQ Tools, Smoker Grilling Accessories for Vegetable, Outdoor Cooking Camping, Birthday Gifts for Men Dad Husband
$23.99
Shop NowRealistic Timeline: 6-Week Schedule for a Mid-Size Build
Building outdoor kitchen installations of typical mid-range scope — roughly 8 to 12 linear feet, three appliances, sink, gas, electrical — runs a 6-week clock when professionally managed. Week 1 is permitting and excavation: file with the building department (5 to 15 business days for plan review in most counties), excavate, lay gravel base. Week 2 is the slab pour and 7-day cure. Week 3 is framing and the first inspection. Week 4 is gas, plumbing, and electrical rough-in plus the second inspection.
Week 5 is veneer, countertop templating, and starting the appliance install. Week 6 is countertop install, hood and vent finalization, final inspection, and punch list. Add one buffer week for weather delays — if you're starting in early spring or late fall, expect at least one rain or freeze day. The single biggest schedule killer is countertop fabrication: granite shops typically need 10 to 14 business days from template to install, so template the moment veneer is up. If you template before veneer, the measurements will be off by 1/4 inch and the slab won't fit.
How to Hire and Sequence Contractors for Building Outdoor Kitchen Work
The fastest way to derail a building outdoor kitchen project is to hire trades in the wrong order. Start with the general contractor (or yourself as GC) — get them locked in 6 to 10 weeks before the desired start date. Reputable outdoor kitchen GCs in major metros like Phoenix, Atlanta, and Dallas book 3 to 4 months out during peak season (March through June). Next, hire the licensed plumber/gas fitter and electrician — they need to see plans before slab pour to confirm rough-in stub locations.
Get bids from at least three contractors per trade, and require itemized line-item pricing rather than lump-sum bids. A plumber should break out trenching, pipe materials, fittings, sediment trap, valves, pressure test, and permit fee separately. Lump-sum bids hide where the contractor padded margin and make change orders impossible to evaluate fairly. Verify each contractor's state license number on your state contractor licensing board's website, confirm active general liability insurance ($1M minimum) and workers' comp, and ask for three references from outdoor kitchen jobs completed in the last 12 months. Drive past at least one of those completed jobs.
Payment Schedules That Protect You and Motivate Trades
Never pay more than 10 percent up front to any contractor on a building outdoor kitchen project. Standard industry practice for residential exterior work runs 10/30/30/30 — 10 percent at contract signing, 30 percent at materials delivery to job site, 30 percent at rough-in inspection pass, and the final 30 percent at final inspection pass and punch list completion. This structure ties payment to verifiable milestones, not vague time markers.
For materials-heavy phases like masonry veneer or granite countertops, use a separate progress draw — pay the supplier directly when materials arrive, then pay the installer their labor portion after install passes inspection. This avoids the classic problem where a contractor takes a 50 percent deposit, buys cheaper materials than specified, pockets the difference, and disappears mid-job. Also build in a 5 to 10 percent retainage held until 30 days after final inspection — this gives you leverage to get the punch list actually completed. Most state contractor laws explicitly allow retainage on residential remodel work; check yours before adding it to the contract.
Permitting Phases and Inspection Hand-Offs
Building outdoor kitchen projects with utilities trigger three to four inspections in most jurisdictions: slab/footing (after rebar is set, before concrete pours), rough-in (after gas, plumbing, and electrical lines are run but before sheathing covers them), and final (after appliances install and everything is operational). Some counties add a separate gas-only inspection if natural gas is involved.
Schedule each inspection through your county's online permit portal as soon as the previous phase wraps. Most building departments offer next-business-day inspections if booked before 3 PM the day prior. Keep your permit card on-site at all times — inspectors will ask for it. Have your plans rolled up in a tube next to the card; inspectors love being handed plans without having to ask. Failed inspections cost 3 to 7 calendar days while you fix the issue and re-schedule, so the difference between an organized GC and a sloppy one shows up most painfully here. Common failures: missing GFCI on the outdoor outlet, gas pipe not sleeved through the slab, no shut-off valve at the kitchen, drainage less than 1/4 inch per foot.
Managing Change Orders Without Blowing the Budget
Every building outdoor kitchen project gets change orders — typically 3 to 7 of them on a $20,000 build. Common ones: upgrading from 30-inch grill to 36-inch grill ($800 to $2,400 difference plus rough-in adjustment), adding a side burner discovered during framing ($600 to $1,400 installed), switching countertop material after seeing the slab ($400 to $1,800 difference), running power for a future TV mount ($300 to $700). Plan for change orders by reserving 10 to 15 percent of total budget as a contingency line item in your contract.
Require every change order in writing before work proceeds — a one-page form listing the change, materials and labor cost, and any schedule impact. Both you and the contractor sign before the change happens. Verbal change orders are how disputes start: the contractor remembers a $1,200 add, you remember $600, and now you're arguing two months later with no paper trail. Most contractor associations publish free change order templates; the AIA G701 form is the gold standard but a simple Google Docs template works fine for residential work. Always pair this kind of structured planning with a complete outdoor kitchen setup resource for picking the right specs in the first place.
Materials Lead Times and Why They Matter
Building outdoor kitchen schedules live and die by lead times. Order grills, refrigerators, and side burners the day the contract is signed. A Lynx L36ATR grill has a 4 to 8 week lead time direct from manufacturer. Built-in refrigerators from Blaze, Bull, or Summerset run 2 to 6 weeks. A Twin Eagles 36-inch grill can hit 12 weeks during peak season. If you wait until framing is done to order, you'll sit on a finished cabinet for a month waiting for an appliance.
Stone veneer typically ships in 1 to 2 weeks. Granite slabs are sitting in fabricator yards — drive over and pick the actual slab you want before contracts are signed. Steel-stud RTA kits from Sunstone or RTA Outdoor Living ship in 5 to 10 business days. Custom welded stainless cabinets from Danver run 6 to 14 weeks. Build a one-page materials schedule listing every item, vendor, lead time, and required-on-site date — share this with your GC at the kickoff meeting. The schedule becomes your single source of truth and exposes dependency risks before they become delays.
Site Logistics: Access, Storage, and Neighbor Communication
Backyards are notoriously hard to work in. Before building outdoor kitchen construction starts, walk the access path with your GC — gates, fences, hedges, sprinkler heads, septic field locations, irrigation lines. A 6-foot gate is the minimum for most equipment; a 4-foot gate forces every wheelbarrow load of concrete to come through by hand and adds 4 to 8 hours of labor per cubic yard.
Designate a materials staging area away from the build zone — typically the driveway or a side yard. Block off lawn with plywood under stacked materials, or you'll be re-sodding $400 to $1,200 worth of grass that died under stone pallets. For the gas line trench, mark every irrigation, low-voltage lighting, and dog-fence line with paint before the trencher arrives. Notify both neighbors in writing one week before construction starts: dates, hours, contractor names, your phone number. This single email avoids 90 percent of complaints, especially if you're in a neighborhood with an active HOA. Some HOAs require architectural review board approval before any permanent exterior structure goes up — check before signing your contract.
Final Walkthrough, Punch List, and Warranty Documentation
The single most-skipped step in building outdoor kitchen projects is a proper final walkthrough. After your county passes final inspection, walk every square inch of the build with your GC and a clipboard. Test every burner, every outlet, the sink under both hot and cold water, every cabinet door and drawer. Operate the gas shut-off valve. Run the GFCI test buttons. Look at every veneer joint and grout line for cracks or hollow spots. Push on countertop overhangs to confirm they're solid.
Document everything that's not perfect on a numbered punch list — typically 10 to 30 items on a fresh build. Items range from minor (touch-up paint, replace a chipped tile) to material (re-grout a section, swap a faulty igniter). Sign and date the list with your contractor and set a 14-day completion deadline. Hold the final 5 to 10 percent retainage until everything on the list is done. Once complete, collect every appliance manual, model and serial number, the permit close-out card, all warranty registration cards, and copies of every inspection sign-off. Scan the entire packet to PDF — you'll need it for insurance, future repairs, and resale disclosure when you sell the home.
Frequently Asked Questions
01What is the realistic timeline for building outdoor kitchen with full utilities?
02Should I act as my own general contractor for building outdoor kitchen?
03What payment structure should I use when building outdoor kitchen with a contractor?
04How long does the building outdoor kitchen permit process take?
05What change orders are most common in building outdoor kitchen projects?
06When should I order appliances during building outdoor kitchen construction?
07How do I keep building outdoor kitchen weather-related delays manageable?
08What does a typical building outdoor kitchen contract include?
09How do I verify a contractor's qualifications for building outdoor kitchen work?
10What's the biggest scheduling mistake when building outdoor kitchen on a tight timeline?
Related Guides
Outdoor Kitchen Stainless Steel: Grades, Maintenance & Complete Buying Guide
Read guide →
GuideL-Shaped Outdoor Kitchen: Layout Ideas, Dimensions & Design Guide
Read guide →
GuideOutdoor Kitchen Gazebo: Hardtop Styles, Sizing, Wind Ratings & Top Brands for 2026
Read guide →
GuidePortable Outdoor Kitchen: Mobile Cooking Setups for Renters, Camping & Tailgating
Read guide →