Do It Yourself Outdoor Kitchen: Complete Beginner Walkthrough From Sketch to First Cook
Do it yourself outdoor kitchen step-by-step for beginners. Sketch, materials list, weekend phasing, tool checklist, and inspection-ready specs.
Outdoor Kitchen Setup Editorial Team
Outdoor living specialists with 15+ years of hands-on experience
Top Picks: Best Do It Yourself Outdoor Kitchen: Complete Beginner Walkthrough From Sketch to First Cook in 2026
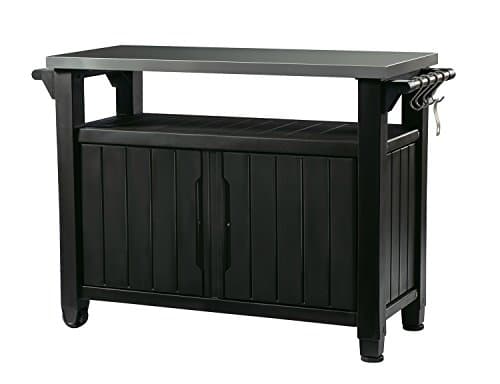
Keter Unity XL Portable Outdoor Table with Stainless Steel Top for Kitchen Prep and Outdoor Storage Cabinet for Grilling Accessories, Dark Grey
$220.99
Shop Now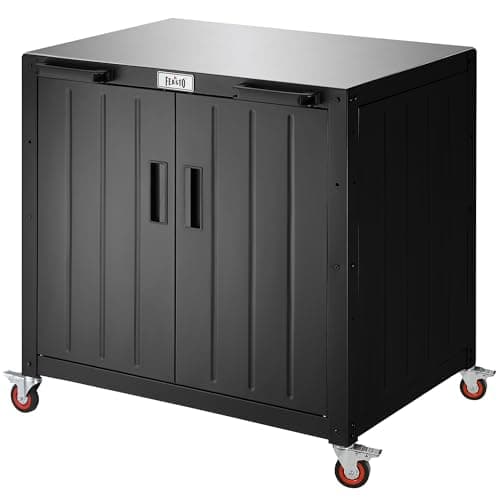
Feasto Outdoor Grill Cart with Storage Cabinet and Stainless Steel Top, 35-Inch Outdoor Grill Station with Door, Modular Kitchen Island for Food Prep and BBQ, Black & Silver
$219.99
Shop Now
Feasto Outdoor Kitchen Island with Cabinet, Outdoor Grill Table with Stainless Steel Top for Pizza Oven& Griddles, Movable Bar Cart with Pull-Out Plate for Parties& Gathering, Heavy-Duty, L74”x W24”
$259.99
Shop Now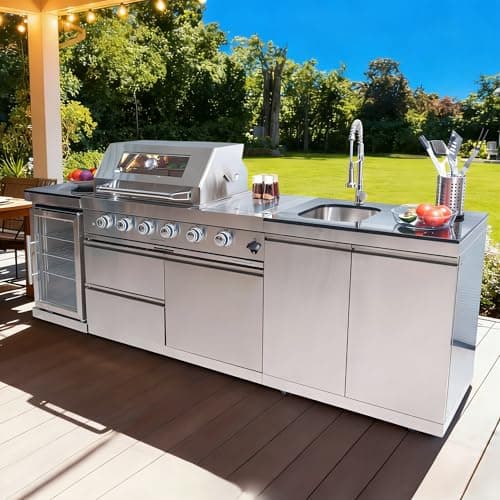
98 Inches Outdoor Kitchen Island, 4-Burner 72000 BTU Propane Stainless Steel BBQ with Side/Rear Burners, With Refrigerator and Sink, Rotisserie, Granite Countertops, Storage, For Backyard BBQ, Silver
$3,652.00
Shop Now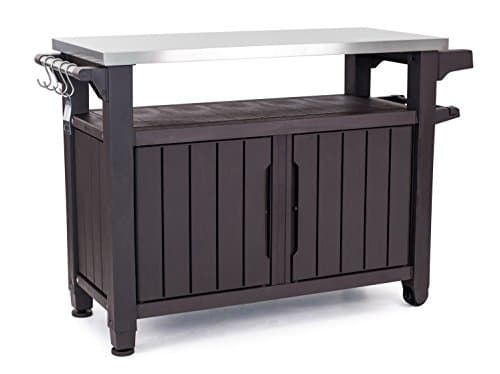
Keter Outdoor Rolling Table Cart for Food Prep, Storage, Bar & Grill, Dark Brown - Portable Kitchen Island Tabletop with Wheels for Drinks, Snacks, and Cooking
$265.99
Shop Now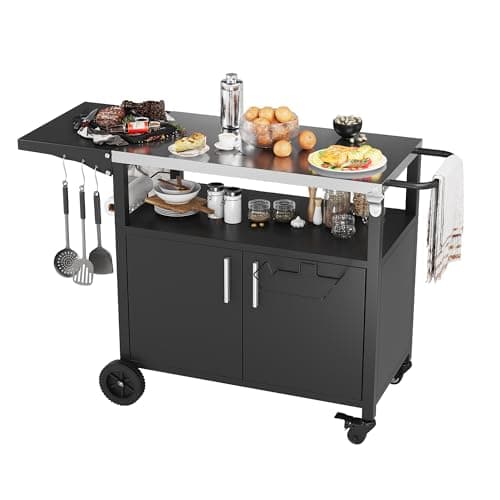
JY QAQA Outdoor Grill Cart with Storage,Patio Kitchen Island Outdoor Grill Table with Wheels,BBQ Cart Movable Pizza Oven Table Stand, Storage Cabinet, Foldable Tabletop, (Black)
$135.98
Shop Now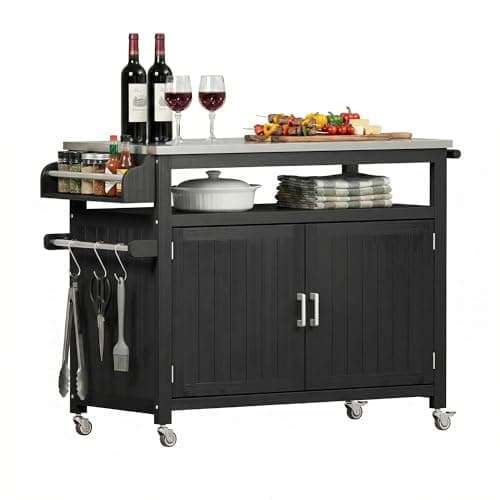
FUQARHY 43.3-Inch Outdoor Kitchen Island with Storage Cabinet and Stainless Steel Top, Solid Wood Prep Station Grill Table with Lockable Wheels for Patio, Backyard, Party (Black)
$199.99
Shop Now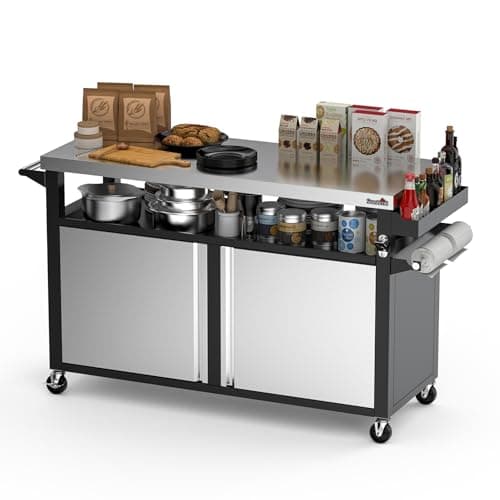
Stanbroil Rolling Outdoor Kitchen Island, BBQ Grill Cart with Stainless Steel Table Top, Double-Door Storage Cabinet & Pull-Out Shelf, Grill Table Cart for Outdoor Indoor, Large
$519.99
Shop NowKeter Unity XL Portable Outdoor Table with Stainless Steel Top for Kitchen Prep and Outdoor Storage Cabinet for Grilling Accessories, Dark Grey
$220.99
Shop NowFeasto Outdoor Grill Cart with Storage Cabinet and Stainless Steel Top, 35-Inch Outdoor Grill Station with Door, Modular Kitchen Island for Food Prep and BBQ, Black & Silver
$219.99
Shop NowFeasto Outdoor Kitchen Island with Cabinet, Outdoor Grill Table with Stainless Steel Top for Pizza Oven& Griddles, Movable Bar Cart with Pull-Out Plate for Parties& Gathering, Heavy-Duty, L74”x W24”
$259.99
Shop Now98 Inches Outdoor Kitchen Island, 4-Burner 72000 BTU Propane Stainless Steel BBQ with Side/Rear Burners, With Refrigerator and Sink, Rotisserie, Granite Countertops, Storage, For Backyard BBQ, Silver
$3,652.00
Shop NowKeter Outdoor Rolling Table Cart for Food Prep, Storage, Bar & Grill, Dark Brown - Portable Kitchen Island Tabletop with Wheels for Drinks, Snacks, and Cooking
$265.99
Shop NowJY QAQA Outdoor Grill Cart with Storage,Patio Kitchen Island Outdoor Grill Table with Wheels,BBQ Cart Movable Pizza Oven Table Stand, Storage Cabinet, Foldable Tabletop, (Black)
$135.98
Shop NowFUQARHY 43.3-Inch Outdoor Kitchen Island with Storage Cabinet and Stainless Steel Top, Solid Wood Prep Station Grill Table with Lockable Wheels for Patio, Backyard, Party (Black)
$199.99
Shop NowStanbroil Rolling Outdoor Kitchen Island, BBQ Grill Cart with Stainless Steel Table Top, Double-Door Storage Cabinet & Pull-Out Shelf, Grill Table Cart for Outdoor Indoor, Large
$519.99
Shop NowWeekend Zero: Permits, Sketch, and Site Selection for Your Do It Yourself Outdoor Kitchen
Before any tool comes out of the box, spend a Saturday with a tape measure, graph paper, and your local building department's website. Most jurisdictions require permits for any structure with gas, electrical, or plumbing connections, and a small subset require permits for any built-in masonry over a certain size. A typical permit for a residential outdoor kitchen runs $150 to $500 and includes one or two inspections. Skipping the permit creates a disclosure problem if you ever sell your home and can void homeowner insurance coverage if a fire originates from the unpermitted structure. For a structured overview of every related topic, see our outdoor kitchen index page for further reading.
Site selection drives everything downstream. Look for a flat area within 25 feet of an exterior wall (for gas and electrical runs), with at least 8 feet of clearance from any combustible structure or overhang, and ideally on the leeward side of your house so prevailing wind blows smoke away from windows. Sketch a plan view at 1/4 inch equals 1 foot scale showing the proposed island footprint, distance to property lines, and routes for utilities. This sketch becomes the basis for your permit application and your shopping list. Take a photo of the site with the sketch held up for reference — useful when you order materials and want to visualize fit.
Weekend One: Foundation Pad and Layout
The foundation determines whether your build sits flat for 25 years or settles unevenly in three. For a 6-by-2-foot island, you need a 7-by-3-foot concrete pad at minimum, 4 inches thick, set on 4 inches of compacted gravel. Cost for materials: approximately $180 in 60-pound bags of concrete (you will need 14 to 16 bags), $60 in gravel base, $35 in 2x4 form lumber, and $25 in rebar. Tools required: shovel, tamper (rent a plate compactor for $60 a day if your soil is loose), wheelbarrow, mixing tub or rented mixer, level, and a screed board.
Excavate to 8 inches below grade, set forms with 2x4s leveled in both directions, lay the gravel and tamp it firm. Mix concrete to a peanut-butter consistency, pour, screed flat with the 2x4 board pulled across the form, and float the surface smooth with a magnesium float. Insert two horizontal courses of #4 rebar before the concrete sets. Cover with plastic sheeting overnight and wait 7 days before placing significant weight on the pad. This is a one-day job for two people working at a steady pace; plan to start at 8 AM and finish cleanup by 4 PM.
Weekend Two: Frame Construction Using Steel Studs or Cinder Block
The two beginner-friendly framing options are galvanized steel studs (for a faced kitchen with veneer) or 8-inch cinder blocks (for a solid masonry build). For first-timers, we recommend cinder block — there is no measuring complex angles, no metal cutting, and the result is structurally bulletproof. Materials for a 6-by-2-foot island three blocks tall: roughly 60 to 70 standard 8x8x16 blocks at $2.50 each ($175), 4 bags of Type S mortar at $14 each ($56), and a sack of mason sand ($12).
Tools: 4-foot level, mason's trowel, rubber mallet, wheelbarrow, mortar mixing tub, and either a brick hammer or angle grinder for any cuts. Lay the first course directly onto the cured concrete pad, troweling a 1-inch mortar bed along the perimeter. Set each block with light taps from the rubber mallet, checking level both directions and along the run. Stagger joints between courses for strength — never stack blocks in a straight vertical column. Leave a precise opening for your grill cutout based on the manufacturer specification (download the PDF before this weekend). The structure should be three blocks tall, which puts your countertop at roughly 36 inches above grade.
Weekend Three: Gas, Electrical, and Plumbing Rough-In (Hire This Out)
This is the weekend you do not do yourself. Have a licensed plumber run the gas line from your meter to the island during the open frame stage, before the countertop and veneer are installed. Standard cost is $800 to $1,800 depending on distance and whether trenching is required. They should install a quarter-turn shutoff valve at the appliance connection and pressure-test the line per local code. Get a receipt and keep the inspection certificate — this protects warranty claims and resale disclosure.
For electrical, hire a licensed electrician to bring a 20-amp GFCI-protected circuit to the island for the refrigerator and outlet. Cost runs $400 to $900 depending on whether you need a new breaker at the panel. The electrician should pull a permit and schedule a rough-in inspection while the wires are visible. Plumbing for a non-pressurized drain to a bucket does not require a licensed plumber in most jurisdictions — that is essentially a kitchen prep sink with a P-trap dropped into a 5-gallon container. If you want a hot-water-supplied sink, that becomes plumber work and the cost rises. Stay with the dry-bucket approach for your first DIY build.
Weekend Four: Stone Veneer or Stucco Finishing
Cinder block is functional but not pretty. Veneer transforms it. The two most beginner-friendly finishing options are manufactured stone veneer (Cultured Stone, Eldorado Stone, ProVia) at $8 to $14 per square foot, or cement stucco at $3 to $6 per square foot. For a 6-by-2-foot, 3-foot-tall island, you have approximately 48 square feet of veneer area — about $400 to $700 in stone veneer or $150 to $300 in stucco materials.
Veneer installation: apply a metal lath fastened with masonry screws every 16 inches, trowel a 1/2-inch scratch coat of Type S mortar, let cure 24 hours, then butter the back of each stone with a 1/2-inch mortar bed and press into place. Work bottom up, leaving a 1/2-inch gap between stones for grout. Wet down the stones before placement to prevent rapid moisture loss into the porous surface. After 48 hours, fill joints with a grout bag. Stucco is faster but requires more skill to achieve a smooth finish — practice on scrap before committing to the full island. For first-time builders, manufactured stone is more forgiving because the irregular pattern hides minor errors.
Weekend Five: Countertop Selection and Installation
The countertop is your single most visible material and gets the most heat exposure. Three beginner-friendly options exist: 2-inch precast concrete (DIY-able with mold and mix, $4 to $8 per square foot in materials), porcelain tile over backer board ($6 to $15 per square foot), or prefab granite remnants from local stone yards ($30 to $55 per square foot installed by the yard).
For absolute beginners, the porcelain tile approach gives the best result-to-skill ratio. Cut 1/2-inch cement backer board to fit the island top, screw to the cinder block at 8-inch spacing using masonry screws, and tape seams with fiberglass mesh and thinset. Tile over the backer using 12x24 porcelain tiles in a running bond pattern, with 1/8-inch grout joints. Cut the grill cutout with a wet saw before tiling around the opening so the cuts hide neatly under the grill bezel. Allow 24 hours for thinset to cure, then grout with an epoxy-modified grout that resists food staining. The DIY concrete option requires building a melamine form, mixing GFRC concrete (glass fiber reinforced), and lifting a 200-plus-pound finished slab onto the island — strongly recommended only for builders with prior concrete experience.
Weekend Six: Grill Drop-In, Cabinet Doors, and Finishing Hardware
This is the rewarding weekend. The 32-inch built-in grill (Blaze 32-inch Premium LTE at $1,999, or Bull Lonestar Select at $1,599) drops into the precut opening in 30 minutes. Connect to the gas stub-out using a yellow flexible appliance connector rated for outdoor use, and tighten with two wrenches — never grip the grill regulator with a single tool, as you can damage internal threads. Test for leaks by spraying soapy water on every joint and watching for bubbles for 60 seconds.
Install access doors below the grill (Blaze 32-inch Single Access Door at $279, or Sunstone 30-inch Double Door at $399) using the supplied flange and masonry screws. Add a non-plumbed sink (Sunstone bar sink at $179) with a 5-gallon bucket below the cabinet to catch drains. The outdoor refrigerator (Summit SPR2BARSCSSADA at $799) slides into a precut cabinet opening and plugs into the GFCI outlet. Install any remaining hardware: hood for the grill if covered, lights under the counter overhang if desired. Total install weekend takes 6 to 8 hours and finishes with the moment you have been waiting for.
Weekend Seven: Final Inspection and First Cookout
Schedule the gas inspection through your permit before lighting the grill for the first time. The inspector will verify pressure-test documentation from your plumber, check that the appliance connector is rated for outdoor use, confirm the shutoff valve is accessible, and look at the overall structural integrity. Most inspectors complete a residential outdoor kitchen inspection in 15 to 30 minutes. If anything fails, fix it and reschedule — do not light gas appliances until you have a passing inspection.
Once approved, season the grill per the manufacturer instructions: typically run all burners on high for 20 to 30 minutes with the lid closed to burn off manufacturing oils. Then load the cookbox with food and host the first official cookout. We recommend an easy menu — burgers, hot dogs, grilled corn, and a simple salad — for cook number one. Spend that meal noting where the workflow feels awkward, where you wished you had more counter space, and what additional accessories or tools would improve the next cook. Most DIY outdoor kitchens see one or two minor refinements (better lighting, a small tool drawer, a trash receptacle) added in the months following the initial build.