Outdoor Grilling Kitchen: High-Heat Zones, Smoke Management & Ventilation Design
Outdoor grilling kitchen design focused on high-heat zones, smoke management, hood ventilation, and protein-first workflow for serious grillers.
Outdoor Kitchen Setup Editorial Team
Outdoor living specialists with 15+ years of hands-on experience
Top Picks: Best Outdoor Grilling Kitchen: High-Heat Zones, Smoke Management & Ventilation Design in 2026
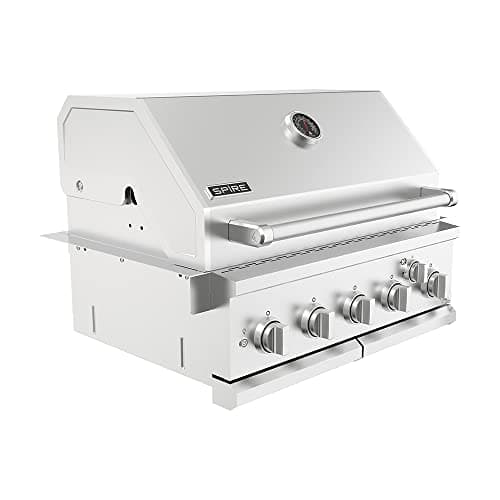
Spire Premium 5 Burner Built In Gas Grill Island Head, Stainless Steel 30 Inch Propane Grill with Rear Burner, 63,000 BTUs, 750 SQ In Racks, Dual Fuel Compatibility - 740-0788P
$899.00
Shop Now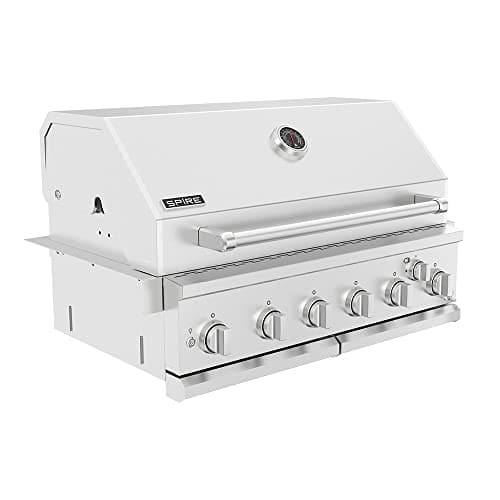
Spire Premium 6 Burner Built In Gas Grill Island Head, Stainless Steel 36 Inch Propane Grill with Rear Burner, 73,000 BTUs, 904 SQ In Racks with Dual Fuel Compatibility - 740-0781P
$1,079.00
Shop Now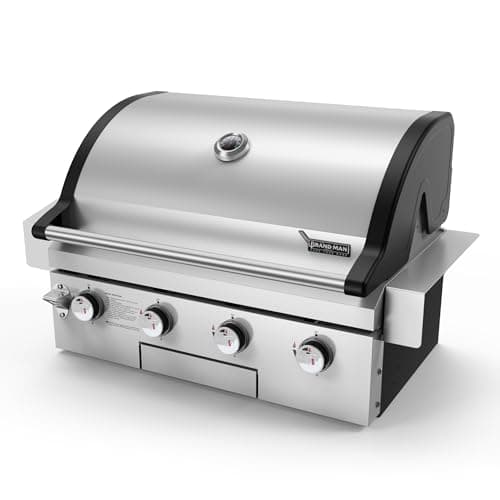
Brand-Man Gas Grill Built-In Head, 30-Inch 4-Burner Propane Grill, Natural Gas Convertible, Heavy Duty 304 Stainless Steel 40,000BTUs BBQ Island Outdoor Kitchen
$889.99
Shop Now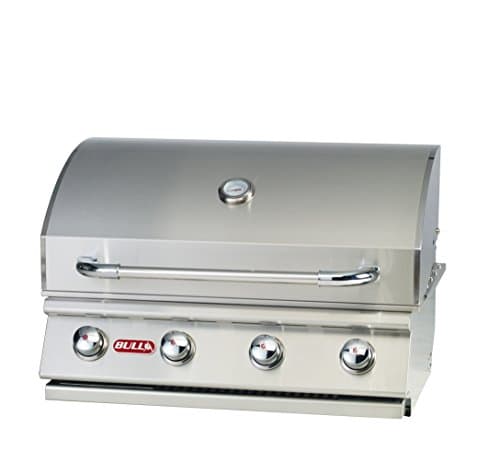
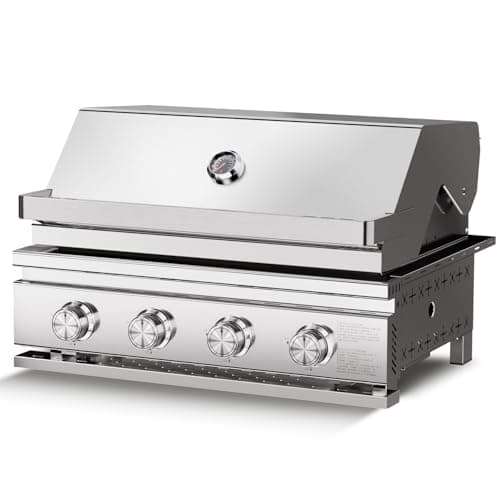
Premium Built In 4 Burner Propane Gas Grill, ALL-Thickened 304 Stainless Steel, 32,000 BTU with 516sq.in. Cooking Space, Baking Tray & Grates,for Patio Backyard Parties Barbecue
$899.99
Shop Now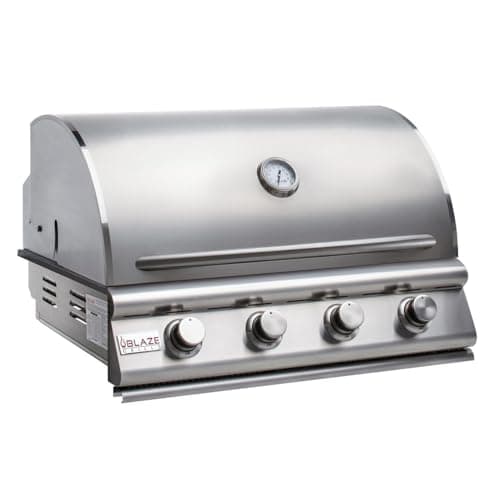
Blaze Prelude LBM Built-In Propane Gas Grill | 32-Inch 4-Burner BBQ with 56,000 BTUs | 304 Stainless Steel Construction | Flame Stabilizing Grids | BLZ-4LBM-LP
$1,749.00
Shop Now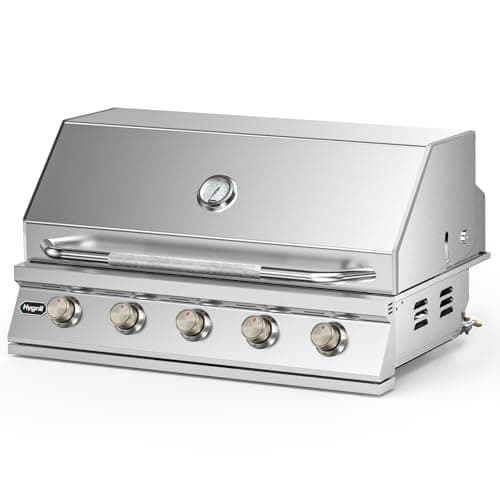
Hygrill STD Series 40-Inch Built In Grill, Stainless Steel 5-Burner Grill Head for Outdoor Kitchen, Natural Gas
$1,629.99
Shop Now
Flintex 40 Inch Built-in BBQ Gas Grill (NG/LPG Convertible), 6-Burner Outdoor Kitchen Gas/Propane Grill with Griddle Combo, Stainless Steel Built-in Outdoor BBQ Grill for Outdoor Kitchen
$1,169.99
Shop NowSpire Premium 5 Burner Built In Gas Grill Island Head, Stainless Steel 30 Inch Propane Grill with Rear Burner, 63,000 BTUs, 750 SQ In Racks, Dual Fuel Compatibility - 740-0788P
$899.00
Shop NowSpire Premium 6 Burner Built In Gas Grill Island Head, Stainless Steel 36 Inch Propane Grill with Rear Burner, 73,000 BTUs, 904 SQ In Racks with Dual Fuel Compatibility - 740-0781P
$1,079.00
Shop NowBrand-Man Gas Grill Built-In Head, 30-Inch 4-Burner Propane Grill, Natural Gas Convertible, Heavy Duty 304 Stainless Steel 40,000BTUs BBQ Island Outdoor Kitchen
$889.99
Shop NowPremium Built In 4 Burner Propane Gas Grill, ALL-Thickened 304 Stainless Steel, 32,000 BTU with 516sq.in. Cooking Space, Baking Tray & Grates,for Patio Backyard Parties Barbecue
$899.99
Shop NowBlaze Prelude LBM Built-In Propane Gas Grill | 32-Inch 4-Burner BBQ with 56,000 BTUs | 304 Stainless Steel Construction | Flame Stabilizing Grids | BLZ-4LBM-LP
$1,749.00
Shop NowHygrill STD Series 40-Inch Built In Grill, Stainless Steel 5-Burner Grill Head for Outdoor Kitchen, Natural Gas
$1,629.99
Shop NowFlintex 40 Inch Built-in BBQ Gas Grill (NG/LPG Convertible), 6-Burner Outdoor Kitchen Gas/Propane Grill with Griddle Combo, Stainless Steel Built-in Outdoor BBQ Grill for Outdoor Kitchen
$1,169.99
Shop NowDesigning Heat Zones in an Outdoor Grilling Kitchen
Heat zoning is the foundational concept that separates a serious outdoor grilling kitchen from a casual one. The grill is divided into at least three thermal zones: a high-heat sear zone (550 to 700 degrees Fahrenheit, often supplemented by infrared burners hitting 1,500 degrees), a medium direct zone (375 to 475 degrees, where most main proteins finish), and a low indirect zone (225 to 325 degrees, for slow cooking, smoking, and warming). For deeper context across related categories, our outdoor kitchen learning hub for further reading.
Layout-wise, the sear zone typically sits on one end of the grill (right side for right-handed cooks, since you naturally pivot food in that direction with tongs in the dominant hand), the medium zone occupies the center, and the indirect zone sits on the opposite end. For a 36-inch grill with four 18,000 BTU burners, this means burners 1 and 2 lit at high, burner 3 at medium, and burner 4 off entirely. The cool zone also serves as a refuge for flare-up rescue — when fat ignites in the hot zone, you slide the protein left for 30 to 60 seconds and the flames die out without scorching the meat. Premium grills like the Lynx Professional add a dedicated infrared sear zone separate from the main burners, giving you a fourth zone for steakhouse-style crust formation.
Smoke Management: Wind Direction, Stack Effect, and Neighbor Considerations
Smoke is the unintended consequence of every fire-cooking session, and good outdoor grilling kitchen design treats smoke control as a core requirement rather than an afterthought. The first variable is wind direction. Identify the prevailing wind direction at your specific yard during cooking hours (usually afternoon and early evening) — most regions have surprisingly consistent patterns. Position the grill so smoke blows away from your seating area, away from your neighbor's yard, and away from any open windows on your house.
The second variable is stack effect. Heat rises, and a tall narrow chimney like a kamado-style smoker creates strong upward draft that lifts smoke 10 to 15 feet above the cookbox before it disperses. A wide flat grill without a tall hood produces low-hanging smoke that lingers at face level. If your grill sits under a covered structure, a properly sized hood with vertical exhaust stack above the roofline transforms smoke management. The third variable is fuel choice — lump charcoal produces less smoke than briquettes, well-seasoned hardwood produces less smoke than green wood, and food-grade pellets produce the cleanest smoke of all common fuels. For neighborhood harmony, schedule longer smokes (briskets, pork shoulders) for weekends rather than weeknights, and avoid early-morning cooks when neighbors have open windows.
Ventilation Hood Sizing for Covered Outdoor Grilling Kitchens
If your outdoor grilling kitchen sits under a solid roof, screened porch, or pergola with solid panels, ventilation becomes mandatory both for code compliance and practical livability. The sizing rule is 100 CFM (cubic feet per minute) of exhaust capacity per 10,000 BTU of grill output. A 90,000 BTU grill needs a 900-CFM hood at minimum; a multi-cooker setup totaling 200,000 BTU needs 2,000 CFM.
Outdoor-rated commercial-style hoods come from a small set of specialists: Vent-A-Hood (XRH series, 600 to 1,500 CFM, $1,800 to $3,500), ProLine Range Hoods (PLJW outdoor series, 600 to 2,000 CFM, $2,200 to $4,500), Trade-Wind (S-7200 outdoor, 1,200 to 2,400 CFM, $3,500 to $6,500), and Modern-Aire (custom commercial-grade, $4,500 to $12,000). The hood should sit 30 to 36 inches above the grill cooking surface and project at least 6 inches beyond the grill edge on all sides. The exhaust duct must be smooth-walled stainless or galvanized steel, run as straight as possible to the exterior, and terminate at least 10 feet from any operable window. Make-up air supply is required by code in many jurisdictions when exhaust exceeds 400 CFM.
High-Heat Surface Materials for Outdoor Grilling Kitchen Counters
Counter materials adjacent to a hot grill see surface temperatures of 200 to 400 degrees Fahrenheit when the lid is open and food is being staged. Not every countertop material handles this well. Best performers: sintered stone surfaces like Dekton ($85 to $150 per square foot, virtually impervious to heat and stains); natural granite ($45 to $100 per square foot, excellent heat resistance, slight risk of thermal shock cracking on cheap thin slabs); concrete with high-temperature sealer ($65 to $135 per square foot, durable but stains if sealer wears).
Acceptable performers: porcelain tile ($6 to $25 per square foot, individual tiles can crack from rapid temperature changes but easy to replace); natural stone like quartzite ($60 to $120 per square foot, harder than granite but more expensive). Avoid: natural marble (etches from acidic foods, stains from grease), engineered quartz used indoors (Caesarstone, Silestone — the polymer binder yellows under direct UV and degrades over 220 degrees Fahrenheit), and any wood-based surface within 18 inches of the grill (charring risk). The sweet spot for most outdoor grilling kitchens is natural granite at 3 cm thickness with a leathered finish that hides grease drops better than polished surfaces.
Grease Management and Drainage in Outdoor Grilling Kitchens
Grease accumulation is the unglamorous reality of serious grilling. A single cookout for 8 to 12 people generates roughly 4 to 8 ounces of rendered fat that drips through grates and settles in collection trays, on burner shields, and on the surrounding masonry. Inadequate grease management leads to grease fires, pest attraction, and gradual degradation of the surrounding surfaces.
Premium built-in grills include integrated grease management systems — Lynx uses a labyrinth design that channels drippings to a removable tray; DCS uses a sloped firebox that drains forward; Bull and Napoleon use removable grease cups. These systems should be emptied after every cook and washed weekly. The countertop and floor surrounding the grill should slope 1/8 inch per foot away from the grill toward a drain or open ground, never toward seating areas. For floor drainage, install a 6-inch trench drain (NDS Pro Series at $200 per 4-foot section) directly in front of the grill that connects to a grease-trapping interceptor before discharging to the storm system or dry well. Grease traps need annual cleanout — typically a 30-minute job. Wood-fired and charcoal grills add ash management — a removable ash pan emptied into a metal container minimizes the risk of stray embers igniting nearby surfaces.
Protein-First Prep Workflow for Grilling Sessions
An outdoor grilling kitchen is optimized for protein cooking, and the prep workflow should reflect that priority. The standard mise en place: proteins come out of cold storage no more than 30 to 45 minutes before grilling (longer if frozen, never if just lightly chilled), are seasoned at the prep counter, then transported to the grill. The prep zone should sit immediately adjacent to the cold storage, not across the kitchen — every step a raw protein takes adds time on a hot day and increases food safety risk.
A practical protein-first layout: 24-inch outdoor refrigerator on the left, 36-inch prep counter in the middle (large enough to lay out two full sheet pans of seasoned proteins), grill station on the right. Tool storage above and below the prep counter holds tongs, spatulas, instant-read thermometer, salt cellars, and rub jars. Two cutting boards — one labeled raw protein and one for finished food — prevent cross-contamination. A dedicated trash receptacle below the prep counter (Bull 14-inch Trash Drawer at $549) keeps food packaging out of sight. After grilling, finished proteins rest on a cutting board on the cold side of the kitchen for the appropriate carryover time before serving — never on the same surface that handled raw food.
Lighting for Late-Evening Outdoor Grilling Sessions
Many serious grillers cook in the evening when ambient light is fading, and proper lighting is both a safety requirement and a quality requirement — you cannot judge meat doneness by visual char if you cannot see the protein clearly. Three lighting layers serve an outdoor grilling kitchen well. Task lighting directly above the cooking surface and prep counter at 100 to 150 lumens per square foot — bright enough to see food color accurately. Recessed LED downlights or under-pergola track lights work well; integrated grill hood lights (Lynx, Napoleon Prestige PRO) handle the cookbox interior.
Ambient lighting at 30 to 50 lumens per square foot illuminates the broader kitchen and dining area without creating glare on cooking surfaces. String lights, lantern fixtures, or under-counter LED strips serve this role. Accent lighting highlights architectural features, planters, and pathways at 10 to 20 lumens per square foot. Color temperature matters: 3000K to 3500K (warm white) renders meat and vegetables most accurately. Avoid 5000K daylight bulbs in cooking areas — they make medium-rare beef look gray and unappetizing. All exterior lighting must be on GFCI-protected circuits with weatherproof junction boxes. Smart controls (Lutron Caseta, Philips Hue Outdoor) allow scenes for prep, cook, and dining phases.
Fire Safety Around an Outdoor Grilling Kitchen
An outdoor grilling kitchen with multiple high-BTU appliances under a covered structure presents real fire risk if not properly designed. Required clearances vary by jurisdiction but standard guidelines apply broadly. Vertical clearance: at least 36 inches between the top of an open grill and any combustible material (wood pergola, vinyl siding); 48 inches if the structure is fully enclosed. Insulating jackets on built-in grills reduce required clearance to as little as 6 inches to combustibles when properly installed.
Horizontal clearance: 12 inches minimum from grill side panels to combustible cabinetry, 18 inches for high-output models above 80,000 BTU. Fire suppression: A 5-pound ABC dry chemical fire extinguisher should be mounted within 10 feet of the cooking area, easily accessible from outside the immediate hot zone. Some insurance carriers offer premium discounts for kitchens with installed suppression systems like the Ansul R-102 (commercial-grade, $1,500 to $4,000 installed). Material selection within 36 inches of the grill: only non-combustible surfaces — stone, masonry, stainless steel, porcelain. Test the smoke and CO detectors in your house at the start of every grilling season. Never leave a lit grill unattended, and let charcoal/wood ash cool in a metal container for 48 hours before disposal.