Outdoor Kitchen With Traeger and Blackstone: Setup, Layout & Integration Guide
Outdoor kitchen with Traeger and Blackstone setup: how to integrate a pellet grill and flat top griddle into one island, layout options, electrical needs, and clearance requirements.
Outdoor Kitchen Setup Editorial Team
Outdoor living specialists with 15+ years of hands-on experience
An outdoor kitchen with a Traeger and Blackstone gives you two fundamentally different cooking methods in one setup: low-and-slow pellet smoking from the Traeger and high-heat flat-top griddle cooking from the Blackstone. These two appliances cover more cooking styles than almost any other combination — you can smoke a brisket for 12 hours on the Traeger while simultaneously cooking breakfast hash on the Blackstone at the same time on a weekend morning. The pairing is especially popular among outdoor cooking enthusiasts who want gas grill heat and wood smoke flavor without buying separate appliances for each task.
The integration challenge is that Traeger and Blackstone are both freestanding units designed for standalone use — neither was originally built for drop-in island installation. A Traeger Timberline or Ironwood can be set on a reinforced countertop or placed in a dedicated section of an L-shaped island, but the side hopper and controller need clearance that most standard outdoor kitchen cabinet layouts don't account for. The Blackstone Pro Series has flanged edge plates designed for countertop recessing, but the grease management system — the angled cooktop and rear grease trap — requires specific clearance below the cooktop surface that varies by model.
This guide covers how to integrate both units into a functional outdoor kitchen, including the most common layout configurations, the specific clearance requirements for each appliance, the electrical and utility needs, and the pellet storage solution that prevents the most common Traeger-in-an-island problem: moisture getting into the hopper. We also cover the pure freestanding setup for those who want both units on a common prep table without building a permanent island.
Top Picks: Best Outdoor Kitchen With Traeger and Blackstone: Setup, Layout & Integration Guide in 2026
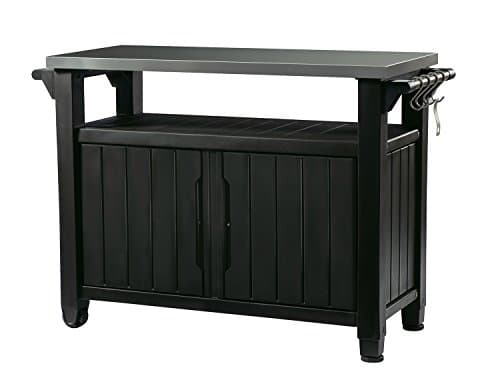
Keter Unity XL Portable Outdoor Table with Stainless Steel Top for Kitchen Prep and Outdoor Storage Cabinet for Grilling Accessories, Dark Grey
$220.99
Shop Now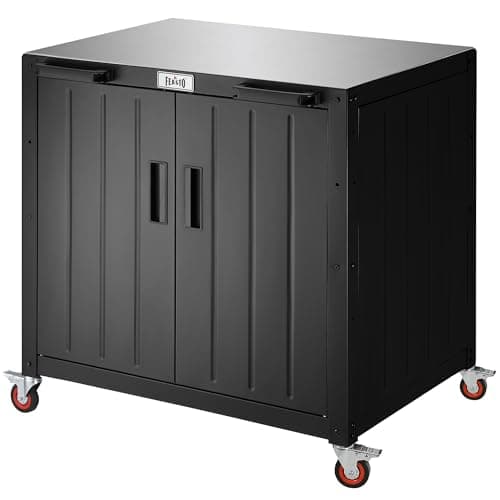
Feasto Outdoor Grill Cart with Storage Cabinet and Stainless Steel Top, 35-Inch Outdoor Grill Station with Door, Modular Kitchen Island for Food Prep and BBQ, Black & Silver
$219.99
Shop Now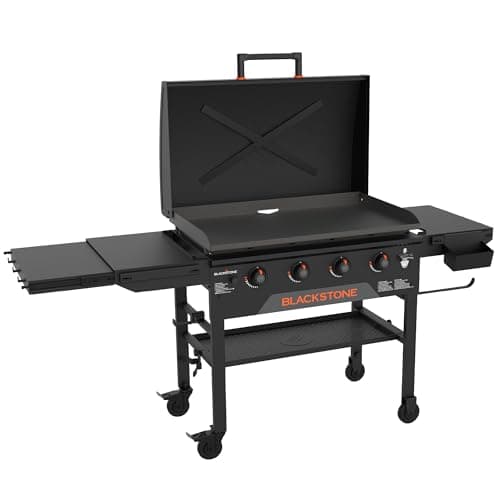
Blackstone Original 36" Griddle, Portable Outdoor Grill with Built-In Hood, Black - Includes Extendable Side Shelves and Caster Wheels
$499.00
Shop Now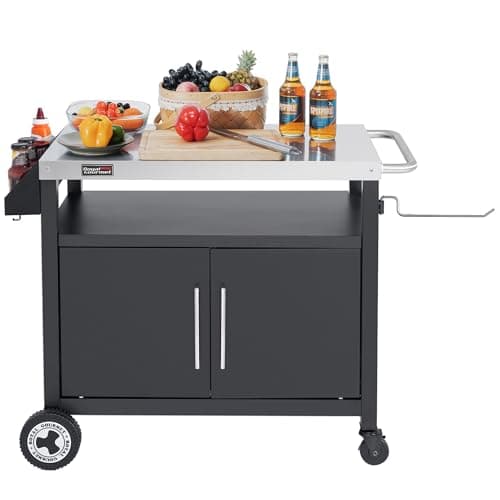
Grills House Outdoor Grill Cart with Wheels, Movable Kitchen Island with Storage Cabinet for BBQ, Stainless Steel Dining Cart Table for Food Prep, Black, PC3403S-SC
$159.96
Shop Now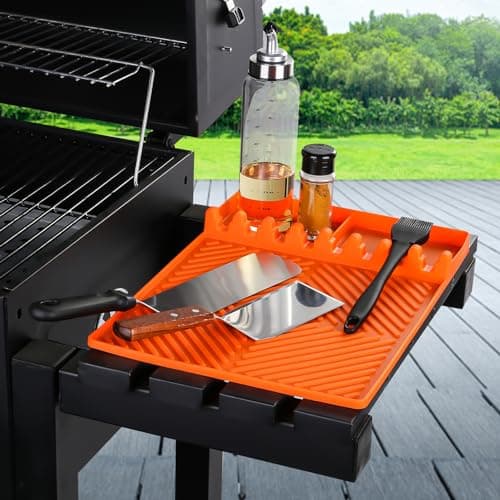
Silicone Tools Mat for Griddle Kitchen Cooking Baking Countertop-Side Shelf Spatula Mat with Drip Pad for Blackstone Weber Traeger Pit Boss Flat Top Grill Smoker- BBQ Accessories Gifts for Men(Orange)
$12.97
Shop Now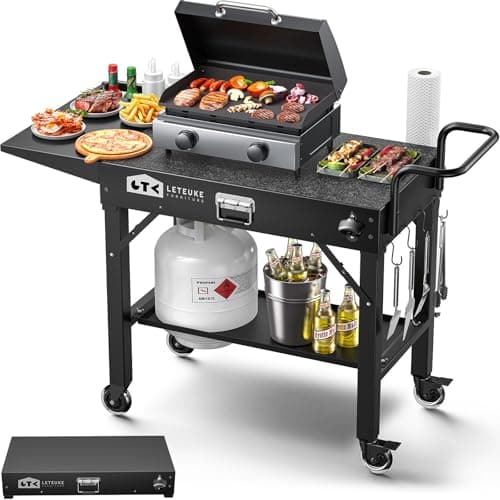
Leteuke Grill Cart for Blackstone Griddle, Portable Outdoor Grill Table, Foldable Cart Table with Wheels for Ninja, Griddle Stand Fit 17 Inch Or 22 Inch, BBQ Prep Tables with Seasoning Tray
$129.99
Shop Now
Silicone Grill Tools Mat for Blackstone Weber Traeger Pit Boss Flat Top Grill Smoker,BBQ Accessories Pad Mats for Outdoor Kitchen Counter Cooking, Side Shelf Spatula Mat,Gifts for Men (Black)
$9.99
Shop Now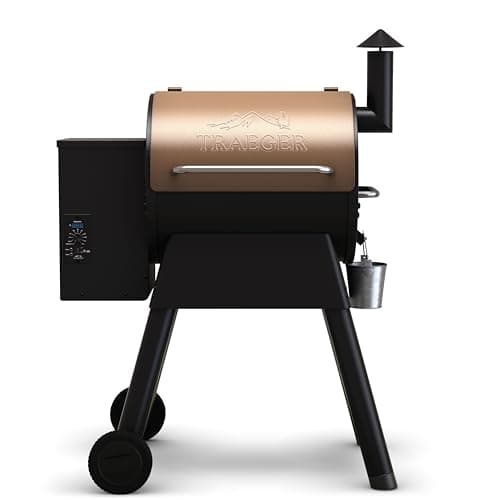
Traeger Grills Pro 22 Wood Pellet Grill & Smoker, Electric Pellet Smoker Grill Combo, 6-in-1 BBQ Versatility, 572 sq. in. Grilling Capacity, Meat Probe, 450 Degree Max Temperature, 18LB Hopper, Bronze
$389.00
Shop NowKeter Unity XL Portable Outdoor Table with Stainless Steel Top for Kitchen Prep and Outdoor Storage Cabinet for Grilling Accessories, Dark Grey
$220.99
Shop NowFeasto Outdoor Grill Cart with Storage Cabinet and Stainless Steel Top, 35-Inch Outdoor Grill Station with Door, Modular Kitchen Island for Food Prep and BBQ, Black & Silver
$219.99
Shop NowBlackstone Original 36" Griddle, Portable Outdoor Grill with Built-In Hood, Black - Includes Extendable Side Shelves and Caster Wheels
$499.00
Shop NowGrills House Outdoor Grill Cart with Wheels, Movable Kitchen Island with Storage Cabinet for BBQ, Stainless Steel Dining Cart Table for Food Prep, Black, PC3403S-SC
$159.96
Shop NowSilicone Tools Mat for Griddle Kitchen Cooking Baking Countertop-Side Shelf Spatula Mat with Drip Pad for Blackstone Weber Traeger Pit Boss Flat Top Grill Smoker- BBQ Accessories Gifts for Men(Orange)
$12.97
Shop NowLeteuke Grill Cart for Blackstone Griddle, Portable Outdoor Grill Table, Foldable Cart Table with Wheels for Ninja, Griddle Stand Fit 17 Inch Or 22 Inch, BBQ Prep Tables with Seasoning Tray
$129.99
Shop NowSilicone Grill Tools Mat for Blackstone Weber Traeger Pit Boss Flat Top Grill Smoker,BBQ Accessories Pad Mats for Outdoor Kitchen Counter Cooking, Side Shelf Spatula Mat,Gifts for Men (Black)
$9.99
Shop NowTraeger Grills Pro 22 Wood Pellet Grill & Smoker, Electric Pellet Smoker Grill Combo, 6-in-1 BBQ Versatility, 572 sq. in. Grilling Capacity, Meat Probe, 450 Degree Max Temperature, 18LB Hopper, Bronze
$389.00
Shop NowUnderstanding the Two Appliances Before You Design
Before planning any outdoor kitchen layout around a Traeger and Blackstone, understand the operational requirements that differ from standard built-in gas appliances.
Traeger pellet grills: Traeger's Timberline, Ironwood, and Pro series are all freestanding, barrel-shaped units. They require 120V AC power for the auger motor, igniter, and WiFIRE controller — a GFCI outdoor outlet is required, not optional. They exhaust smoke from the chimney at the rear or top, which means clearance above and behind the unit matters for both smoke dispersal and cabinet material protection. The hopper holds 20–24 lbs of pellets (depending on model), which must stay dry — any water intrusion causes the pellets to swell and jam the auger.
Blackstone flat top griddles: The Blackstone 36-inch Griddle Cooking Station uses standard 20 lb propane (or can be converted to natural gas with a conversion kit and regulator). The cooktop surface is one continuous flat steel plate that heats zones independently. Grease and food debris drain off the rear of the cooktop into a grease trap — this rear drainage means the griddle cannot be fully recessed from below without a grease collection modification. The 28-inch and 36-inch models have different BTU outputs (34,000 BTU and 60,000 BTU respectively) affecting how much clearance is needed from adjacent surfaces and overhead structures.
Why they work together: The Traeger handles every low-and-slow application (ribs, brisket, pork shoulder, whole chicken) where wood smoke improves the result. The Blackstone handles everything high-heat and flat (smash burgers, stir fry, eggs, pancakes, seafood, steak sear). Together they cover 95% of outdoor cooking scenarios, with the only gap being direct charcoal grilling flavor — a use case you can address with a cast iron skillet on the Blackstone for a partial sear.
Layout Options for a Traeger and Blackstone Outdoor Kitchen
There are four practical layout configurations for an outdoor kitchen combining a Traeger and Blackstone. The right choice depends on your patio size, whether you want a permanent island or a semi-portable setup, and your budget.
Option 1 — Side-by-side on a single island: A straight 10-to-12-foot island with the Blackstone on one end and the Traeger on the other, with a prep counter and refrigerator in the middle. The Traeger sits on a reinforced section of countertop (or in a purpose-built recessed section) and is plugged into an outlet integrated into the island end. The Blackstone is similarly set on the opposite end. This is the most compact permanent setup. Minimum island length: 10 feet if both units are set-in, 8 feet if the Traeger is at counter level and the Blackstone is also set-in at a consistent height.
Option 2 — L-shaped island with separate stations: The long leg of the L houses the Blackstone and prep counter; the short leg houses the Traeger and pellet storage. This separates the smoke zone (Traeger) from the high-heat zone (Blackstone) and gives you natural workspace delineation. L-shapes require 120–160 sq ft of patio space to function well with adequate aisle clearance. This is the highest-function layout for a two-unit setup.
Option 3 — Shared prep table, freestanding units: A 6-to-8-foot stainless steel prep table in the center with the Traeger and Blackstone positioned on either side as freestanding units. No permanent installation required. Lowest cost, most flexible (you can rearrange or add appliances), and easiest to winterize. The drawback is no under-counter storage and a less finished appearance.
Option 4 — Traeger pavilion + Blackstone island: The Traeger is positioned under or adjacent to a dedicated shade structure (pergola or pavilion) 5–8 feet from the main outdoor kitchen island, which houses the Blackstone, refrigerator, sink, and prep counter. This maximizes smoke management (the Traeger's exhaust doesn't compete with the island's ventilation zone) and gives each appliance its own dedicated workflow. Best for larger patio spaces (400+ sq ft).
Clearance Requirements for Both Units
Clearances are the most commonly miscalculated element when building an outdoor kitchen around a Traeger and Blackstone. Both appliances have specific minimums that differ from standard gas built-ins.
Traeger clearance requirements: Traeger recommends a minimum of 24 inches clearance between the grill surface and any overhead combustible surface (including wood pergola members and vinyl patio covers). Non-combustible overhead structures (concrete, aluminum) can be as close as 12 inches from the top of the grill — but this still affects smoke dispersal. Lateral clearance from combustible materials: 12 inches on each side. The rear chimney (on Ironwood and Pro models) needs 12 inches of clearance from any wall or vertical surface. The pellet hopper door swings open on the left side — leave 18–24 inches of clearance for hopper access and loading.
Blackstone clearance requirements: The 36-inch Blackstone Griddle requires 24 inches of clearance from overhead combustibles and 6 inches from side surfaces. The rear grease trap extends 3–4 inches behind the cooking surface — plan for this when determining the front-to-back dimension of any counter or structure the Blackstone is set into. The propane connection is at the rear bottom of the unit, requiring access for the regulator and a minimum 4-inch clearance behind the unit for hose routing.
The smoke crossover problem: When both units are running simultaneously, Traeger smoke output is substantial (especially during the startup and temperature-rise phase). If your layout puts the Traeger upwind of the Blackstone and your dining area, smoke will blow across both. Plan the Traeger location so the prevailing wind direction carries smoke away from the dining area and main seating. This is not a clearance issue — it's a site orientation decision that no configurator will flag but that makes or breaks the cooking experience.
Electrical and Utility Requirements
An outdoor kitchen with a Traeger requires more electrical planning than a pure gas kitchen. Here's what's needed:
Electrical for the Traeger: Every Traeger model requires a standard 120V, 15-amp GFCI-protected outlet. The power draw is relatively low (300 watts during startup, dropping to 50–100 watts during normal operation) but the GFCI protection is required by code for any outdoor outlet. Install the outlet inside or on the side of the island at counter level — not at floor level where it can collect water. A weatherproof in-use cover is required. If you're also installing an outdoor refrigerator, you need at least two circuits — the refrigerator draws 2–3 amps continuously and sharing a circuit with the Traeger increases the risk of a nuisance GFCI trip.
Propane vs. natural gas for the Blackstone: The standard Blackstone ships with a standard propane hose and regulator for a 20 lb LP tank. For a permanent outdoor kitchen, natural gas conversion is the cleaner option: you eliminate propane tank storage inside the island (a fire code concern in enclosed cabinets), you never run out of fuel mid-cook, and the cost per BTU is lower. Blackstone sells natural gas conversion kits for their Pro Series models. You'll need a licensed plumber to extend a ¾-inch gas line to the island and install a shutoff valve accessible from outside the cabinet.
Propane storage caution: If you use LP rather than natural gas, do not store the propane tank in an enclosed cabinet under or adjacent to the Blackstone. NFPA 58 and most local fire codes require LP cylinders in outdoor kitchens to be either at grade level in a ventilated cabinet (with a ventilation opening at the bottom for heavier-than-air propane to escape) or positioned adjacent to the island, not inside enclosed storage. A vented LP cabinet is the proper solution — a standard kitchen cabinet door with no ventilation is not code-compliant for LP storage.
Pellet Storage and Moisture Management for Traeger in an Island
The most common problem with Traeger integration in a permanent outdoor kitchen is moisture in the pellet hopper. Wood pellets are hygroscopic — they absorb ambient humidity and, with enough moisture exposure, expand and crumble, jamming the auger. In a freestanding Traeger on a covered patio this is manageable with a grill cover. In an outdoor kitchen island setup, it requires active management.
Solutions in order of effectiveness:
1. Sealed pellet storage cabinet adjacent to the Traeger: The best solution for integrated builds. Build a sealed stainless steel or HDPE cabinet next to the Traeger with a gasketed door, holding 60–80 lbs of pellets in an airtight container. A 5-gallon gamma-sealed bucket holds 20 lbs; two to three buckets in the cabinet give you a full season's supply. The cabinet keeps pellets bone-dry regardless of rainfall or humidity. Load the hopper from the cabinet as needed.
2. Empty the hopper between cooks: Traeger's standard recommendation is to run the shutdown cycle, then dump the remaining pellets from the hopper into an airtight container after every use. This is the correct approach for any non-covered installation. Time-consuming but completely effective if you're disciplined about it.
3. Overnight Cover: If the Traeger is set into or on the island without a dedicated pellet cabinet, use the official Traeger grill cover (or a custom-fit outdoor cover) whenever the grill isn't in use. A cover alone won't protect pellets from sustained high humidity (coastal climates, rainy seasons), but in low-humidity inland climates it's adequate.
4. Pellet drying: If pellets have absorbed moisture and crumbled, spread them on a baking sheet and run them at 250°F in an indoor oven for 30 minutes. This drives off the moisture and restores pellet integrity enough for one more cook. Not a long-term solution — treat this as a rescue for an expensive bag of pellets, not a maintenance routine.
Best Products for a Traeger and Blackstone Outdoor Kitchen Setup
Beyond the two primary appliances, a Traeger and Blackstone outdoor kitchen benefits from a specific set of accessories that address the workflow between the two cooking methods.
Prep surface between the two units: A stainless steel prep cart or integrated countertop section between the Traeger and Blackstone acts as a transfer station — you can move food from the smoker to the griddle for a finishing sear without carrying hot items across the patio. A 24-to-36-inch prep surface between the two units is ideal. Surfaces adjacent to the Blackstone need to handle occasional grease splatter — stainless steel or sealed concrete are better choices than painted wood in this position.
Temperature probe manager: When running both units simultaneously, you're monitoring two separate temperature profiles. A multi-probe thermometer like the ThermoWorks Signals (4 probes, remote monitoring via app) lets you track a brisket on the Traeger and a smash burger internal temp on the Blackstone from the same interface without moving back and forth.
Pellet storage: A sealed pellet storage solution adjacent to the Traeger is essentially required for any integrated island setup. Stainless steel cabinets with gasketed doors, or a dedicated 20-gallon gamma-sealed plastic bin in a vented cabinet, are the two standard approaches.
Grease management for the Blackstone: The standard rear grease trap works for freestanding use but can overflow faster than expected during high-volume cooking. A 3-cup grease catch cup is the factory default — upgrade to a 1-quart aluminum grease drip pan (standard chafing dish fuel size) held in a bracket at the rear of the griddle station for longer cooking sessions without interruption.