Outdoor Kitchen Construction: Methods, Codes & Build Sequence
Outdoor kitchen construction methods compared: CMU block, steel-stud frame, RTA modular, poured concrete. Code requirements, footings, and build sequence.
Outdoor Kitchen Setup Editorial Team
Outdoor living specialists with 15+ years of hands-on experience
Top Picks: Best Outdoor Kitchen Construction: Methods, Codes & Build Sequence in 2026
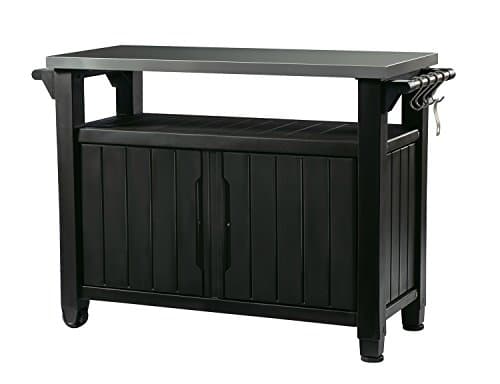
Keter Unity XL Portable Outdoor Table with Stainless Steel Top for Kitchen Prep and Outdoor Storage Cabinet for Grilling Accessories, Dark Grey
$220.99
Shop Now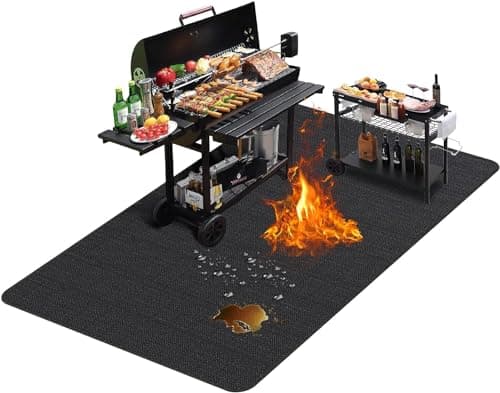
TAOMAND Large 76 x 52 inches Under Grill Mats for Outdoor Grill | Double-Sided Fireproof | Waterproof | Oil-Proof | Easy to Clean | Indoor Fireplace/Fire Pit Mat | Quality BBQ Mat for Deck Patio Lawn
$33.99
Shop Now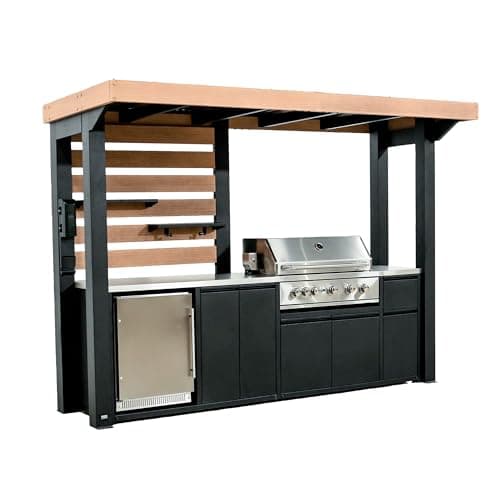
Backyard Discovery Fusion Flame Galvanized Steel Covered Outdoor Kitchen with 5-Burner Stainless, Grill, Refrigerator, Countertop, Storage, and, Roof for All-Season Outdoor Cooking, electric
$4,999.00
Shop Now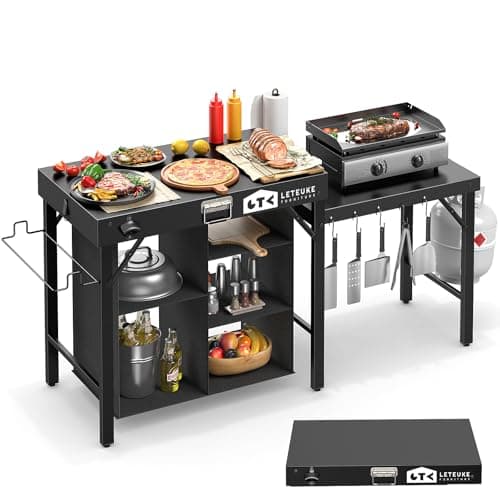
Leteuke Grill Table for Blackstone Griddle, Portable Foldable Grill Table with Storage Fits Ninja, Blackstone Griddle Stand for Outdoor Camping, Picnic, Garden, Patio, Dining, BBQ, Party
$159.99
Shop Now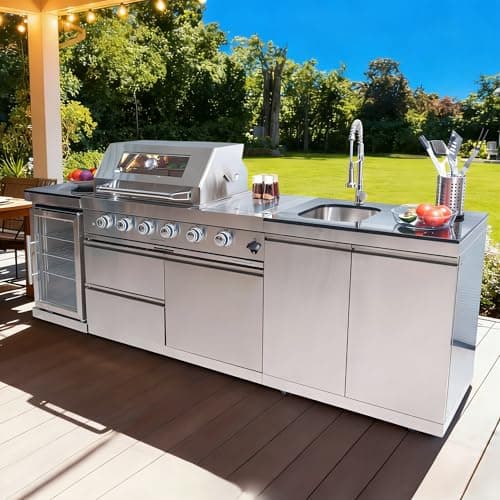
98 Inches Outdoor Kitchen Island, 4-Burner 72000 BTU Propane Stainless Steel BBQ with Side/Rear Burners, With Refrigerator and Sink, Rotisserie, Granite Countertops, Storage, For Backyard BBQ, Silver
$3,652.00
Shop Now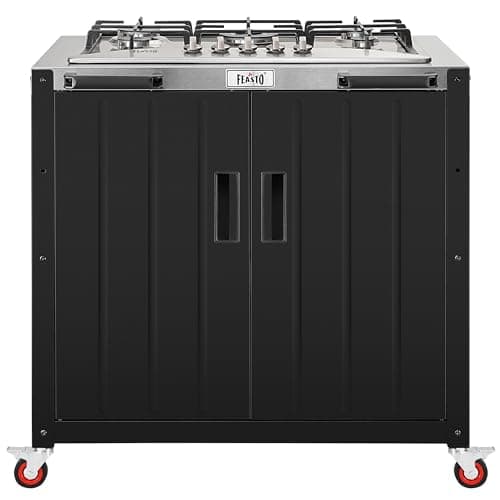
Feasto Gas Grill, Movable Outdoor Gas Stove Stainless Steel Top with Cabinet, 5 Burners with 36,200 BTUs, Outdoor Propane Grill for Outdoor Cooking, Ideal for Lawn & Garden, L35.4 x W24
$539.99
Shop Now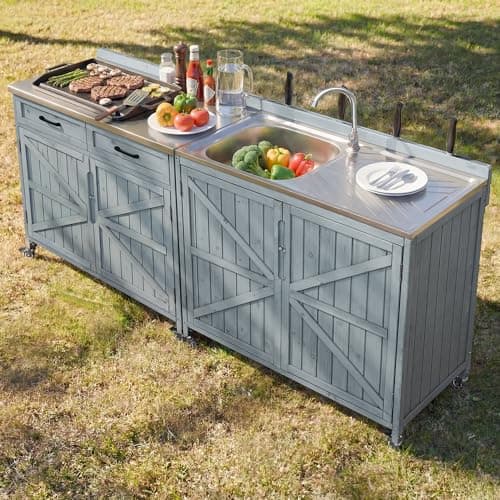
Merax 2 Piece Modular Outdoor Kitchen Series- Kitchen Grill Cart w/Stainless Steel Sink, Wood Rolling BBQ Prep Table w/Stainless Steel Top, Lockable Wheels for Patio & Outdoor Cooking, Grey Blue
$529.99
Shop Now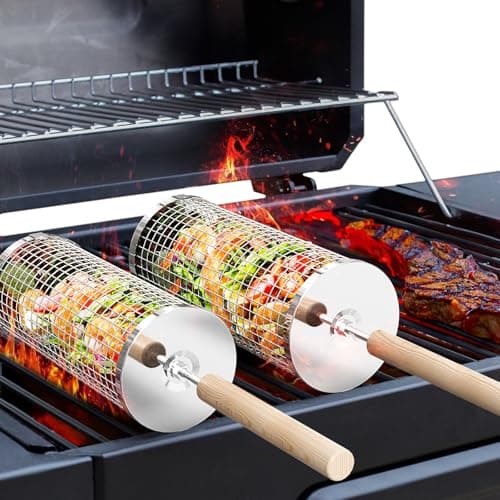
ivtivfu Rolling Grill Basket, Removable Wooden Handle, 304 Stainless Steel, Nesting BBQ Tools, Smoker Grilling Accessories for Vegetable, Outdoor Cooking Camping, Birthday Gifts for Men Dad Husband
$23.99
Shop NowKeter Unity XL Portable Outdoor Table with Stainless Steel Top for Kitchen Prep and Outdoor Storage Cabinet for Grilling Accessories, Dark Grey
$220.99
Shop NowTAOMAND Large 76 x 52 inches Under Grill Mats for Outdoor Grill | Double-Sided Fireproof | Waterproof | Oil-Proof | Easy to Clean | Indoor Fireplace/Fire Pit Mat | Quality BBQ Mat for Deck Patio Lawn
$33.99
Shop NowBackyard Discovery Fusion Flame Galvanized Steel Covered Outdoor Kitchen with 5-Burner Stainless, Grill, Refrigerator, Countertop, Storage, and, Roof for All-Season Outdoor Cooking, electric
$4,999.00
Shop NowLeteuke Grill Table for Blackstone Griddle, Portable Foldable Grill Table with Storage Fits Ninja, Blackstone Griddle Stand for Outdoor Camping, Picnic, Garden, Patio, Dining, BBQ, Party
$159.99
Shop Now98 Inches Outdoor Kitchen Island, 4-Burner 72000 BTU Propane Stainless Steel BBQ with Side/Rear Burners, With Refrigerator and Sink, Rotisserie, Granite Countertops, Storage, For Backyard BBQ, Silver
$3,652.00
Shop NowFeasto Gas Grill, Movable Outdoor Gas Stove Stainless Steel Top with Cabinet, 5 Burners with 36,200 BTUs, Outdoor Propane Grill for Outdoor Cooking, Ideal for Lawn & Garden, L35.4 x W24
$539.99
Shop NowMerax 2 Piece Modular Outdoor Kitchen Series- Kitchen Grill Cart w/Stainless Steel Sink, Wood Rolling BBQ Prep Table w/Stainless Steel Top, Lockable Wheels for Patio & Outdoor Cooking, Grey Blue
$529.99
Shop Nowivtivfu Rolling Grill Basket, Removable Wooden Handle, 304 Stainless Steel, Nesting BBQ Tools, Smoker Grilling Accessories for Vegetable, Outdoor Cooking Camping, Birthday Gifts for Men Dad Husband
$23.99
Shop NowCMU Block Outdoor Kitchen Construction: When and How
Concrete masonry unit construction uses standard 8x8x16-inch hollow concrete blocks (CMU blocks, sometimes mistakenly called cinder blocks) stacked and mortared into the structural shell of the kitchen. Each block weighs roughly 35 pounds and costs $1.75 to $2.40 at most regional masonry suppliers in 2026. A typical 8-foot-long L-shape kitchen requires about 95 to 110 blocks, plus 8 to 12 bags of Type S mortar.
Outdoor kitchen construction with CMU starts with a poured concrete footing 12 inches wide by 18 inches deep below the frost line (24 inches in northern climates, 12 inches in mild zones). The first course is set in mortar on the cured footing, then subsequent courses are stacked with vertical rebar (#4 grade 60) running through the cells every 32 inches and embedded into the footing. Cells containing rebar are filled with grout. After the structure cures for at least seven days, scratch-coat stucco or stone veneer is applied. CMU's strengths are immense compressive strength (1,900-plus psi), termite resistance, and fire resistance up to four hours. Its weakness is moisture absorption — every CMU outdoor kitchen needs a moisture barrier (Tyvek StuccoWrap or 30-pound felt) between the block and any veneer, or trapped water will spall the masonry within five years.
Steel-Stud Frame Construction: The Northern Climate Standard
Galvanized steel-stud framing has overtaken CMU in cold-climate outdoor kitchen construction because it does not absorb water, does not crack from freeze-thaw, and weighs roughly one-eighth as much per linear foot. The framing system uses 20-gauge or 18-gauge G90-galvanized steel studs (3-5/8 inch or 6 inch wide) spaced 16 inches on center, fastened to a bottom track anchored into the concrete pad with Tapcon screws every 24 inches.
The exterior cladding starts with cement backer board (HardieBacker 1/2 inch or Durock 1/2 inch) screwed directly to the studs with corrosion-resistant cement board screws every 8 inches along the edges and 12 inches in the field. Seams are taped with alkali-resistant fiberglass mesh tape and thinset. Stone veneer, stucco, or porcelain panel cladding is then applied over a moisture barrier. The interior cavity stays dry because steel framing creates a true rainscreen — drainage gaps behind the cladding let infiltrated water exit at weep holes along the bottom track. Steel framing also makes appliance cutouts trivial: studs are simply spaced to bracket the grill opening, and a galvanized steel header above each cutout transfers the load to adjacent studs. Total material cost runs about $14 to $18 per linear foot of wall, roughly 30 percent less than CMU.
RTA Modular Outdoor Kitchen Construction Explained
Ready-to-assemble outdoor kitchen construction skips on-site framing entirely. Manufacturers including RTA Outdoor Living, NatureKast, and Werever ship pre-engineered cabinet boxes — typically 30, 36, or 42 inches wide — built from one of three core materials: powder-coated 16-gauge aluminum, marine-grade 304 stainless steel, or high-density polyethylene polymer (HDPE). The boxes ship flat-packed on pallets and bolt together with included structural connectors, taking a homeowner with basic tools roughly 6 to 12 hours to assemble a 10-foot kitchen.
Once assembled, the cabinet shell sits on a poured concrete pad or compacted paver base, anchored with concrete wedge anchors at four points minimum. Countertop material — usually granite, quartz, or sintered stone — is fabricated off-site to dimensions provided by the kit and dropped on top with construction adhesive. Stone veneer, if desired, is applied to the cabinet faces using polymer-modified thinset directly bonded to the cement-board cabinet exteriors that most RTA brands include. Drawbacks of RTA outdoor kitchen construction include limited custom dimensions (you select from a fixed catalog), thinner appearance compared to 8-inch CMU walls, and slightly lower resale value perceived by appraisers who sometimes treat RTA installations as semi-permanent. Total installed cost typically ranges from $8,500 to $18,000 for a 10-foot configuration.
Poured Concrete Monolithic Outdoor Kitchen Bases
The premium tier of outdoor kitchen construction is poured-in-place reinforced concrete, used in luxury custom builds and commercial-grade installations. The technique creates an integrated footing, base wall, and countertop substrate from a single continuous concrete pour, reinforced with #4 rebar in a 12-inch grid pattern. Form work is built from 3/4-inch CDX plywood, sealed with form release oil, and braced to handle the hydrostatic pressure of wet concrete (roughly 150 pounds per cubic foot during the pour).
The pour itself uses 4,000 psi air-entrained concrete with a 4-inch slump, placed and vibrated to eliminate voids. After 28 days of cure, forms are stripped and the surface is acid-washed or polished smooth. The result is a monolithic structure that lasts 75-plus years with zero maintenance, tolerates any climate, and supports concrete or stone countertop overlays of any thickness. Drawbacks are weight (a 10-foot kitchen base weighs about 4,000 pounds, requiring engineered footings), cost ($75 to $125 per linear foot for the base alone), and contractor scarcity — only specialized concrete artisans handle this work. Outdoor kitchen construction firms like Concrete Encounter in California and Solus Decor in British Columbia produce some of the most architecturally striking poured-concrete kitchens in North America, with completed projects routinely exceeding $80,000.
Footings, Slabs, and Foundation Requirements by Code
Outdoor kitchen construction begins with the foundation, and code requirements vary sharply by region. For permanent kitchens over 200 pounds per linear foot (every CMU and poured-concrete build), IRC Section R403 mandates footings extending below the frost line. Frost depths range from 6 inches in coastal Florida to 60 inches in northern Minnesota — your local building department maintains the exact minimum for your jurisdiction.
The standard footing for a residential outdoor kitchen is 12 inches wide by depth-of-frost-line, with two #4 rebar bars running continuously along the length, lifted on chairs to sit 3 inches above the bottom of the footing. Pad slabs supporting RTA kits or steel-frame kitchens typically use 4-inch reinforced concrete with 6x6 W2.9xW2.9 welded wire mesh, poured over 4 inches of compacted Class II base aggregate. The slab should slope 1/8 inch per foot away from the house for drainage. Frost-protected shallow foundations (FPSF) — using rigid foam insulation buried at the slab perimeter — are an approved alternative in northern climates per IRC R403.3, allowing 12-inch footings even in 48-inch frost zones. Always pull a permit and schedule a pre-pour inspection before any concrete placement; a missed inspection means the building official can require demolition for verification.
Gas, Electrical, and Plumbing Code Requirements
Three subsystems within outdoor kitchen construction trigger the strictest code scrutiny. Gas line installation follows IFGC and NFPA 54. Natural gas mains running to the kitchen must be black iron, CSST (corrugated stainless steel tubing), or HDPE polyethylene where buried. Pipe sizing depends on total appliance BTU load — a 90,000 BTU grill plus a 20,000 BTU side burner requires 3/4-inch line within 25 feet of the meter, stepped up to 1 inch for longer runs. Every gas connection requires a quarter-turn shutoff within 6 feet of the appliance and a leak test at 10 psi for 15 minutes before commissioning.
Electrical work per NEC Article 210.8(A)(3) requires GFCI protection on all outdoor receptacles. Dedicated 20-amp circuits serve refrigerators and warming drawers; 240V circuits are needed for some pizza ovens and electric grills. All outdoor wiring must be in liquid-tight conduit (LFNC or LFMC) where exposed, and underground feeders must be UF cable or THWN-2 conductors in PVC conduit at minimum 18-inch burial depth. Plumbing for outdoor sinks uses Type L copper or PEX-A, with frost-proof hose bibs (Woodford 17 series is the contractor standard) on every supply line. Drain lines tie into the home's sanitary system or a properly permitted gray water dispersion field. Hire licensed pros for all three — DIY work in these trades fails inspection 65 percent of the time per ICC data.
Build Sequence: From Demolition to Final Inspection
Successful outdoor kitchen construction follows a strict 12-step sequence, and skipping or reordering steps creates expensive rework. Step 1: Final design with dimensions, appliance cutouts, and utility locations marked. Step 2: Pull permits — typically a single combination permit covers structure, gas, electrical, and plumbing in most jurisdictions. Step 3: Site demolition and excavation. Remove existing pavers or sod to subgrade, then excavate footing trenches to required depth.
Step 4: Underground utility rough-in. Run gas line, electrical conduit, and water supply/drain lines before pouring concrete. Step 5: Footing pour and inspection. Step 6: Slab pour (if applicable) and 7-day cure. Step 7: Wall construction (CMU, steel framing, or RTA assembly). Step 8: Above-grade utility rough-in within walls — gas stub-outs, electrical receptacle boxes, water supply stubs. Step 9: Rough-in inspections (gas pressure test, electrical, plumbing). Step 10: Cement board and exterior cladding installation. Step 11: Countertop fabrication, delivery, and installation; appliance install. Step 12: Final inspections (gas final, electrical final, structural final). Following this sequence end-to-end takes 3 to 8 weeks for most projects, with 4 to 7 inspector visits depending on jurisdiction.
Common Outdoor Kitchen Construction Mistakes to Avoid
Even experienced builders make recurring errors during outdoor kitchen construction. Inadequate appliance ventilation is the most common failure — every grill manufacturer requires specific clearances around the firebox (Lynx specifies 4 inches sides, 12 inches rear; Blaze requires 1 inch sides, 4 inches rear) and most demand insulated jackets for combustible material proximity. Builders who skip these create fire hazards that void appliance warranties.
Ignoring drainage ruins more outdoor kitchens than any other single issue. Water pools inside CMU cells and at countertop perimeters where flashing was omitted, freezing in winter and cracking the structure within three to five seasons. Always install weep holes in the bottom course and through-wall flashing at every horizontal joint. Undersized gas lines appear in roughly 22 percent of inspector failures — a 60-foot run to a 100,000 BTU grill needs at least 1-inch black iron, not the 1/2-inch line that is sufficient at 15 feet. Wood framing instead of steel or CMU is forbidden by IRC Section R302.7 within 18 inches of any cooking appliance, yet appears in many DIY builds. Inadequate countertop overhang (less than 1.5 inches past the cabinet face) traps water against the cabinet edge, accelerating corrosion. Hire experienced help for the steps where these errors compound — the cost of correction always exceeds the savings of cutting corners.