
Outdoor Kitchen Kits with Sink: Formats, Plumbing, and Whether the Module Is Worth It
A confession from someone who has spec'd a lot of kit orders: the sink is the module buyers delete first and regret most.
Photo: Chrys Stam / Pexels (Pexels License)
A confession from someone who has spec'd a lot of kit orders: the sink is the module buyers delete first and regret most. When the quote for outdoor kitchen kits with sink modules comes in $400 to $1,200 higher than the same island without one, that line item looks like the obvious place to save. Then the first real cookout happens, and the host walks inside eleven times in one evening with chicken-slicked hands, a dirty tong, and a pot that needs filling. By August, the retrofit they ask about is the module they crossed off in March.
The regret is avoidable in both directions, because some yards genuinely do not need a sink station, and some kits include one that is little more than a stainless bowl with nowhere for water to come from or go. This guide covers the intersection our other pages do not: which kit formats include a sink module, the plumbing each one quietly assumes, drainage, winterizing, and when skipping the module is the smarter call.
Top picks for this build
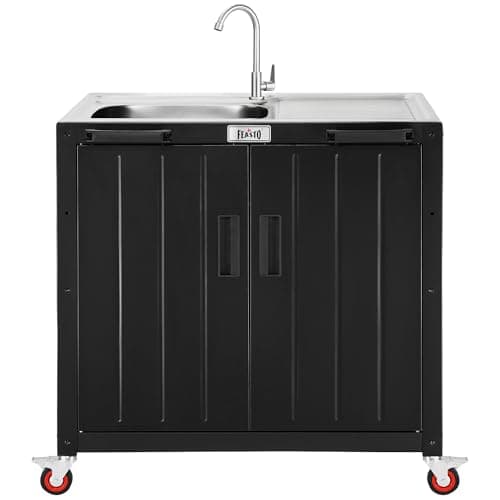
Feasto Outdoor Kitchen Island with Stainless Steel Sink and Storage Cabinet, 35-Inch BBQ Prep Station with Faucet & Lockable Wheels for Patio, Backyard, and Outdoor Cooking, Black & Silver
$306.99
Check price on Amazon: Feasto Outdoor Kitchen Island with Stainless Steel Sink and Storage Cabinet, 35-Inch BBQ Prep Station with Faucet & Lockable Wheels for Patio, Backyard, and Outdoor Cooking, Black & Silver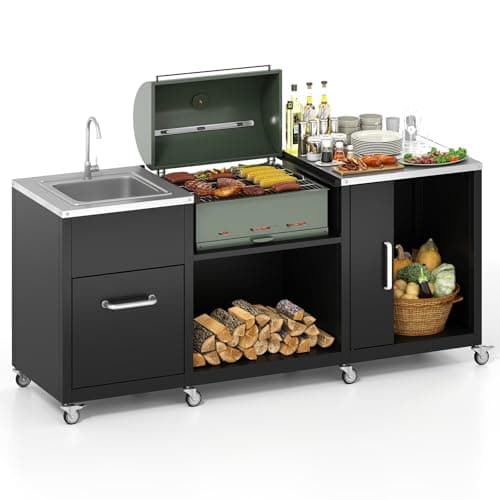
Happygrill 80” Outdoor Grill Table with Sink & Drainage, Heavy Duty Metal Grill Cart w/Cabinet & Removable Stainless Steel Top, Portable Prep Cooking Table w/Wheels for BBQ, Patio, Camping & Backyard
See price on Amazon
Check price on Amazon: Happygrill 80” Outdoor Grill Table with Sink & Drainage, Heavy Duty Metal Grill Cart w/Cabinet & Removable Stainless Steel Top, Portable Prep Cooking Table w/Wheels for BBQ, Patio, Camping & Backyard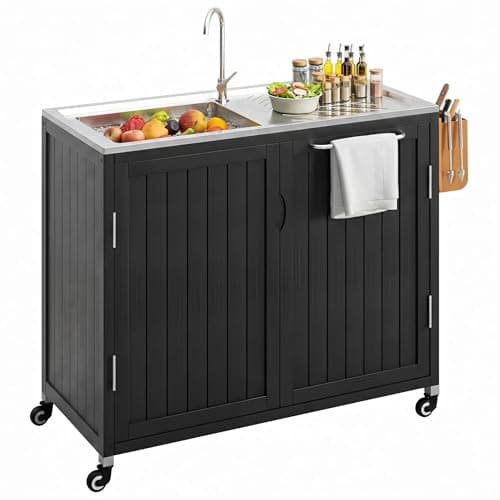
Outdoor Kitchen Island with 304 Stainless Steel Sink and Large Storage Cabinet,40-Inch BBQ Prep Station with Sink & 360 Lockable Wheels for Patio,Solid Wood Grill Cart,Backyard, Outdoor Party, Black
$229.99
Check price on Amazon: Outdoor Kitchen Island with 304 Stainless Steel Sink and Large Storage Cabinet,40-Inch BBQ Prep Station with Sink & 360 Lockable Wheels for Patio,Solid Wood Grill Cart,Backyard, Outdoor Party, Black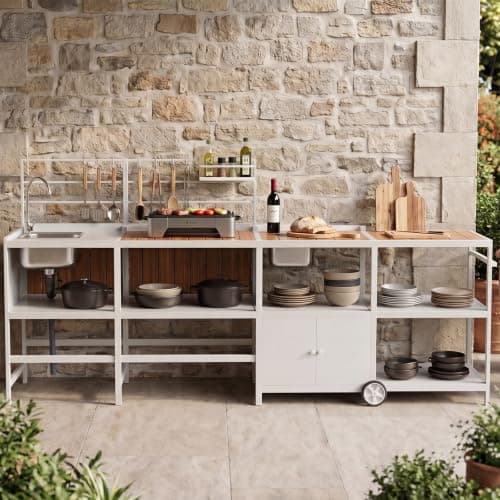
Modular Outdoor Kitchen Island with Sink, 4Pcs Aluminum Outdoor Kitchen Kit
$499.99
Check price on Amazon: Modular Outdoor Kitchen Island with Sink, 4Pcs Aluminum Outdoor Kitchen Kit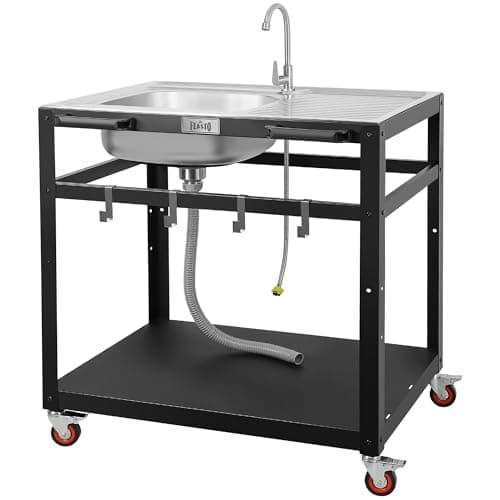
FEASTO 35-Inch Outdoor Grill Cart with Stainless Steel Sink, Rolling BBQ Prep Table with Faucet, Storage Shelves and Lockable Wheels for Patio, Backyard and Outdoor Cooking, Silver & Black
$249.99
Check price on Amazon: FEASTO 35-Inch Outdoor Grill Cart with Stainless Steel Sink, Rolling BBQ Prep Table with Faucet, Storage Shelves and Lockable Wheels for Patio, Backyard and Outdoor Cooking, Silver & Black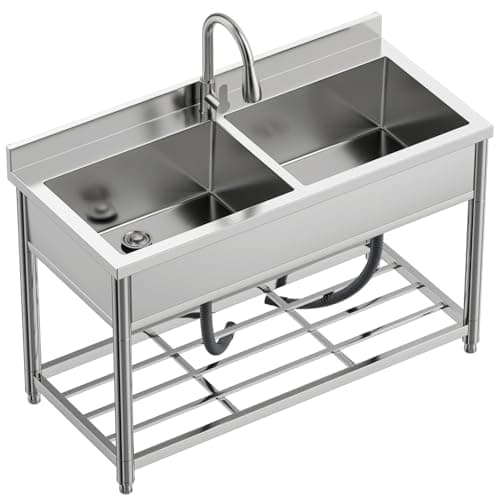
GGW 2-Compartment Commercial Sink, Stainless Steel Utility Sink with Pull-out Faucet, Free Standing Double Bowl Kitchen Sink for Restaurant, Garage, Shop, Cafe, Outoor, 21.7"D x 47.2"W x 37"H
$469.99
Check price on Amazon: GGW 2-Compartment Commercial Sink, Stainless Steel Utility Sink with Pull-out Faucet, Free Standing Double Bowl Kitchen Sink for Restaurant, Garage, Shop, Cafe, Outoor, 21.7"D x 47.2"W x 37"HFeasto Outdoor Kitchen Island with Stainless Steel Sink and Storage Cabinet, 35-Inch BBQ Prep Station with Faucet & Lockable Wheels for Patio, Backyard, and Outdoor Cooking, Black & Silver
$306.99
Check price on Amazon: Feasto Outdoor Kitchen Island with Stainless Steel Sink and Storage Cabinet, 35-Inch BBQ Prep Station with Faucet & Lockable Wheels for Patio, Backyard, and Outdoor Cooking, Black & SilverHappygrill 80” Outdoor Grill Table with Sink & Drainage, Heavy Duty Metal Grill Cart w/Cabinet & Removable Stainless Steel Top, Portable Prep Cooking Table w/Wheels for BBQ, Patio, Camping & Backyard
See price on Amazon
Check price on Amazon: Happygrill 80” Outdoor Grill Table with Sink & Drainage, Heavy Duty Metal Grill Cart w/Cabinet & Removable Stainless Steel Top, Portable Prep Cooking Table w/Wheels for BBQ, Patio, Camping & BackyardOutdoor Kitchen Island with 304 Stainless Steel Sink and Large Storage Cabinet,40-Inch BBQ Prep Station with Sink & 360 Lockable Wheels for Patio,Solid Wood Grill Cart,Backyard, Outdoor Party, Black
$229.99
Check price on Amazon: Outdoor Kitchen Island with 304 Stainless Steel Sink and Large Storage Cabinet,40-Inch BBQ Prep Station with Sink & 360 Lockable Wheels for Patio,Solid Wood Grill Cart,Backyard, Outdoor Party, BlackModular Outdoor Kitchen Island with Sink, 4Pcs Aluminum Outdoor Kitchen Kit
$499.99
Check price on Amazon: Modular Outdoor Kitchen Island with Sink, 4Pcs Aluminum Outdoor Kitchen KitFEASTO 35-Inch Outdoor Grill Cart with Stainless Steel Sink, Rolling BBQ Prep Table with Faucet, Storage Shelves and Lockable Wheels for Patio, Backyard and Outdoor Cooking, Silver & Black
$249.99
Check price on Amazon: FEASTO 35-Inch Outdoor Grill Cart with Stainless Steel Sink, Rolling BBQ Prep Table with Faucet, Storage Shelves and Lockable Wheels for Patio, Backyard and Outdoor Cooking, Silver & BlackGGW 2-Compartment Commercial Sink, Stainless Steel Utility Sink with Pull-out Faucet, Free Standing Double Bowl Kitchen Sink for Restaurant, Garage, Shop, Cafe, Outoor, 21.7"D x 47.2"W x 37"H
$469.99
Check price on Amazon: GGW 2-Compartment Commercial Sink, Stainless Steel Utility Sink with Pull-out Faucet, Free Standing Double Bowl Kitchen Sink for Restaurant, Garage, Shop, Cafe, Outoor, 21.7"D x 47.2"W x 37"HPrices and availability are accurate as of October 22, 2026, 11:45 AM UTC and are subject to change.
The Three Kit Formats That Include a Sink Module
Manufacturers package sinks into kits in three distinct ways, and the format determines everything downstream, from plumbing to price.
- Modular sink cabinet. The most common format in island-style kits. You get a dedicated base cabinet, usually 24 to 33 inches wide, with a pre-cut countertop section, a drop-in stainless bowl, and sometimes a cold-only faucet. It bolts into the run like any other cabinet, so you can position it anywhere, including the short leg of an L-shaped layout.
- Drop-in cutout in a countertop kit. The kit ships a full-length countertop with a factory cutout and a separate bowl. Cheaper, but the cabinet below is open storage with no plumbing chase, so you route supply and drain lines yourself.
- Cart-style station with onboard tank. Freestanding carts and prep tables with a small bowl fed by a 5 to 7 gallon tank and a battery or foot pump. Zero plumbing required, but capacity is a handful of hand-washes before a refill.
Of the three, only the modular sink cabinet behaves like a real kitchen fixture.
Is greywater from an outdoor sink legal to drain into the yard
It depends entirely on your state and county. Some jurisdictions allow sink discharge for irrigation or to a dry well, often with conditions like no food solids or grease; others classify any drain to grade as an illegal connection. Call your local building or code office before installing a dry well, and never send greasy water anywhere but a sanitary drain.

What Plumbing Each Kit Actually Assumes You Have
Here is what the product photos never show: almost no kit includes the plumbing. The sink module arrives assuming one of three water strategies.
- Garden-hose, cold-only. The default for most modular sink cabinets. The faucet has a single cold inlet with a hose-thread adapter, fed from the nearest spigot. Simple, seasonal, no permits.
- Tank or jug gravity systems. Cart-style kits and some budget islands use a refillable tank; gravity or a small 12V pump moves water, and a second jug catches the waste. Fine for hand rinsing, useless for filling stockpots.
- Tied into house supply and drain. Premium kits with hot-and-cold faucets assume buried supply lines and a sanitary drain connection, which means trenching below frost line, a licensed plumber in most jurisdictions, and a permit. It is also the only approach that gives you hot water and year-round use.
Decide which you can live with, then buy the kit built for it. Our outdoor kitchen plumbing guide covers the buried-line approach; the rest of this page assumes the hose-fed setup most kit owners use.
A Typical Hose-Fed Sink Install, Step by Step
A hose-fed sink station is a two-to-three-hour job on assembly day. Here is the sequence I use on a standard modular sink cabinet:
- Position the sink cabinet in the island run so its back panel faces the side of the yard where your spigot lives; shorter hose runs mean better pressure.
- Set the drop-in bowl into the countertop cutout with a bead of outdoor-rated silicone under the rim, then clamp it from below with the supplied hardware.
- Mount the faucet and connect its cold inlet to a hose-thread adapter, with thread tape on every metal-to-metal joint.
- Run a drinking-water-safe hose (NSF-61 or RV/marine rated, never a standard green hose) from the spigot through the cabinet's rear access hole.
- Install an inline shutoff valve at the cabinet end so you can kill water at the sink without walking to the house.
- Fit the strainer and tailpiece into the drain. Add a P-trap only if you are tying into a real drain; for a greywater can, a straight tailpiece is better because a trap holds water that will freeze.
- Open the spigot slowly, check every joint dry-handed, then run the faucet for two minutes and re-check.
Budget $60 to $120 in hose, adapters, and the valve beyond the kit itself.
Drainage: Where the Water Goes Matters More Than Where It Comes From
Supply is the easy half. Drainage is where kit owners improvise, and where local code can bite. You have three real options.
- Greywater can. A 5-gallon container under the tailpiece, emptied onto ornamental beds. Zero installation, and for a sink used mainly for hand and tool rinsing, it is honestly the right answer, as long as you remember to empty it.
- Dry well. A gravel-filled pit roughly 2 feet across and 2 to 3 feet deep, ten or more feet from the foundation, fed by a buried 1.5-inch line. It handles far more volume, but only for water with no food solids or grease.
- Tie-in to the sanitary drain. The code-correct, all-season option, and the only one that legally accepts greasy dishwater in most places. It requires a trap, a vent, and a permit.
One caution: greywater rules are state and county specific. Some jurisdictions treat any sink discharge to grade as an illegal drain; others explicitly allow irrigation reuse. Check your local code office before digging a dry well. And if you want the station to use less water in the first place, a faucet carrying the EPA WaterSense label cuts flow by about 30 percent.
Sizing the Sink Module Within Your Island Run
A sink module competes for the scarcest resource in any kit: linear counter inches.
For islands under 8 feet, a 15-to-18-inch bar-sink module is the ceiling; a full 33-inch sink cabinet in a 78-inch island leaves no landing zone beside the grill. From 8 to 12 feet, the 24-to-30-inch module is the sweet spot. Past 12 feet, or in any L-shaped outdoor kitchen with sink plans, put the module in the shorter leg of the L so the long leg stays an unbroken prep-and-grill surface, and keep at least 18 inches of counter on the sink's working side. Placing it at the end of the run nearest the house spigot shortens every hose and drain line above.
Bowl depth matters more outdoors than in: 8 inches minimum, because shallow bar bowls splash and hold nothing bigger than a saucepan. Full cutout templates and rough-in measurements live in our outdoor kitchen sink dimensions guide, with bowl, faucet, and material picks in the outdoor kitchen sink guide.
Winterizing the Sink Module Before the First Hard Freeze
Last October, a reader in Ohio sent me photos of his eight-month-old kit island. He had skipped winterizing because "it's just a hose sink." The first hard freeze of fall 2025 split a $6 brass hose-adapter fitting inside the cabinet, and the slow leak warped the cabinet floor and killed the faucet cartridge: about $240 in parts and a lost weekend, versus the ten minutes the routine below takes.
- Shut the house spigot, then open the sink faucet and the inline shutoff to release pressure.
- Disconnect the hose at both ends, drain it downhill, and store it indoors.
- Open or remove every fitting at the faucet inlet; trapped water in a closed brass fitting is exactly what burst in the story above.
- If you plumbed a P-trap, pour in a cup of RV antifreeze (propylene glycol, the pink jug, never automotive) or pull the trap and stuff a rag in the line to keep critters out.
- Empty and dry the greywater can, sponge out the bowl, and leave the faucet handle open.
- Cover the station, and bag the aerator and adapter inside the cabinet for spring.
Hard-plumbed stations add one step: blow out the buried supply line with 40 to 50 psi of compressed air, just like an irrigation system.
What size sink comes in most outdoor kitchen kits
Most modular kits use a single-bowl stainless sink between 15 and 25 inches wide, set in a 24-to-33-inch cabinet. Bowl depth runs 6 to 10 inches; favor 8 inches or more, since shallow bar bowls splash and cannot hold a stockpot. Small islands should stick to the smaller bar-sink modules so prep space survives.
Do outdoor kitchen sinks have hot water
Only if you plumb for it. Hose-fed and tank-fed kit sinks are cold-only, which covers hand washing and rinsing but not proper dishwashing. Hot water requires an insulated line from the house water heater or a small point-of-use heater at the island, both of which usually involve a plumber and a permit. Many owners simply carry out a kettle for the rare hot-water task.
Can I add a sink module to a kit I already own
Usually, yes. Modular lines sell sink cabinets as standalone units in matching finishes, so you can swap one in place of a blank cabinet or extend the run; confirm the series is still in production and the dimensions match. For countertop-style kits, a retrofit means cutting the counter, which is a job for a pro on granite or concrete.
How much does the sink module add to a kit's price
Plan on $400 to $1,200 over the same island without one, depending on the line. That usually buys the cabinet, bowl, and a basic cold faucet, plus roughly $60 to $120 in hose, adapters, and a shutoff valve for a hose-fed setup. Hot and cold water with a real drain adds $1,500 to $4,000 in professional plumbing.
When to Skip the Sink Module, and What to Do Instead
After all that advocacy, the honest flip side: outdoor kitchen kits with sink modules are the wrong buy for a real subset of yards.
- Your grill sits within about 20 feet of a door to the indoor kitchen. A ten-second walk to a real sink with hot water beats a cold-only station every time; this is the best predictor of an unused outdoor sink.
- You are in a deep-freeze climate and know you will not do the fall routine. Be honest. An unwinterized sink is a liability, not an amenity.
- The kit's sink is a token. A 12-inch bowl with a tank pump adds cost without adding function.
Instead of the module, order the same kit with a blank base cabinet in that position. You keep the storage, save the money, and preserve the option: most modular lines sell the sink cabinet separately, so you can retrofit next season if you find yourself making that eleven-trip walk. In the meantime, a $40 collapsible camp sink and a spigoted water jug on the counter cover 80 percent of what the module does. For help choosing the complete package in the first place, start with the kit and layout guides on the Outdoor Kitchen Setup homepage.
The details people ask about most:
Do I need a sink in my outdoor kitchen?
You need one if your cooking area sits more than about 20 feet from an indoor kitchen door, if you prep raw meat outside, or if you entertain often. You can reasonably skip it if the indoor sink is a few steps away, or if your climate makes winterizing a chore you know you will not keep up with.
How do outdoor kitchen sinks work?
Most kit sinks work like a simplified indoor sink: a cold-water line, usually a drinking-water-safe hose from an outdoor spigot, feeds a single-handle faucet, and the drain empties into a greywater container, a dry well, or a tied-in house drain. Upgraded installs bury supply lines below frost depth and add hot water from the house.
How do I winterize an outdoor kitchen sink?
Shut off the water source, open the faucet to relieve pressure, then disconnect and drain the supply hose and store it indoors. Open or remove fittings at the faucet inlet so no water sits trapped in metal. Add RV antifreeze to any P-trap or remove the trap, empty the greywater container, dry the bowl, leave the faucet open, and cover the station.
Do outdoor kitchen kits come with the sink and faucet included?
It varies by format. Modular sink cabinets usually include the bowl and often a cold-only faucet, but almost never the hose, adapters, shutoff valve, or drain hardware. Countertop kits with a cutout may ship the bowl only. Read the included-components list carefully: "sink-ready" typically means there is a hole in the counter and nothing else.
Can I get an L-shaped outdoor kitchen kit with a sink?
Yes. Most modular island lines offer corner units that let you build an L, and because the sink module is a standalone cabinet, you can place it anywhere in the run. The standard advice is to put the sink in the shorter leg of the L, nearest your water source, so the long leg stays a continuous prep-and-grill surface.
Can an outdoor kitchen sink run off a garden hose?
Yes, and this is how most kit sinks are designed to run. The faucet inlet accepts a hose-thread connection from a nearby spigot. Use a hose rated drinking-water safe, such as an NSF-61 or RV/marine hose, because standard garden hoses can leach chemicals and off-flavors, and disconnect the run before the first freeze.
Where does the water drain from an outdoor kitchen kit sink?
Three options: a greywater container under the cabinet that you empty by hand, a gravel dry well ten or more feet from the house fed by a buried line, or a code-compliant tie-in to the home's sanitary drain with a trap and vent. The tie-in is the only option that legally accepts greasy dishwater in most jurisdictions.
This guide is part of Outdoor Kitchen Types: Choosing Between Built-In, Modular, Prefab, and Portable — the hub covering every kitchen types guide on Outdoor Kitchen Setup.
Related Guides
Written and edited by Sukie
Sukie is the editor behind Outdoor Kitchen Setup. They compile manufacturer specification sheets, published building codes, and industry sizing standards into the measurement and planning guides on this site, and check every figure against its original source before it goes live. Where a number varies by brand or by local code, the guides say so rather than presenting a single figure as universal.