Outdoor Cooking Setup: How to Build One That Actually Works
Outdoor cooking setup guide from a backyard cook: four setup tiers, hot/cold/wet/dry zones, fuel choices, weather protection, and real budgets from $600 up.
By Sukie
Editor · compiles manufacturer specs and building-code references into the measurement guides on this site
An outdoor cooking setup is the whole arrangement — the cooker, the surfaces around it, the storage, and the light — rather than just the grill people usually shop for first.
It is 6:40 on a Friday evening in late June. The chicken thighs are searing, someone hands you a cold drink, the corn is wrapped and waiting, and the smell drifting over the fence has already pulled a neighbor into conversation. Then the spell breaks: the tongs are inside, the platter is inside, the thermometer is in a kitchen drawer, and you spend the next twenty minutes jogging through the patio door while the thighs go from golden to regrettable. That gap between the evening you pictured and the evening you got is almost never about cooking skill. It is about the outdoor cooking setup itself.
A functional setup keeps everything the cook needs within two steps of the fire: heat, cold storage, prep surface, tools, and a landing zone for finished food. A frustrating one scatters those jobs between the backyard and the indoor kitchen and turns every cookout into a relay race. The difference has surprisingly little to do with budget. We have watched a $600 cart-based station outperform a $20,000 stone island because the cart was organized around how the cook actually moves.
This guide walks through the four tiers of backyard cooking stations, the zone-and-workflow thinking that makes any of them work, fuel and weather decisions, and honest dollar figures for each level, so you can build the version that fits your patio and your patience.
Top Picks: Best Outdoor Cooking Setup: How to Build One That Actually Works in 2026
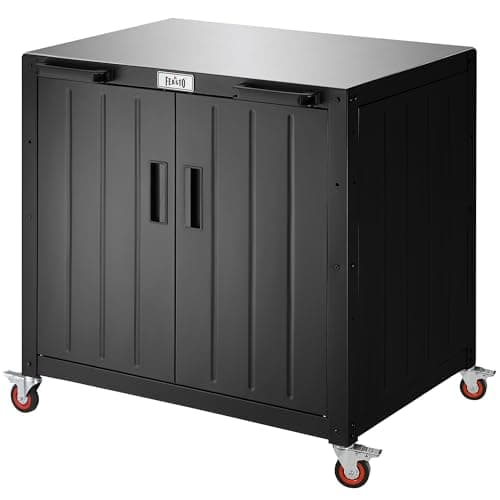
Feasto Outdoor Grill Cart with Storage Cabinet and Stainless Steel Top, 35-Inch Outdoor Grill Station with Door, Modular Kitchen Island for Food Prep and BBQ, Black & Silver
$249.00
Shop Now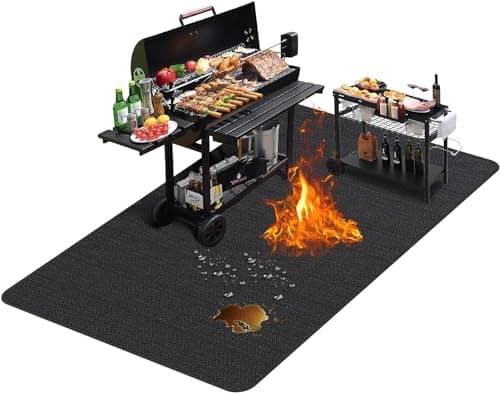
TAOMAND Large 76 x 52 inches Under Grill Mats for Outdoor Grill | Double-Sided Fireproof | Waterproof | Oil-Proof | Easy to Clean | Indoor Fireplace/Fire Pit Mat | Quality BBQ Mat for Deck Patio Lawn
$30.59
Shop Now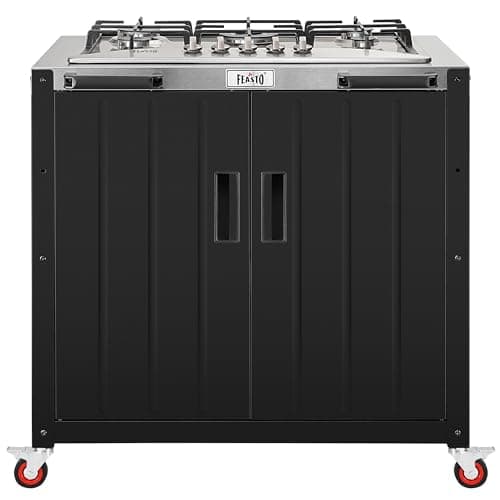
Feasto Outdoor Kitchen Island with Propane Gas Stove and Storage Cabinet, 35-Inch Outdoor Cooking Station with 304 Stainless Steel Top & Lockable Wheels for Backyard Patio, Black & Silver
$459.99
Shop Now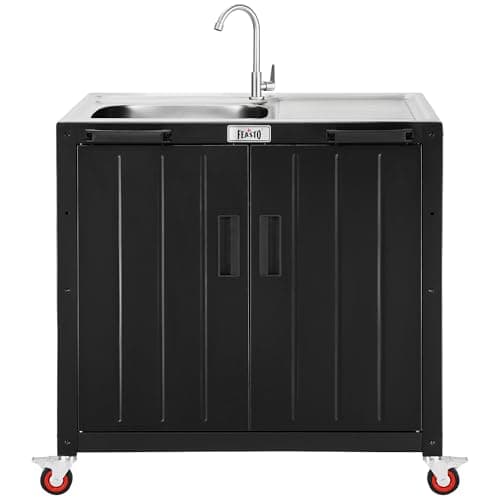
Feasto Outdoor Kitchen Island with Stainless Steel Sink and Storage Cabinet, 35-Inch BBQ Prep Station with Faucet & Lockable Wheels for Patio, Backyard, and Outdoor Cooking, Black & Silver
$329.00
Shop Now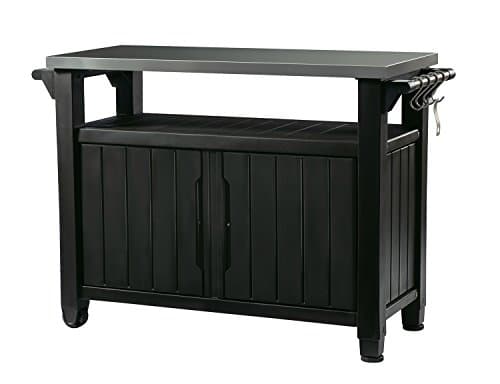
Keter Unity XL Portable Outdoor Table with Stainless Steel Top for Kitchen Prep and Outdoor Storage Cabinet for Grilling Accessories, Dark Grey
$237.99
Shop NowFeasto Outdoor Grill Cart with Storage Cabinet and Stainless Steel Top, 35-Inch Outdoor Grill Station with Door, Modular Kitchen Island for Food Prep and BBQ, Black & Silver
$249.00
Shop NowTAOMAND Large 76 x 52 inches Under Grill Mats for Outdoor Grill | Double-Sided Fireproof | Waterproof | Oil-Proof | Easy to Clean | Indoor Fireplace/Fire Pit Mat | Quality BBQ Mat for Deck Patio Lawn
$30.59
Shop NowFeasto Outdoor Kitchen Island with Propane Gas Stove and Storage Cabinet, 35-Inch Outdoor Cooking Station with 304 Stainless Steel Top & Lockable Wheels for Backyard Patio, Black & Silver
$459.99
Shop NowFeasto Outdoor Kitchen Island with Stainless Steel Sink and Storage Cabinet, 35-Inch BBQ Prep Station with Faucet & Lockable Wheels for Patio, Backyard, and Outdoor Cooking, Black & Silver
$329.00
Shop NowKeter Unity XL Portable Outdoor Table with Stainless Steel Top for Kitchen Prep and Outdoor Storage Cabinet for Grilling Accessories, Dark Grey
$237.99
Shop NowWhat a Typical Outdoor Kitchen Setup Includes
A typical outdoor kitchen setup includes a primary cooking appliance (grill or griddle), at least 36 inches of counter or cart surface beside it, cold storage within a few steps, enclosed storage for tools and fuel, task lighting, and a clear path between the cooking area and the indoor kitchen. Everything else, including the sink, side burner, pizza oven, and bar seating, is an upgrade layered on top of that core.
Searchers often picture the full version: grill, side stove for sauces, a wok burner for high-heat stir-fries, and a plumbed sink in one run of counters. That configuration is real and covered below, but it is the fourth tier of a progression, not the entry point. Roughly 80 percent of the cooking happens on the core five elements, which is why a well-organized cart can feel more capable than a sprawling island that ignores them.
The reason we treat this list as the definition, rather than any specific appliance package, is that the list describes jobs, not products. Cold storage can be a $45 rolling cooler or a $2,400 outdoor-rated refrigerator; both fill the same slot in the setup. Deciding which jobs you will cover, then choosing hardware to match your budget, is the entire planning method behind everything we publish on Outdoor Kitchen Setup.
The Four Tiers of Outdoor Cooking Setups
Nearly every outdoor cooking setup we have built, visited, or reviewed falls into one of four tiers, and the smartest money move is knowing which tier you actually need before a showroom decides for you.
Tier 1, the starter cart: a freestanding grill or griddle plus a work cart or table. Total cost usually lands between $400 and $900, assembled in an afternoon, and it moves with you if you rent.
Tier 2, the griddle-centric station: built around a large flat-top like a Blackstone, with dedicated prep surface, tool rails, and squeeze-bottle organization. Typically $700 to $1,800. This is the fastest-growing tier in American backyards for a reason: one surface handles breakfast, smash burgers, fajitas, and fried rice.
Tier 3, the built-in island: a drop-in grill set into a masonry or steel-framed island with counters, doors, and often a refrigerator. Expect $6,000 to $15,000 installed, less if you assemble a prefab kit yourself.
Tier 4, the full outdoor kitchen: multiple cooking appliances, plumbed sink, utility runs, and a roof or pergola. Realistic range is $15,000 to $60,000 and it behaves like a room addition, permits included.
Each tier up buys convenience and permanence, not better food. Start at the tier your cooking frequency justifies; twice-a-month grillers rarely out-cook their Tier 1 hardware.
Tier 1: The Starter Cart Setup (Our $612 July 2025 Build)
In July 2025 we assembled a complete starter station for a rented duplex patio in Ohio, and the receipts totaled $612 all-in: a 3-burner propane grill on sale for $329, a stainless prep cart with a lower shelf for $119, a 52-quart wheeled cooler for $54, an instant-read thermometer for $35, a magnetic-strip tool set for $28, a grill cover for $27, and a first propane tank exchange for $20. That station cooked 41 meals between July and Halloween, and at no point did the cook have to go inside for anything but the raw food itself.
The cart is the underrated hero. A grill alone forces you to balance trays on the fold-down side shelf; a cart gives you a true prep zone, a tool home, and a landing surface for finished food. If your patio is tight or you may relocate, a portable outdoor kitchen approach with folding tables and a wheeled griddle stand delivers the same function in a footprint you can collapse.
Here is the gear list we would rebuild today, in buying order:
- Grill or griddle sized to your usual headcount (3 burners feeds up to 6 comfortably)
- Prep cart or table with at least 4 square feet of surface and a lower shelf
- Wheeled cooler or beverage tub for cold storage
- Instant-read digital thermometer
- Long tongs, wide spatula, and a small sheet pan dedicated to outdoor duty
- Weatherproof bin for the tools so nothing migrates back indoors
- Fitted cover and a spare propane tank
Tier 2: The Blackstone Griddle-Centric Setup
The griddle station deserves its own tier because the workflow is genuinely different from grilling. A 36-inch flat-top is a production line: raw ingredients enter from the left, move across heat zones, and exit right onto a landing tray. That left-to-right flow means a Blackstone setup lives or dies on side surface, and the single most common mistake is parking the griddle against a wall with no prep space on either flank.
A working griddle station needs the flat-top itself ($250 to $600 for most Blackstone models), a prep table on the loading side, a landing shelf on the exit side, a squeeze-bottle caddy for oil and water, a scraper and two spatulas, and an infrared or instant-read thermometer, since griddle surface zones can vary by 150°F from edge to center. Budget $700 to $1,200 for a complete station bought new, or closer to $1,800 if you add a folding canopy and a dedicated cart with paper-towel and trash stations.
Seasoning maintenance replaces grate scrubbing as the core chore: a thin coat of oil after every cook, three minutes, non-negotiable. Skip it for two rainy weeks and you will meet orange rust spots that take an hour of scraping and re-seasoning to reverse. Our full Blackstone outdoor kitchen guide covers station layouts, wind management, and which accessories are worth the money, so we will not duplicate that here.
Tiers 3 and 4: Built-In Islands and the Full Outdoor Kitchen
The jump from cart to built-in is the biggest philosophical shift in this progression: you stop buying products and start building a small piece of architecture. A Tier 3 island fixes your grill's location forever, so the planning questions change from "what should I buy" to "where do utilities run, which way does the smoke blow, and how far is the indoor fridge." Get those wrong in a cart setup and you roll the cart; get them wrong in masonry and you live with it.
Tier 3 typically means a prefab or custom island of 8 to 12 linear feet holding a drop-in grill, access doors, a trash pullout, and often an outdoor-rated refrigerator. Prefab kits run $3,500 to $8,000 plus the appliances; custom masonry starts around $10,000 installed. Tier 4 adds the wet zone (plumbed sink with drainage), a second cooking appliance such as a side burner, wok burner, or pizza oven, dedicated electrical circuits, and shelter. Choosing which appliances earn a permanent slot is a big enough decision that we maintain a separate outdoor kitchen appliances guide ranking them by cost per use.
One firm recommendation: do not order a Tier 3 or 4 project from a glossy brochure. Dimensioned drawings catch clearance problems, gas-line routing, and counter-height mistakes while they are still erasable. Our outdoor kitchen plans library includes layouts for straight-run, L-shape, and U-shape islands with the measurements builders actually need.
Zones and the Workflow Triangle: Hot, Cold, Wet, Dry
Professional kitchens are organized into stations, and the same four-zone logic scales down to a patio perfectly. The hot zone is anything that generates heat: grill, griddle, side burner, wok burner, smoker. Keep 24 inches of clearance on each side and never let it share a surface with raw-food prep. The cold zone holds refrigeration or coolers plus drinks; put it at the edge of the cooking area so guests can grab a beverage without crossing behind the cook. The wet zone is the sink and its drainage, the most expensive zone per use; most Tier 1 and 2 cooks fake it beautifully with a water jug and a dish bin. The dry zone is prep counter and storage, and it is the zone everyone under-builds: the working minimum is 36 inches of continuous surface next to the heat, and the comfortable number is closer to 60.
Connecting the zones is the workflow triangle: fire, prep, and landing. Trace the path one chicken thigh takes from cooler to plate; if it crosses itself, passes through a door, or exceeds about eight steps, the layout is fighting you. The landing zone is the leg everyone forgets. Meat coming off the fire needs a clean surface immediately, or it lands back on the tray that held it raw, the classic cross-contamination shortcut. Keep a second sheet pan and the thermometer parked there, and tape the USDA's safe minimum internal temperature chart inside a cabinet door: 165°F for poultry, 160°F for ground meats, 145°F plus a rest for whole cuts.
Two more rules that cost nothing: keep the trash within arm's reach of the prep surface, and give the cook a light that does not cast their own shadow onto the grates. A $25 clamp light solves more overcooked steaks than a $2,000 grill upgrade.
Fuel Choices: Propane, Natural Gas, Charcoal, and Pellets
Fuel is a lifestyle decision disguised as a technical one, and it should be settled before you buy anything, because it dictates which appliances are even eligible.
Propane is the default for good reason: instant heat, portable tanks, and universal appliance support. A 20-pound tank costs about $20 to exchange and covers roughly 18 to 20 hours of grilling. Its only real weaknesses are mid-cook tank surprises (keep a spare) and a slightly drier heat than charcoal loyalists prefer.
Natural gas makes sense only at Tier 3 and above. Running a line typically costs $300 to $900 depending on distance from the meter, but the fuel itself costs a third of propane per BTU and never runs out on a Saturday. The trade is permanence: a natural-gas grill is plumbed in place.
Charcoal delivers the highest searing temperatures and the flavor most people mean when they say "grilled." It demands a 20-to-30-minute lighting runway and ash cleanup, which is why many established cooking stations pair a small charcoal kettle with a gas primary rather than choosing one.
Pellets occupy the set-and-forget corner: electronic temperature control and genuine wood smoke, ideal for ribs and brisket, less thrilling for a quick weeknight sear. Pellet grills need a covered electrical outlet and dry pellet storage, which quietly adds an infrastructure requirement people discover after purchase.
The honest answer for most households is propane primary plus one flavor fuel (charcoal or pellets) as the weekend toy.
Weather Protection, Placement, and the Budget Reality Check
Sun, wind, and rain will do more damage to your investment than any amount of cooking. Place the station where prevailing wind pushes smoke away from seating and doorways, keep gas appliances at least 10 feet from structures per most manufacturer manuals, and think hard before positioning a griddle where afternoon crosswind hits it broadside; a steady 15 mph wind can hold a flat-top 100°F below its target. Overhead, a pergola or offset cantilever umbrella extends your season by months, but any roof over a fire appliance needs generous clearance and ventilation, so check your local code before building.
Maintenance is the cheapest weather protection there is. The routine that keeps our own equipment alive:
- After every cook: brush grates or re-oil the griddle, empty grease traps, cover everything once cool
- Monthly: check propane connections with soapy water, wipe down stainless with the grain, clear spider webs from burner tubes
- Each spring: deep-clean burners, replace worn grates, re-season cast iron and flat-tops, inspect the cover for tears
- Before winter: run tanks to empty or shut valves, drain any water lines, move portable pieces into a garage or shed
On budget, the figures worth planning around in 2026: $400 to $900 for a capable Tier 1 station, $700 to $1,800 for a serious griddle setup, $6,000 to $15,000 for a built-in island, and $15,000 to $60,000 for a full kitchen with utilities. The pattern across every tier is that surfaces, storage, and shelter, the unglamorous line items, deliver more day-to-day satisfaction per dollar than another burner ever will.
Launch Day: Putting Your Setup to Work
However far up the tiers you build, the first cook is where planning meets reality, and a short shakedown protects you from discovering problems with eight hungry guests watching. Cook a low-stakes meal for the household first: burgers, not brisket. You are testing the outdoor cooking setup, not your recipe repertoire, and you will inevitably reposition the cart, move the trash, or discover the light is in the wrong place. That is the point.
Run this checklist before the first real gathering:
- Leak-test every gas connection with soapy water after assembly (bubbles mean stop)
- Burn off the new grill or season the new griddle per the manual before food touches it
- Verify the fire-to-prep-to-landing path is clear and under eight steps
- Stock the tool bin, thermometer, and two sheet pans in their permanent homes
- Fill the spare propane tank now, not the morning of the party
- Confirm night lighting actually reaches the cooking surface
- Position a fire extinguisher or baking soda within reach, and know that water does not belong on a grease fire
Then let the station evolve. Every setup we have documented changed within its first month of real use, and that is a feature of starting at the right tier rather than the biggest one: you learn what your household actually cooks before any decision is set in stone. When the cart starts feeling small, you will know precisely which island layout to build, and you will design it around a workflow you have already proven.
Points worth settling before you commit:
Do I really need a sink in my outdoor kitchen?
No, and it should usually be the last major addition, not the first. Plumbing drives trenching, drainage, and winterization costs that often exceed the sink itself. A water jug with a spigot, a dish bin, and paper towels handle hand-washing and cleanup for Tier 1 and 2 stations. Add a plumbed sink when you are already running utilities for a built-in project and cook outside multiple times per week.
Should I buy a Blackstone griddle or a traditional grill first?
Choose by menu. A griddle wins for breakfast, smash burgers, fajitas, fried rice, and feeding crowds fast from one surface; a grill wins for steaks, chicken over direct flame, and anything that benefits from char and smoke. If you can only buy one and cook varied meals, most households get more weekly use from the griddle, then add a small charcoal kettle later for grill flavor.
Can I leave my outdoor cooking equipment outside all winter?
Built-in appliances are designed to overwinter in place with a fitted cover, closed gas valves, and drained water lines. Portable gear lasts dramatically longer stored in a garage or shed; freeze-thaw cycles are hard on regulators, wheels, and griddle seasoning. If storage space is limited, prioritize moving the griddle indoors, since its bare-steel surface rusts fastest, and give everything else a quality cover strapped against wind.
Frequently Asked Questions
01What is the best setup for an outdoor kitchen on a small patio?
02How much does a basic outdoor cooking setup cost?
This guide is part of Outdoor Kitchen Build Guides: Planning, Permits, Cost, and Hiring — the hub covering every planning & guides guide on Outdoor Kitchen Setup.
Related Guides
Written and edited by Sukie
Sukie is the editor behind Outdoor Kitchen Setup. They compile manufacturer specification sheets, published building codes, and industry sizing standards into the measurement and planning guides on this site, and check every figure against its original source before it goes live. Where a number varies by brand or by local code, the guides say so rather than presenting a single figure as universal.