Outdoor Kitchen Backsplash Height: Behind the Grill, the Sink and the Bar
Outdoor kitchen backsplash height has no code minimum. What sets it: the 6 in rise to a 42 in bar, grill clearances, sink landing, plus a worked example.
By Sukie
Editor · compiles manufacturer specs and building-code references into the measurement guides on this site
There is no code-mandated outdoor kitchen backsplash height. No building code and no kitchen-planning guideline says how tall the splash wall behind your counter has to be. What decides it is two other sets of numbers: the counter heights either side of it, and your grill manufacturer's clearance to anything that can burn.
Online answers disagree because the figure people quote is a side effect of something else. On a two-level island the raised back wall is simply the gap between a 36-inch working counter and a 42-inch bar. Behind a grill, the height matters much less than how far the grill sits from the wall. Below: one table covering each case, and a grill run against a house wall worked through with the arithmetic shown.
Top Picks: Best Outdoor Kitchen Backsplash Height: Behind the Grill, the Sink and the Bar in 2026
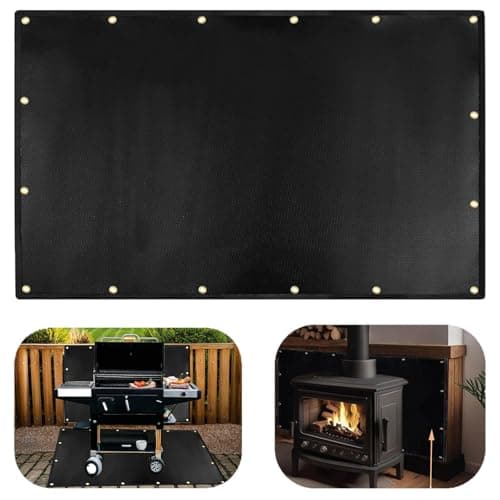
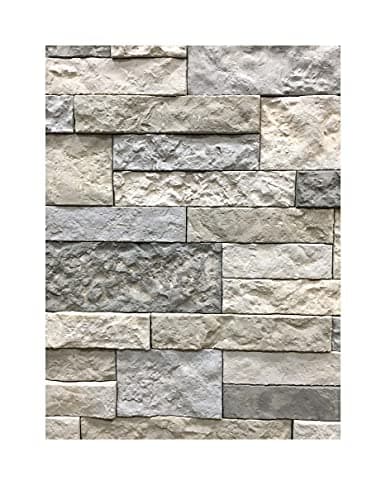
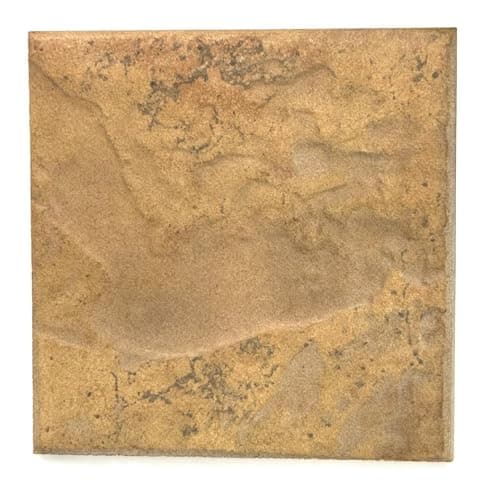
Tenedos Desert Sand 6x6 Matte Porcelain Tile – Durable Indoor & Outdoor Ceramic Floor and Wall Tile, Stone-Look Finish, Waterproof & Stain-Resistant, Ideal for Kitchen, Patio, Entryway – 12 Tile Box
$109.00
Shop Now
Tenedos Desert Sand 6x6 Matte Porcelain Tile – Durable Indoor & Outdoor Ceramic Floor and Wall Tile, Stone-Look Finish, Waterproof & Stain-Resistant, Ideal for Kitchen, Patio, Entryway – 12 Tile Box
$109.00
Shop NowThe Short Answer: No Code Sets It, but Two Numbers Decide It
The most useful fact about outdoor kitchen backsplash height is that nobody regulates it. The International Residential Code covers structure, gas and electrical, not how tall a strip of stone behind a counter should be. The NKBA Kitchen Planning Guidelines are the closest thing the industry has to a design standard, and they do not give a backsplash height either. (They are written for indoor kitchens. We use them outdoors because we are not aware of an outdoor equivalent.)
So when someone asks for the standard, they usually mean one of two different things:
- The raised back wall on a two-level island. Its height is fixed by the two surfaces it separates. NKBA's seating guideline gives clearances for 36-inch and 42-inch high counters. The rise between those levels is 42 − 36 = 6 inches, measured from counter surface to bar surface. That is the only backsplash-type figure you can derive from a published guideline, and it falls out of arithmetic rather than being chosen.
- A splash wall against the house. Height here is a design choice with no minimum. If a grill sits in front of that wall, a separate rule governs, and it is about distance, not height.
Before you settle either one, fix the counter heights, because everything on this page is measured up from them. Our outdoor kitchen countertop height guide explains where 36 and 42 come from.
Back-Wall Height by Situation, in One Table
Compiled September 2026 from the NKBA Kitchen Planning Guidelines (Guidelines 9, 11 and 17) and the Blaze installation guide for the BLZ-2PRO, BLZ-3PRO and BLZ-4PRO built-in grills. Where a cell says “none published”, we looked and there is no number to give you.
| Situation | Height of back wall | The number that actually governs | Source |
|---|---|---|---|
| Raised bar behind a 36 in working counter | 6 in rise, counter surface to bar surface (42 − 36) | 12 in deep knee space per seat at 42 in; 15 in at 36 in | NKBA Guideline 9 |
| Flush island, no raised wall, grill in the counter | 0 in | Counter extends at least 9 in behind the cooking surface | NKBA Guideline 17 |
| Behind a built-in grill, any height | None published | 5 in behind the grill for the lid to open and close | Blaze Professional guide |
| Grill near a combustible house wall | None published; a splash wall does not replace the gap | 18 in from the back and sides of the grill to combustible material | Blaze Professional guide |
| Grill under a roof or pergola | None published | 6 ft from countertop to overhead construction; vent hood required under combustible overhead | Blaze Professional guide |
| Behind a sink | None published | 24 in landing on one side of the sink and 18 in on the other, at sink height | NKBA Guideline 11 |
The height column is mostly empty on purpose. In every row involving a grill, the binding number runs horizontally: inches between the grill body and the wall behind it. Build a handsome 18-inch splash wall six inches behind a grill and you have met the lid requirement in that manual but not the combustible clearance, if the wall behind the splash is timber.
The grill figures are from one manufacturer's document for one product line. Other brands publish different numbers. Treat this as an illustration of what to look for, and check the installation manual for your exact model before any block goes down.
Behind the Grill, Distance Beats Height
Behind a grill, height is the wrong variable. Take the Blaze Professional grill use and installation guide as a real example. It covers the BLZ-2PRO, BLZ-3PRO and BLZ-4PRO built-ins, and in plain terms it says:
- The grill must go in a non-combustible enclosure only. If the island is built of combustible material, an insulated jacket is required.
- Keep at least 18 inches from the sides and 18 inches from the back of the grill to any combustible material. The manual's examples are wood, gyprock (drywall), paper and plants.
- Leave 5 inches behind the grill for the lid to open and close. The manual stresses that those 5 inches do not satisfy the combustible clearance when a combustible wall is behind the grill.
- Under overhead construction, allow at least 6 feet between the countertop and the overhead structure. Under a combustible overhead, a vent hood must cover the area above the grill.
None of those is a height. A splash wall behind a grill is fine, and it takes grease that would otherwise hit the wall. But nothing in that manual says a masonry backsplash in front of a timber wall lets you close the 18-inch gap. The manual leaves the decision on what counts as combustible to the local fire marshal or building inspector. If you want to put a grill closer to a house wall than its manual allows, the conversation is with the manufacturer and your inspector.
The 5-inch lid figure is where the raised back wall meets the grill. The Blaze lid swings back as it opens, so a raised bar wall built tight behind the grill can stop it opening fully. Keep the face of any riser at least the manual's lid distance behind the rear of the grill body. Then confirm with the actual unit in place. The grill cutout dimensions guide explains which numbers to take from the spec sheet. For reference, the Blaze guide lists a cutout depth of 23⅝ inches for all three Professional models.
Worked Example: A Grill Run Against a Timber-Clad Wall
Here is the arithmetic for a common layout: a grill run backed against a timber-clad house wall, with a raised ledge between the counter and the wall for drinks and serving plates. Assume a BLZ-4PRO, a 36-inch working counter and a 42-inch ledge.
Step 1: ledge rise. 42 − 36 = 6 inches from the counter surface to the ledge surface. If the ledge is capped with a 3 cm slab, that slab is 3 ÷ 2.54 = 1.18 inches thick. So the masonry under it stands 6 − 1.18 = 4.82 inches above the finished counter, just under 4⅞ in. Give that figure to whoever lays the block, not the 6.
Step 2: distance to the wall. The timber cladding is combustible, so the Blaze guide's 18 inches applies from the back of the grill to the wall. The masonry ledge does not change that, because the manual offers no reduction for it.
Step 3: how deep the ledge can be. The ledge sits inside that 18-inch gap. The lid needs 5 inches behind the grill, so the ledge face must be at least 5 inches back from the rear of the grill. 18 − 5 = 13 inches is the deepest the ledge can be (measured from the siding) before it crowds the lid. (This is a serving ledge, not seating; nobody sits with their knees against a house wall.)
Step 4: counter depth. From the siding to the front edge of the cutout: 18 + 23⅝ = 41⅝ inches, before whatever front frame and overhang your builder needs. That is deeper than a typical run, which is why this layout often ends with the grill moved into a freestanding island instead.
Step 5: landing space. NKBA Guideline 17 asks for 12 inches of landing on one side of a cooking surface and 15 inches on the other, at the same height as the cooking surface. The raised ledge does not count toward either.
Swap in your own grill and its manual and the method holds; only the numbers change.
Sinks, Bar Ledges and the Landing-Area Trap
Raised surfaces are not landing space. NKBA Guideline 11 asks for a landing area at least 24 inches wide on one side of a sink and 18 inches on the other. If the counter at the sink is not all the same height, it asks for 24 inches on one side and 3 inches of counter on the other, both at sink height. To count as landing area, a surface must be at least 16 inches deep and between 28 and 45 inches above the floor. A 42-inch ledge meets the height test. A shallow ledge fails the depth test, so it is somewhere to set a glass, not somewhere to put a dripping pan down.
Behind the sink, the faucet sets the height. We found no published sink backsplash height, indoors or out. The splash wall behind a sink has to cover wherever water from the spout actually lands, which depends on the faucet's reach and spout height from its spec sheet. Choose the faucet first, then set the outdoor kitchen backsplash height behind the sink to suit it. The bowl and faucet-deck layout is covered in our outdoor kitchen sink dimensions guide.
A bar riser should be a real bar or nothing. The two-level island earns its 6-inch back wall only if people sit at the upper level. Give each seat what NKBA Guideline 9 asks for at 42 inches, 24 inches wide by 12 inches deep of knee space, or the bar becomes a narrow shelf. Our outdoor kitchen bar dimensions page covers the seating geometry. If you would rather skip the riser, NKBA Guideline 17 gives the flush alternative: in an island at the same height as the cooktop, the counter extends at least 9 inches behind the cooking surface. A flush slab also removes the joint where a raised wall meets the counter, which must be sealed and sloped to shed water.
What to Build the Splash Wall From
One hard rule comes from the grill manual: the island around a built-in grill must be non-combustible, or the grill needs an insulated jacket. A back wall that is part of the island falls under the same rule. Masonry block, poured or precast concrete, natural stone, porcelain and ceramic tile on cement board all meet it. A cedar-clad back wall behind the grill does not, however well it is sealed.
Beyond that, match the splash wall to the counter. A backsplash cut from the same slab as the top leaves one seam to seal, the joint that takes the most water. If you are tiling the splash wall, especially in a climate that freezes, look for tile tested for frost resistance under ISO 10545-12, the international test method for it. The outdoor kitchen tile guide goes through what to ask a supplier.
Two final checks before the wall goes up. First, run the gas, water and electrical lines behind or through the island before the back wall closes over them, and keep them reachable. The Blaze guide requires access to the gas supply line, regulator and shut-off valves once the grill is installed. Second, keep the island cavity ventilated. The same guide requires adequate ventilation of the island to prevent gas build-up, and a solid back wall can close off vents you were counting on.
If you are still at the layout stage, start from the outdoor kitchen overview and come back here once the grill is chosen. The grill's manual sets the numbers; your outdoor kitchen backsplash height follows from them.
Frequently Asked Questions
01What is the standard backsplash height for an outdoor kitchen with a grill and sink?
02What height should I make the nib wall behind my outdoor kitchen?
03Does a stone backsplash reduce the clearance my grill needs from the house?
This guide is part of Outdoor Kitchen Components: What Goes In, In What Order, and What to Skip — the hub covering every components guide on Outdoor Kitchen Setup.
Related Guides
Written and edited by Sukie
Sukie is the editor behind Outdoor Kitchen Setup. They compile manufacturer specification sheets, published building codes, and industry sizing standards into the measurement and planning guides on this site, and check every figure against its original source before it goes live. Where a number varies by brand or by local code, the guides say so rather than presenting a single figure as universal.